The My Disputes category allows an agent to review an evaluation made against him/her and also to raise a dispute if needed. The category also displays all the disputed evaluations submitted by the agents
To access this page, select My Universe > My Disputes.
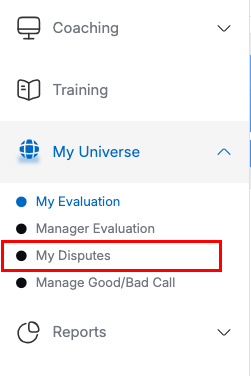
My Disputes
The following screen appears:
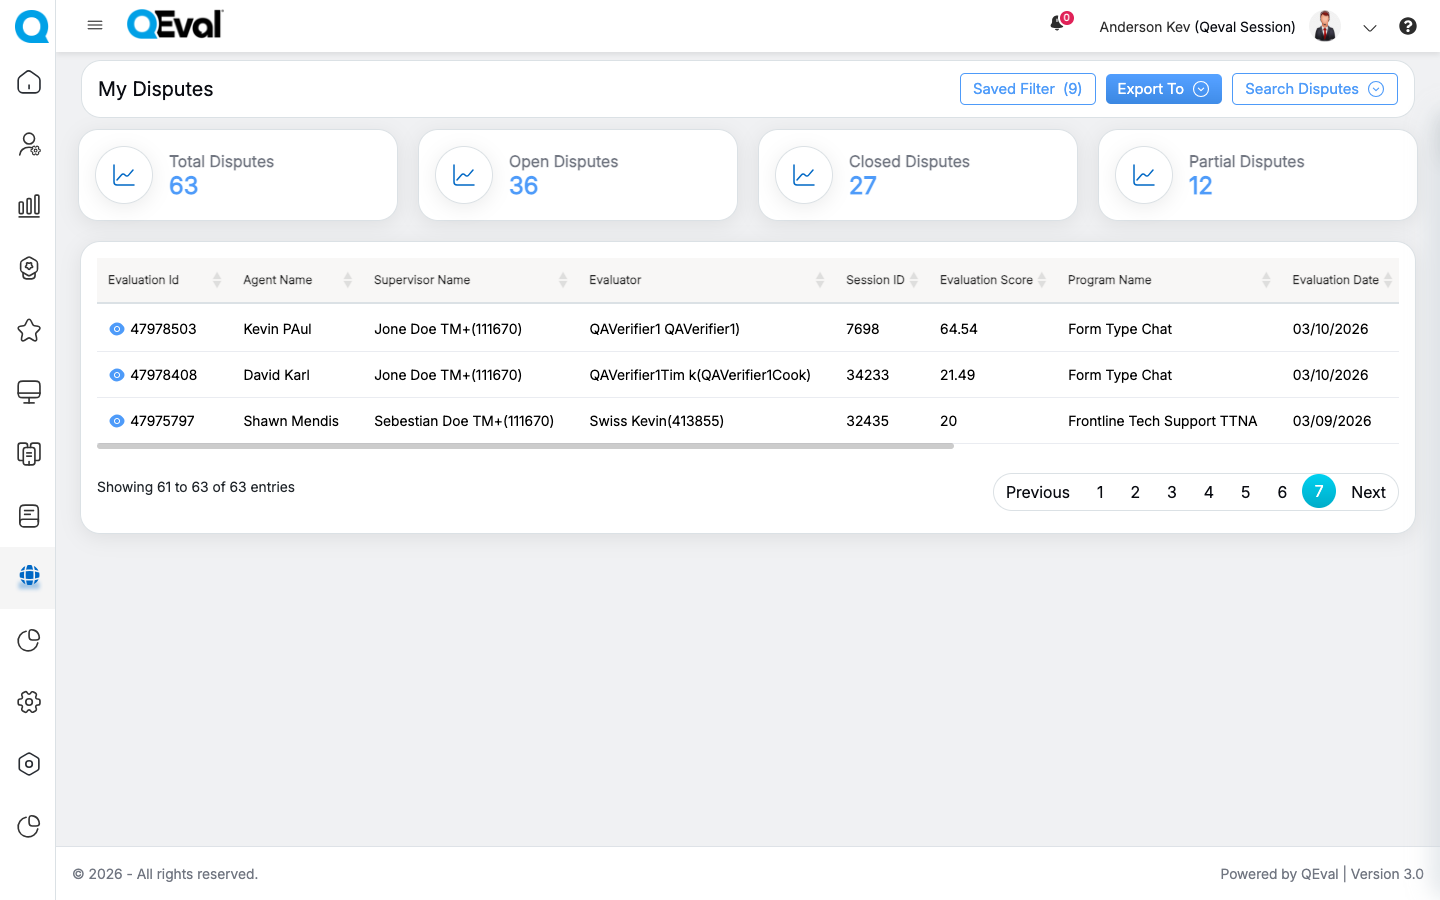
My Disputes
My Disputes page provides a centralized view of all dispute records. Users can refine the list and locate specific disputes by applying the available search filters.
Dispute Summary
The Dispute Summary section at the top of the My Disputes page provides an overview of dispute activity based on the currently applied search filters. It displays the total number of disputes along with a status-wise breakdown, enabling users to quickly monitor dispute volume and track the progress of dispute resolution.
- Total Disputes – Displays the total number of disputes that match the selected search criteria.
- Open Disputes – Displays the number of disputes that are currently open and awaiting review or final resolution. This count includes disputes pending Supervisor or QA Supervisor action.
- Closed Disputes – Displays the number of disputes that have been completed and are no longer pending review. This includes disputes that are Accepted, Declined, or QA Supervisor Partially accepted.
- Partial Disputes – Displays the total number of disputes with a Supervisor Partially Agreed or QA Supervisor Partially Accept status. This card provides visibility into disputes that have been partially accepted during the review process and updates dynamically based on the applied filters.
Dispute List
The Dispute List displays all dispute records that match the currently applied search criteria. Each row represents an individual dispute and provides key information to help users identify, review, and track the dispute throughout its lifecycle. Click the View (eye) icon corresponding to a dispute to open its detailed information.
My Disputes
| Column | Description |
|---|---|
| View (eye) icon | Opens the selected dispute record for detailed review. |
| Evaluation ID | Displays the unique identifier of the evaluation associated with the dispute. |
| Agent Name | Displays the name of the agent whose evaluation is under dispute. |
| Supervisor Name | Displays the supervisor responsible for the evaluated interaction. |
| Evaluator | Displays the name of the evaluator who completed the original evaluation. |
| Session ID | Displays the unique session or interaction identifier associated with the evaluation. |
| Evaluation Score | Displays the score assigned during the original evaluation. |
| Program Name | Displays the program or campaign associated with the evaluation. |
| Evaluation Date | Displays the date on which the evaluation was completed. |
| Dispute Date | Displays the date the dispute was submitted. |
| Modified Date | Displays the most recent date on which the dispute record was updated. |
| Dispute Status | Displays the current status of the dispute, such as Supervisor Agreed, Supervisor Partially Agreed, Supervisor Disagreed, QA Supervisor Accept, QA Supervisor Partially Accept, or QA Supervisor Declined. |
| Disputed Days | Displays the number of days the dispute has been active since it was raised. |
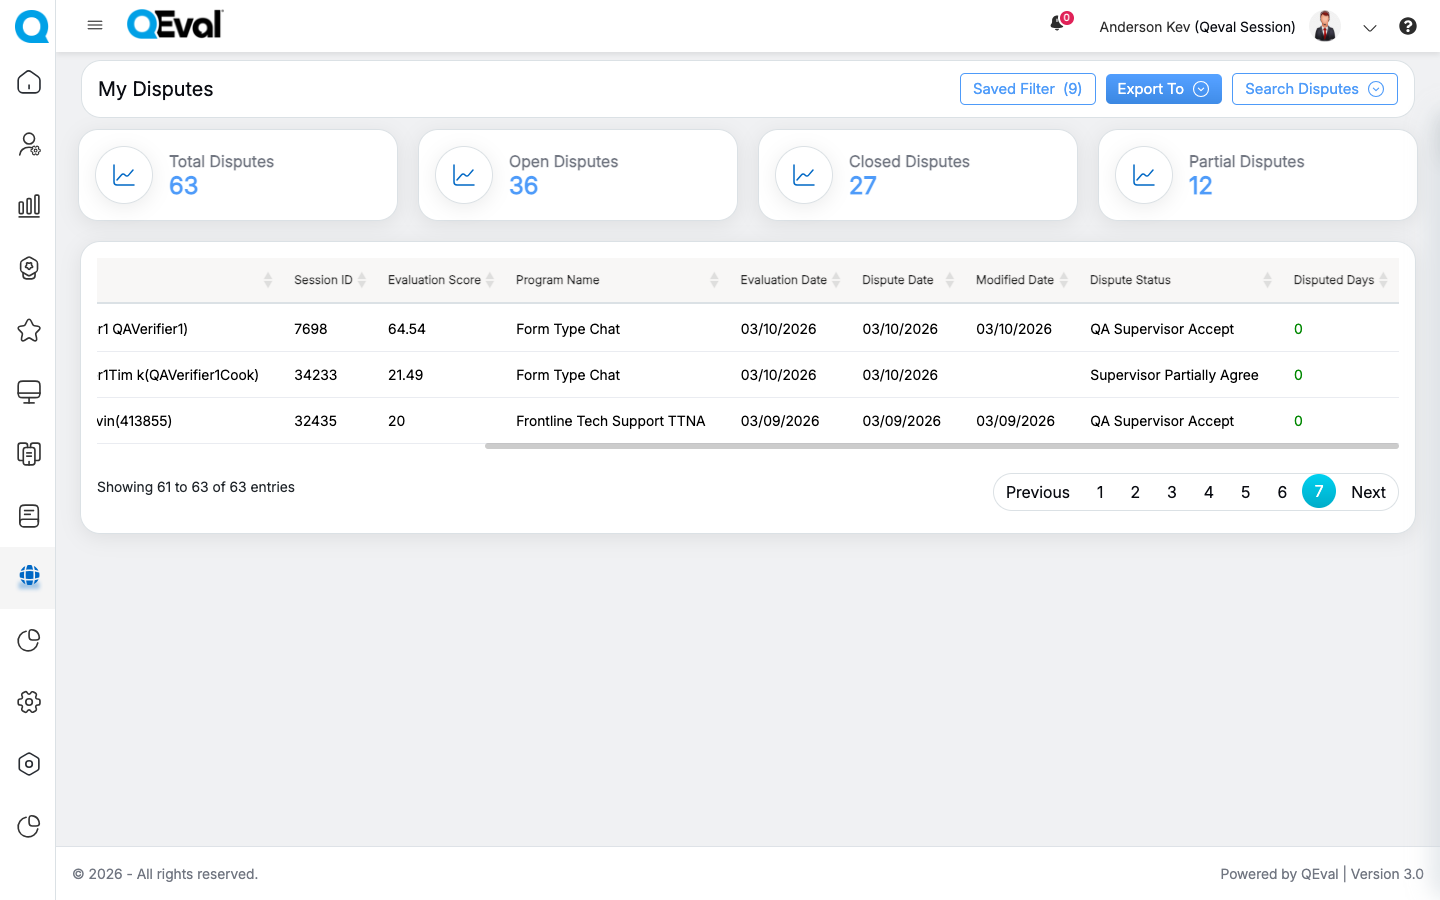
My Dispute Table (Right-Side View)
Search Disputes
A search disputes functionality helps a user search for specific disputes.
Click on the Search Disputes button.
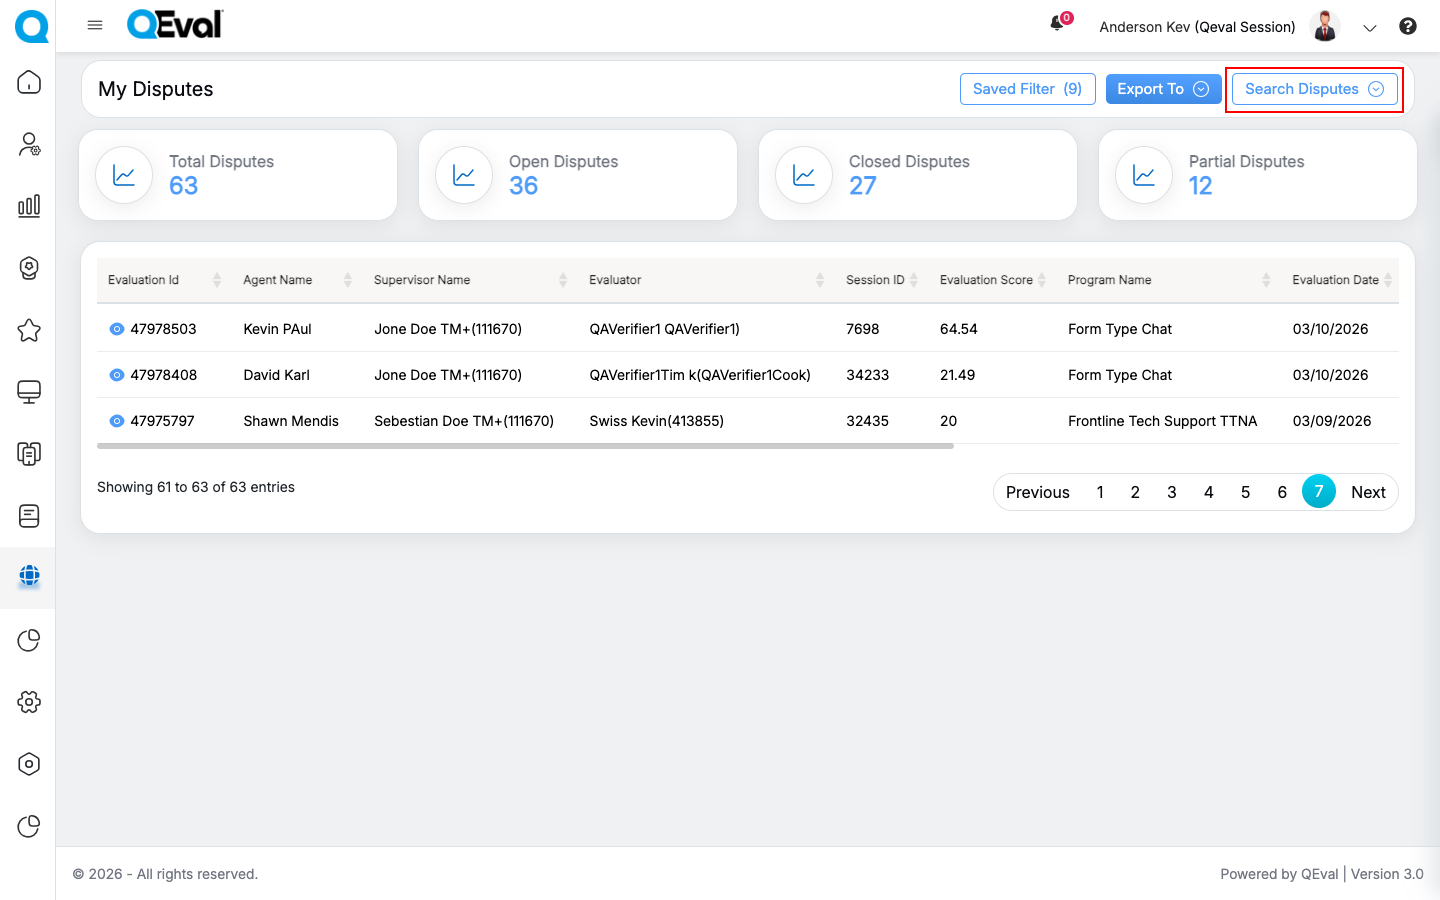
Search Disputes
The following screen appears:
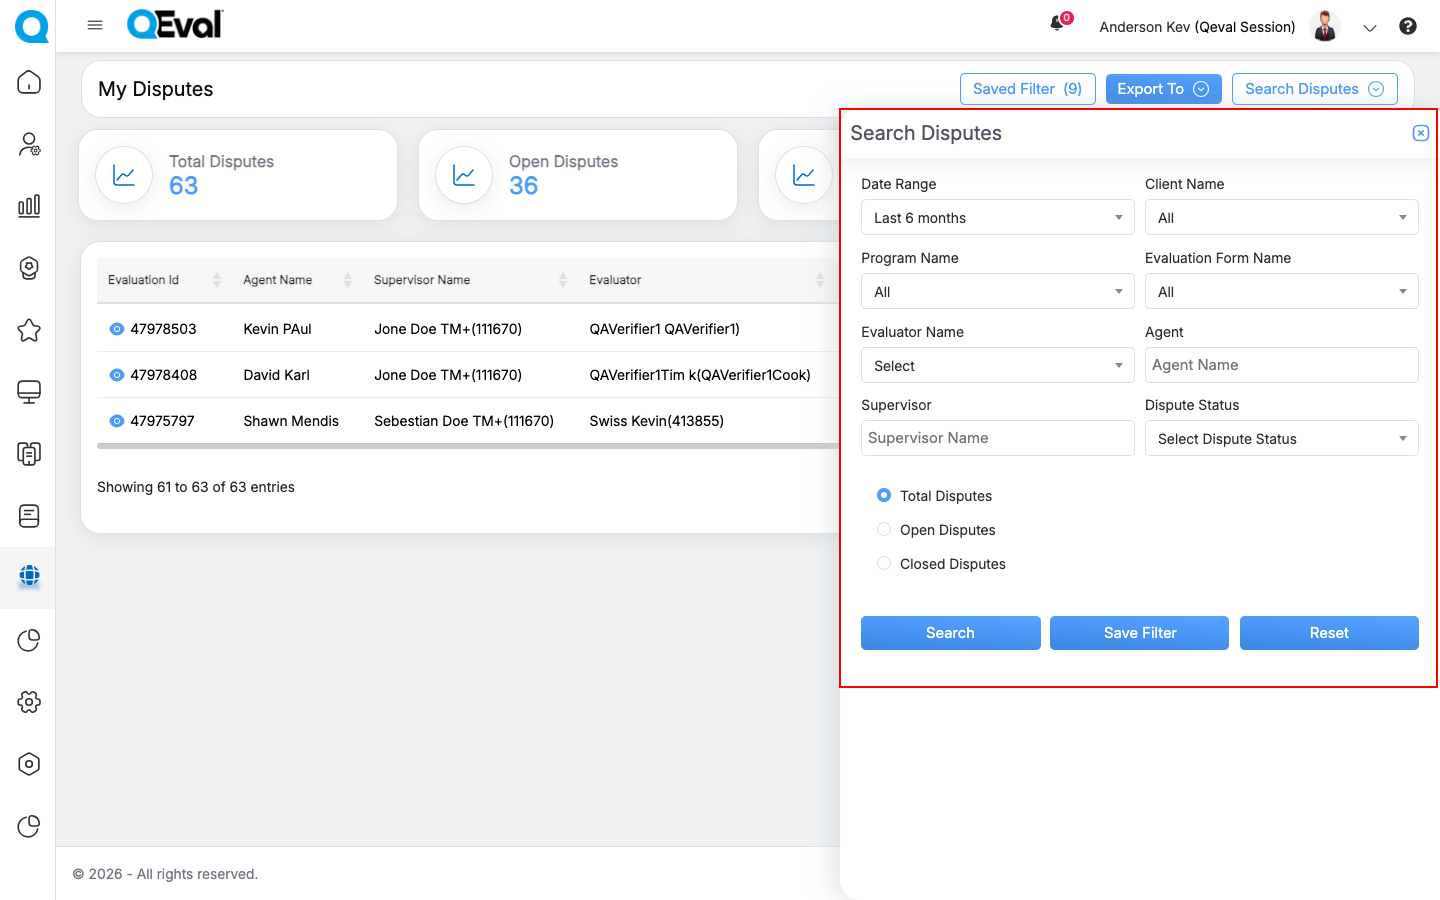
Search Dispute tab
The page displays search criteria based on which one can search for a particular dispute.
|
Screen Elements |
Description |
|---|---|
|
Date Range |
User can define a date range by either selecting from predefined timeframes in the dropdown or specifying a custom range based on the need. Available filters include Today, Last 7 Days, Last 10 Days, Last 30 Days, Last 12 Weeks, Last 6 Months, Week to Date, Month to Date, Previous Day, Previous Week, Previous Month, and Custom Date Range. Select the option that best suits your requirements. |
|
Start Date |
If user selects the custom date range then users would be able to select the start date and end date as per their need. |
|
End Date |
Select the end date here. |
|
Client Name |
Select the name of the client from the dropdown list. |
|
Program Name |
Select a program from the dropdown list which will display the Program Names as per the selection of the Client Name. |
|
Evaluation Form Name |
Select the evaluation form for the selected program of a client from the dropdown list. |
|
Evaluator Name |
Select the Evaluator Name from the dropdown list |
|
Agent Name |
Select up to five agent names from the dropdown to search for disputes. Only disputes where the selected agents and their associated supervisor are aligned will be displayed. |
|
Supervisor Name |
Select up to five supervisors from the dropdown to search for disputes. Supervisors can view and select only supervisors available within their configured hierarchy. Admin users can view and select any supervisor in the system. If no supervisors are available in the hierarchy, the dropdown is disabled and displays “No supervisors available in your hierarchy.” |
|
Dispute Status |
Select a dispute status from the dropdown to search for disputes based on their current review outcome. Available options include Supervisor Agreed, Supervisor Partially Agreed, Supervisor Disagreed, QA Supervisor Accept, QA Supervisor Partially Accept, and QA Supervisor Declined. The search results display only disputes matching the selected status, helping users quickly locate and review relevant dispute records.
|
|
Total Disputes |
Select the radio button to view the disputes with open and closed status. |
|
Open Disputes |
Select the radio button to view the disputes with open status. |
|
Closed Disputes |
Select the radio button to view the disputes with closed status. |
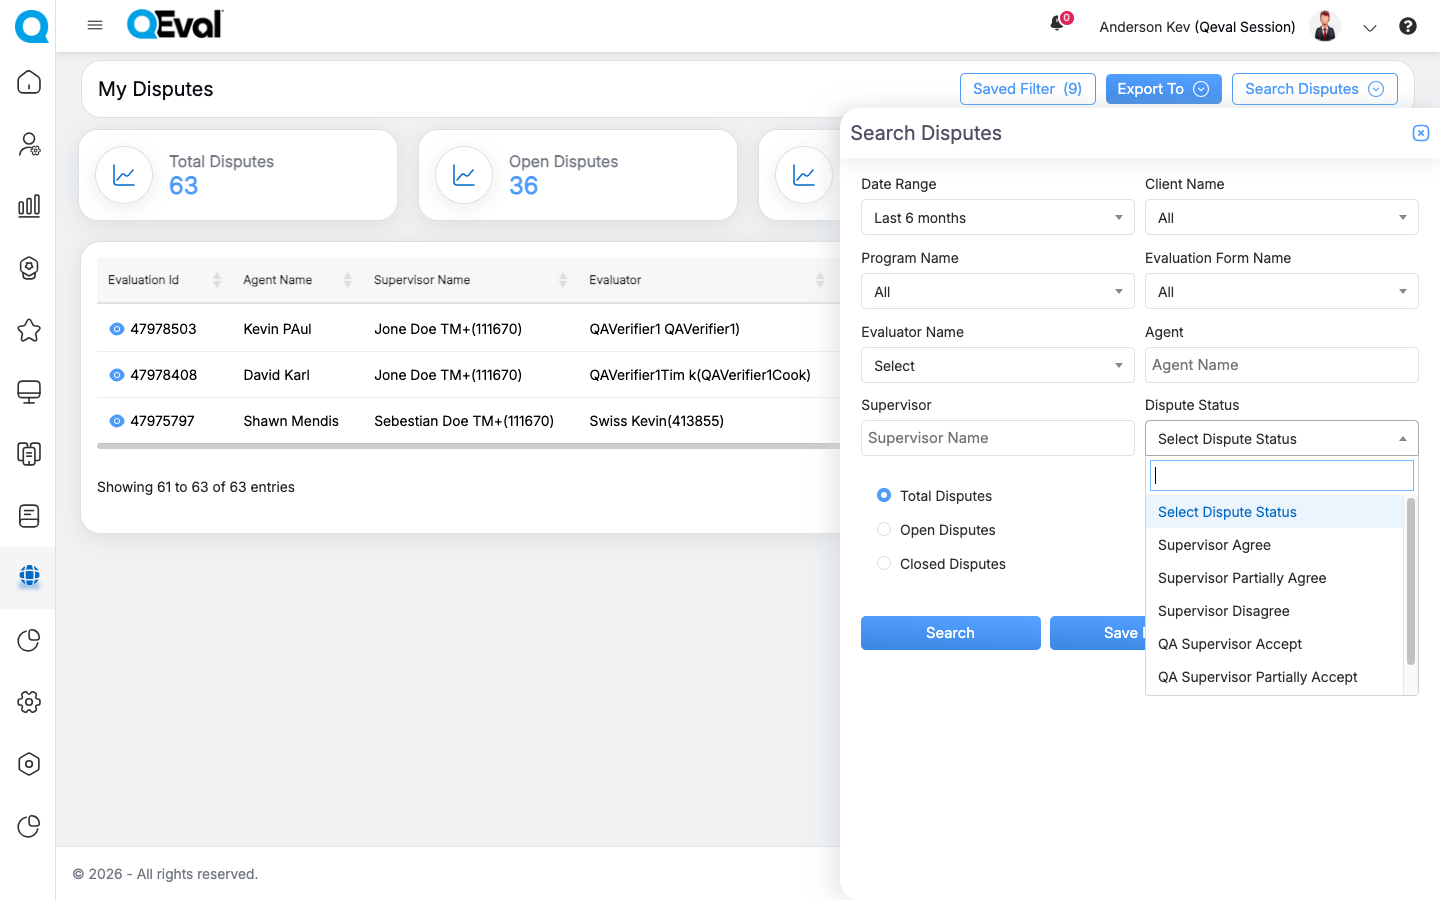
To view the disputes as per the set criteria, click on the Search button. The list of evaluations will be displayed as per the set filters.
My Disputes
Save Filters
The Save Filter functionality allows users to store frequently used filter combinations and quickly reuse them whenever needed. This helps save time, reduces repetitive manual effort, and ensures consistent dispute search results.
Users can apply the required filters and save the configuration for future use. Saved filters can later be accessed, applied, edited, deleted, or marked as the default filter.
This is especially useful when the same dispute search criteria are used repeatedly.
How to Save a Filter in My Disputes
To save a filter:
- Click on the Search Disputes.
Search Disputes
- Apply the required filter criteria.
Search Dispute
- Click Save Filter.
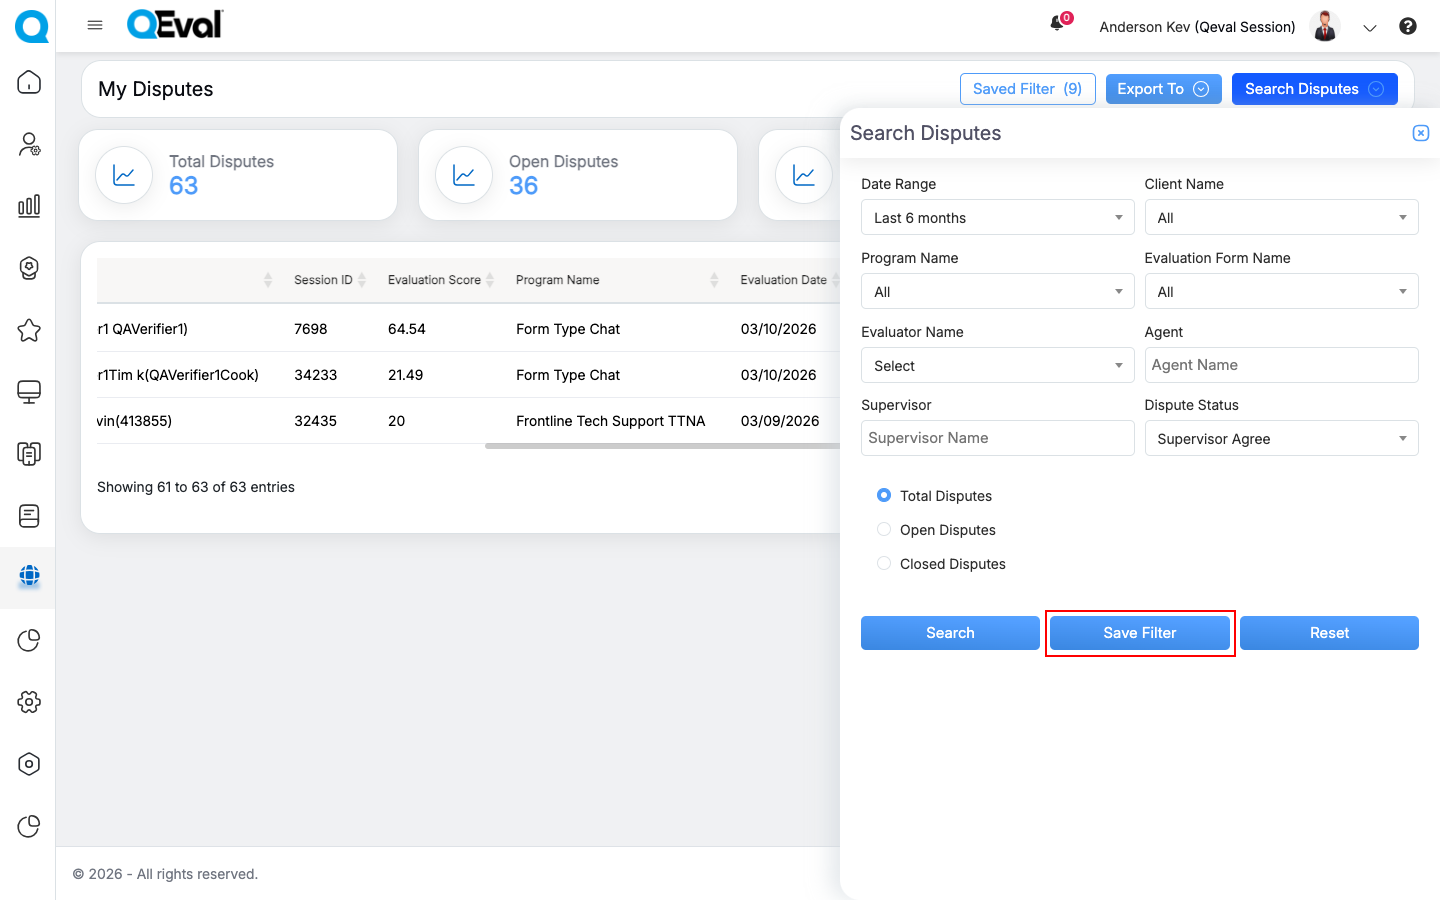
Search Dispute
- In the pop-up window, enter a Filter Name.
- Review the filter configuration.
- Toggle On/Off if you want to set it as the Default Filter.
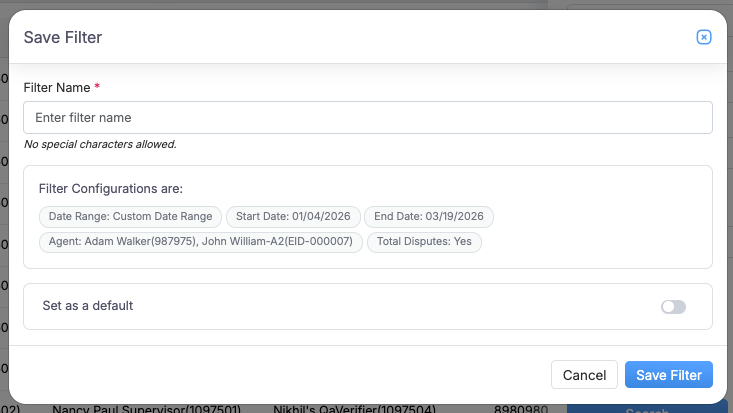
- Click Save Filter to store the configuration.
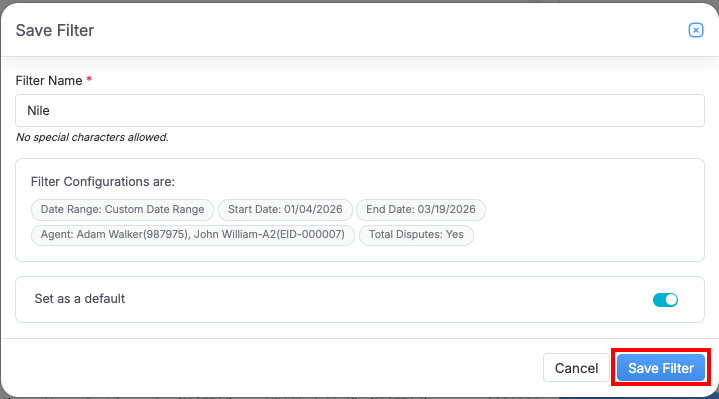
Once saved, the filter can be reused later without reapplying the same criteria manually.
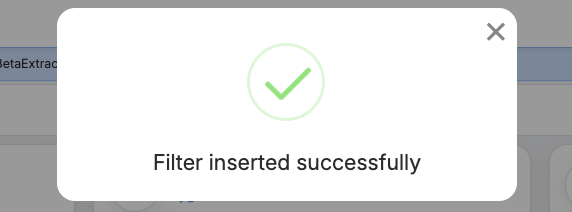
Important Notes
- A filter name can contain up to 50 characters
- Special characters are not allowed in the filter name
- Each user can save up to 10 filters in this module
- If the maximum limit is reached, an existing filter must be deleted before saving a new oneAccessing Saved Filters
Saved filters can be accessed from the Saved Filter (Max 10) option available in the My Disputes section.
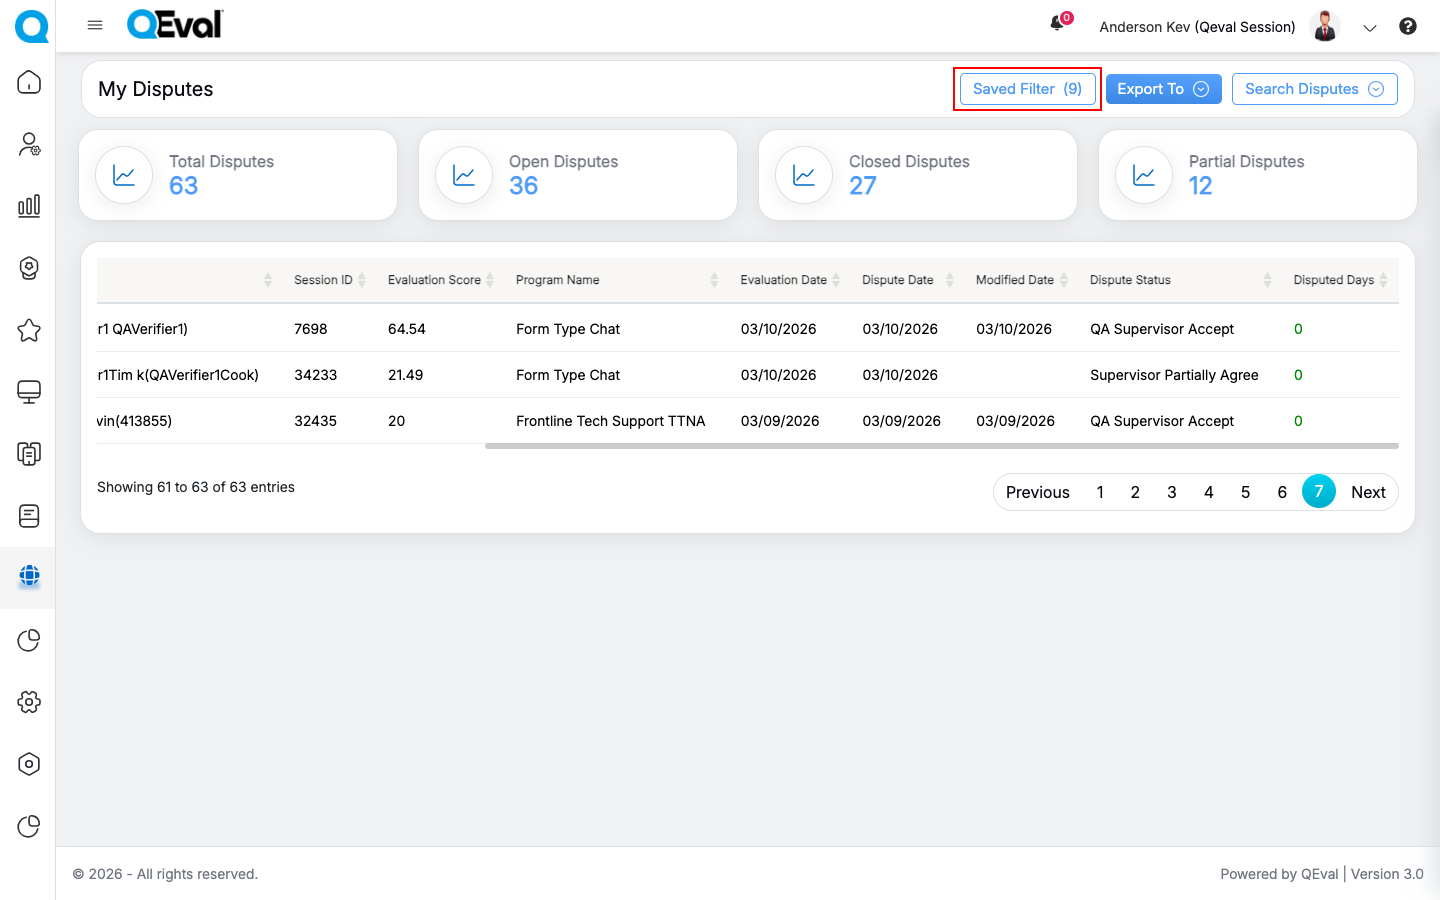
Save Filter Option
When the Saved Filters panel is opened, users can:
- View all previously saved filters
- See the applied filter criteria
- View the creation date or last modified date
- Click a saved filter to automatically apply the stored dispute filter conditions
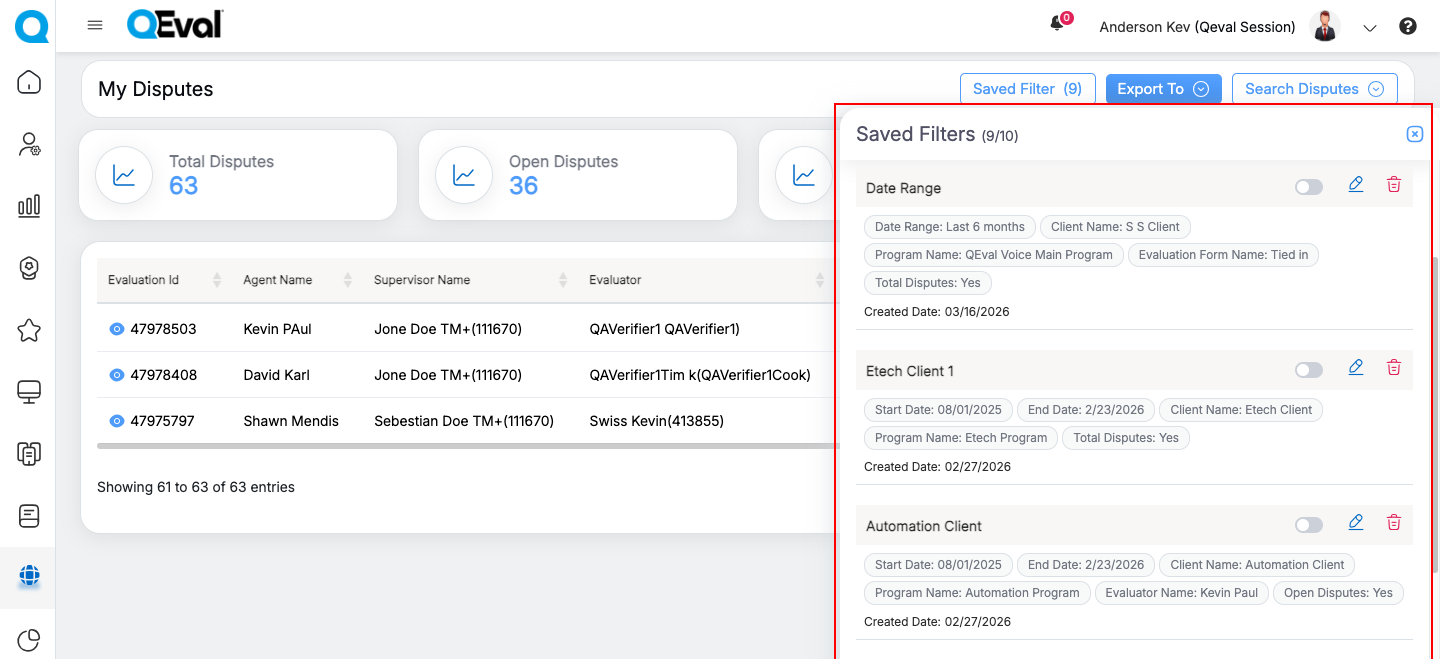
Save Filter Tab
This allows users to quickly retrieve dispute records using previously saved search combinations.
Managing Saved Filters
Users can manage saved filters directly from the Saved Filters panel.
Edit Filter
Users can click the Edit icon next to a saved filter to modify the filter name or update the filter criteria. Once Edit is selected, the filter panel opens with the previously saved values already populated. After making the required changes, click Save Filter to open the Update Filter pop-up, where the filter name can be revised, the updated criteria can be reviewed, and the filter can optionally be set as the default.
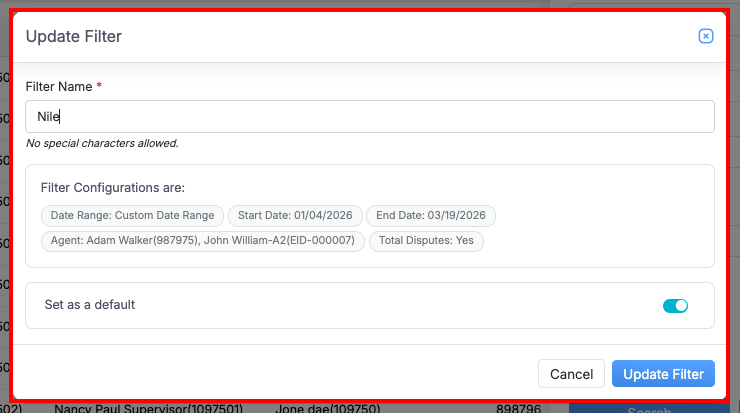
Update Filter
Click Update Filter to save the changes.
Delete Filter
Users can click the Delete icon next to a saved filter and confirm the action to permanently remove it.
Default Filter
One saved filter can be marked as the Default Filter. The default filter is automatically applied whenever the user opens the My Disputes section.
Access Validation
When a saved filter is applied, the system checks whether the user still has access to the associated data included in the saved criteria.
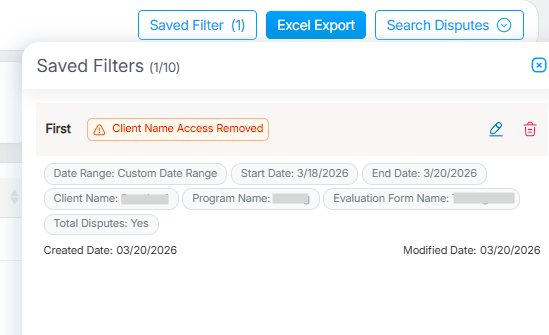
Example: Access Validation
If access has been removed, or if any selected entity no longer exists, the system displays the appropriate validation message. This ensures that saved filters are applied only to valid and accessible dispute data.
Excel Export
The Excel Export option in My Disputes allows users to download the dispute list in Excel format for offline review, analysis, and record-keeping.
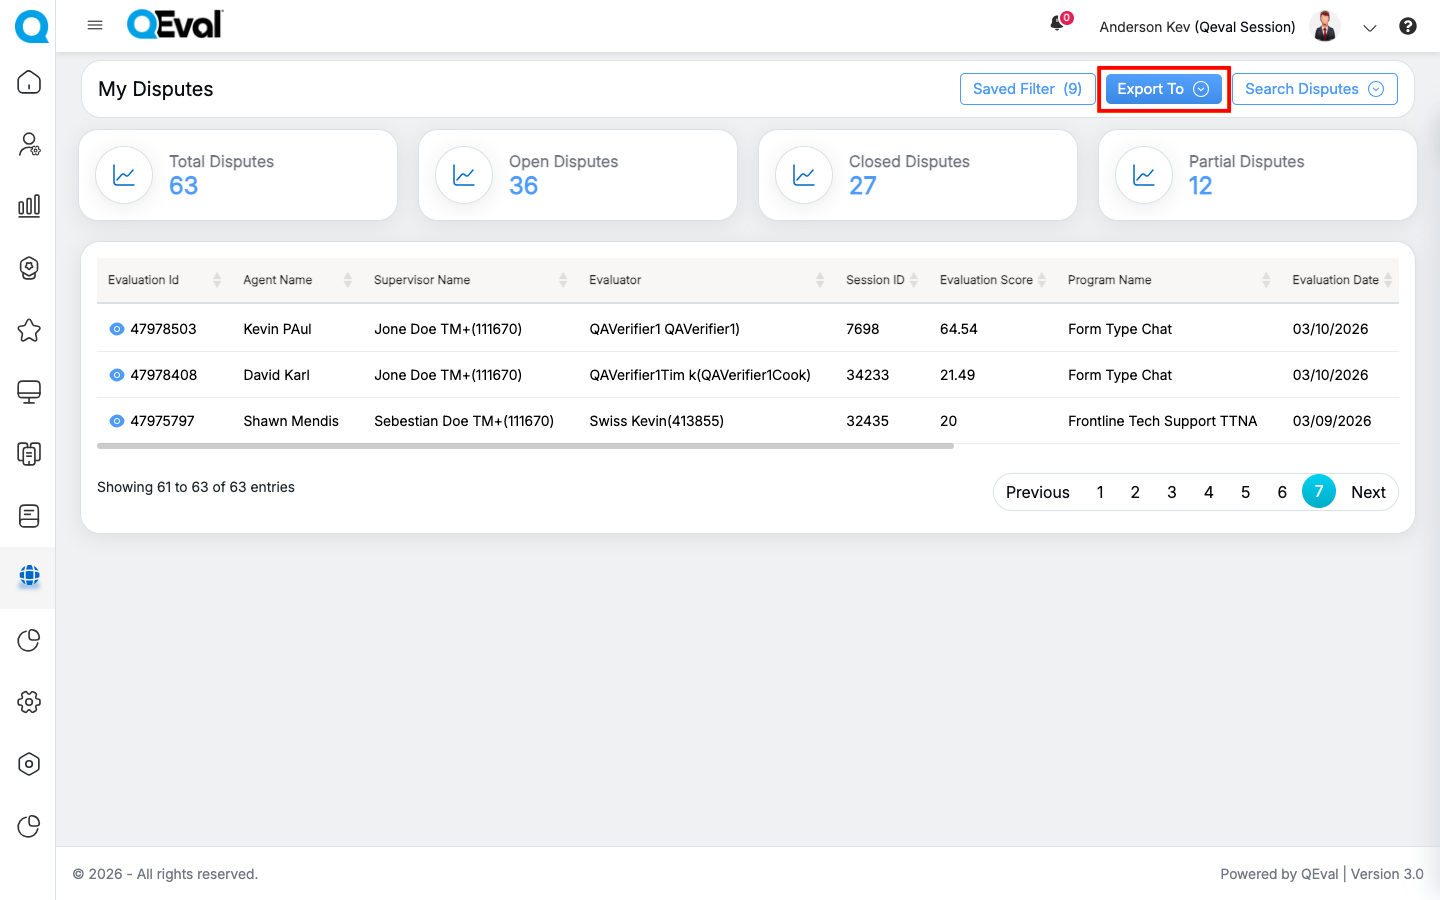
Excel Export To
After applying the required search criteria, click Excel Export at the top of the page to export the displayed dispute data.
This helps users quickly extract dispute details for reporting and further analysis outside the system.
View Evaluation
To view the evaluation form from this page, click on the Evaluation ID.
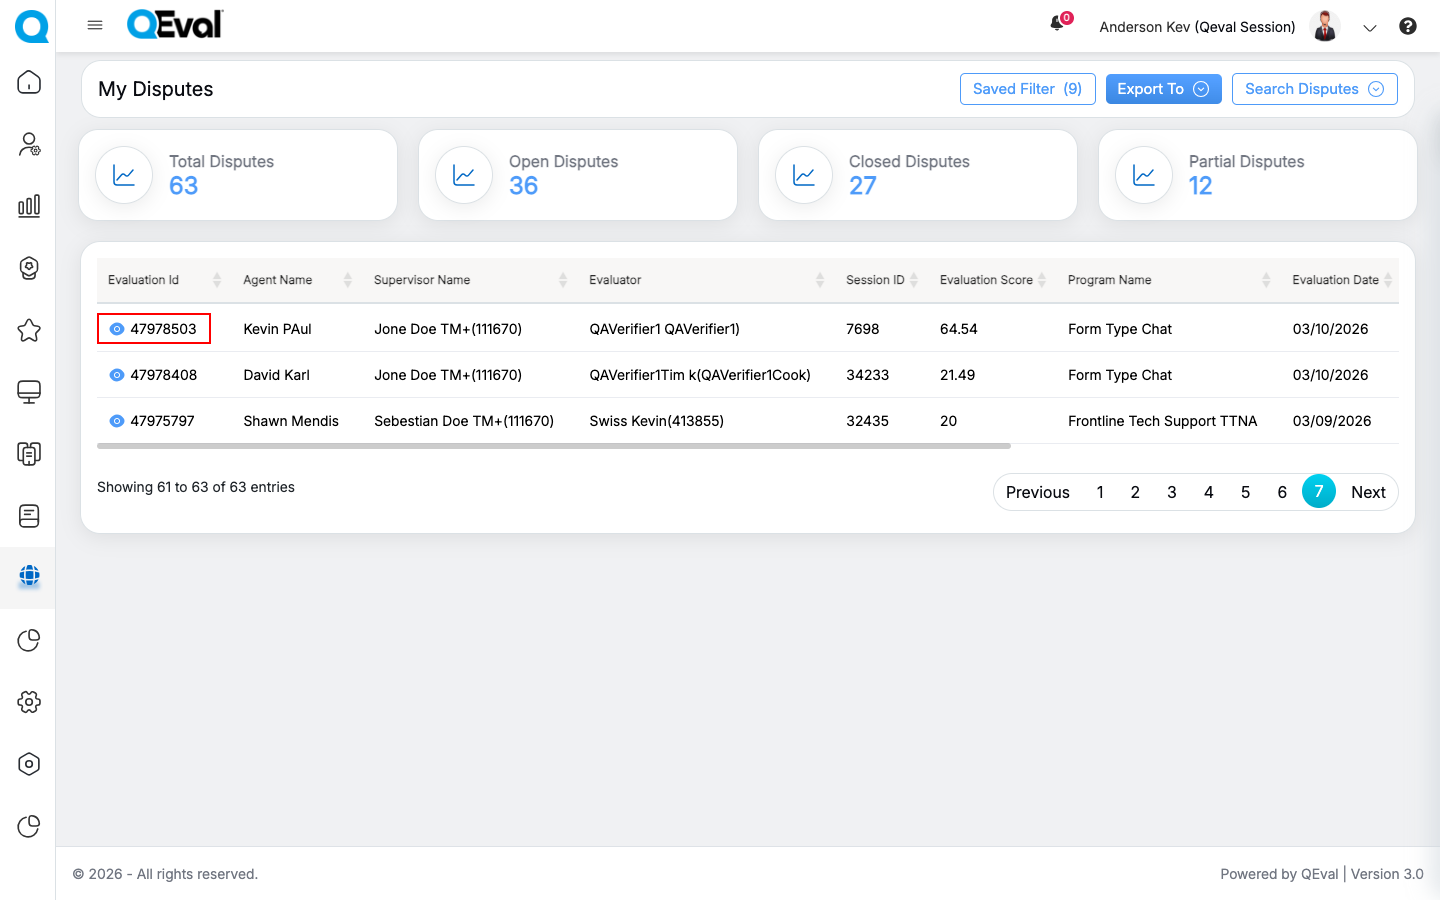
Evaluation ID
The evaluation form will be displayed as shown below:
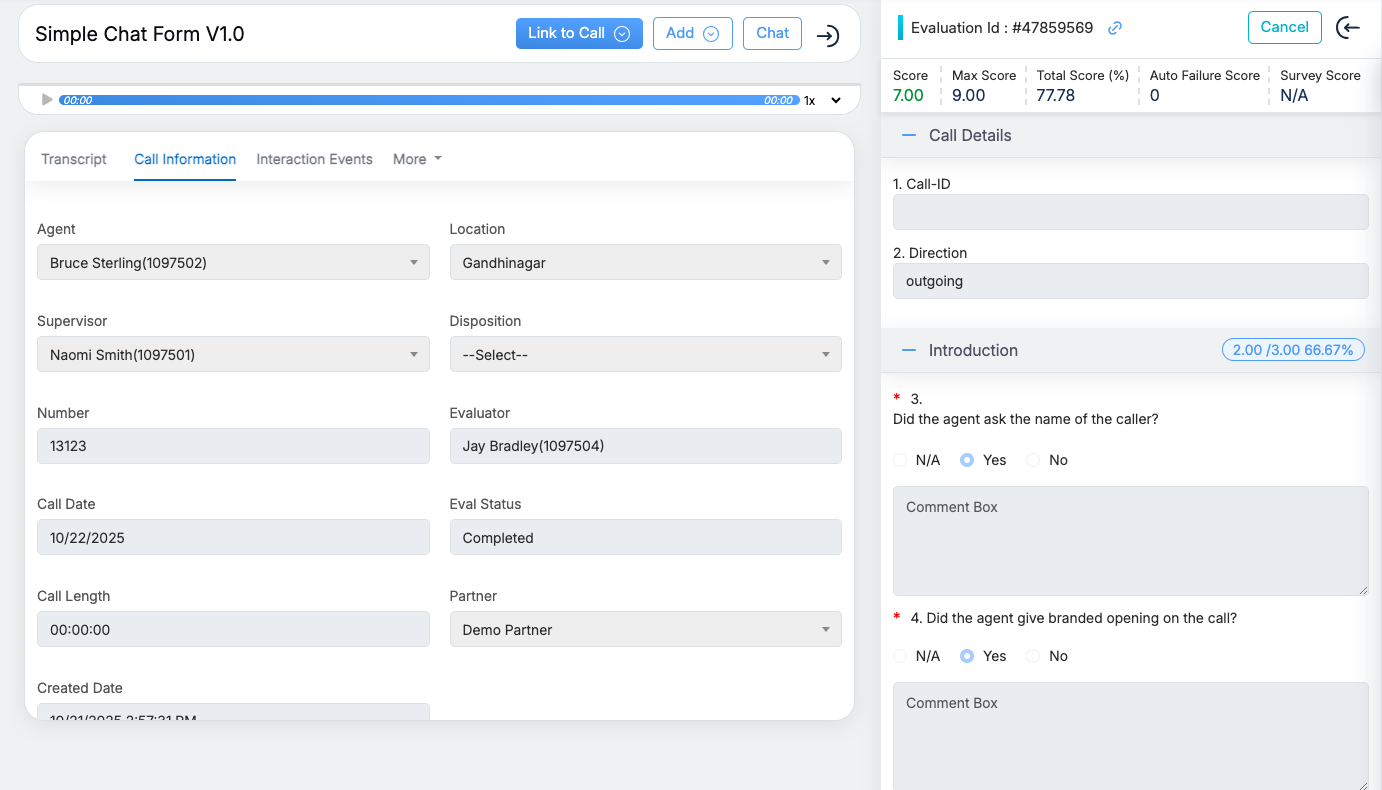
Evaluation Form
This functionality includes individual dispute activities for the agent and supervisor. Thus, it can be categorized into two sections:
- Dispute from agent
- Dispute from agent’s supervisor
To know the process of how to review/dispute any evaluation form, refer to View Evaluation on My Evaluation.
To check the status of the submitted dispute, from the evaluation form page, check the Review/Dispute Information category.
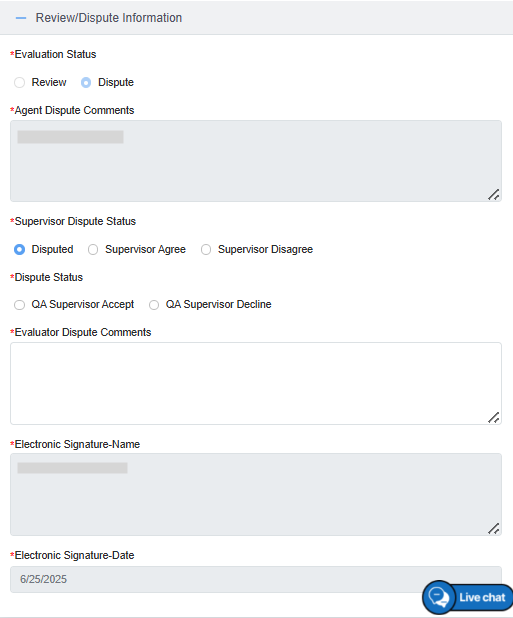
Review Status
Comments submitted by the Agent will be displayed under Agent Dispute Comments.
To change the status, select the required option for the Supervisor Dispute Status field – Disputed, Supervisor Agree, and Supervisor Disagree.
Then, click on the Submit button.
Video