Table of Contents
- Introduction
- User Information Header
- Available Actions
- Role-Based View Breakdown
- Manage MFA
- Cards Displayed Below Header
- Analytics Overview
- Summary
Introduction
The View Profile feature allows users to view their personal, organizational, and account information in one place. While all users can access their profile details, only users with the appropriate permissions can edit specific information.
To access your profile:
- Click the User drop-down menu in the upper-right corner of the QEval portal.
- Select View Profile.
The View Profile page opens and displays your profile information.
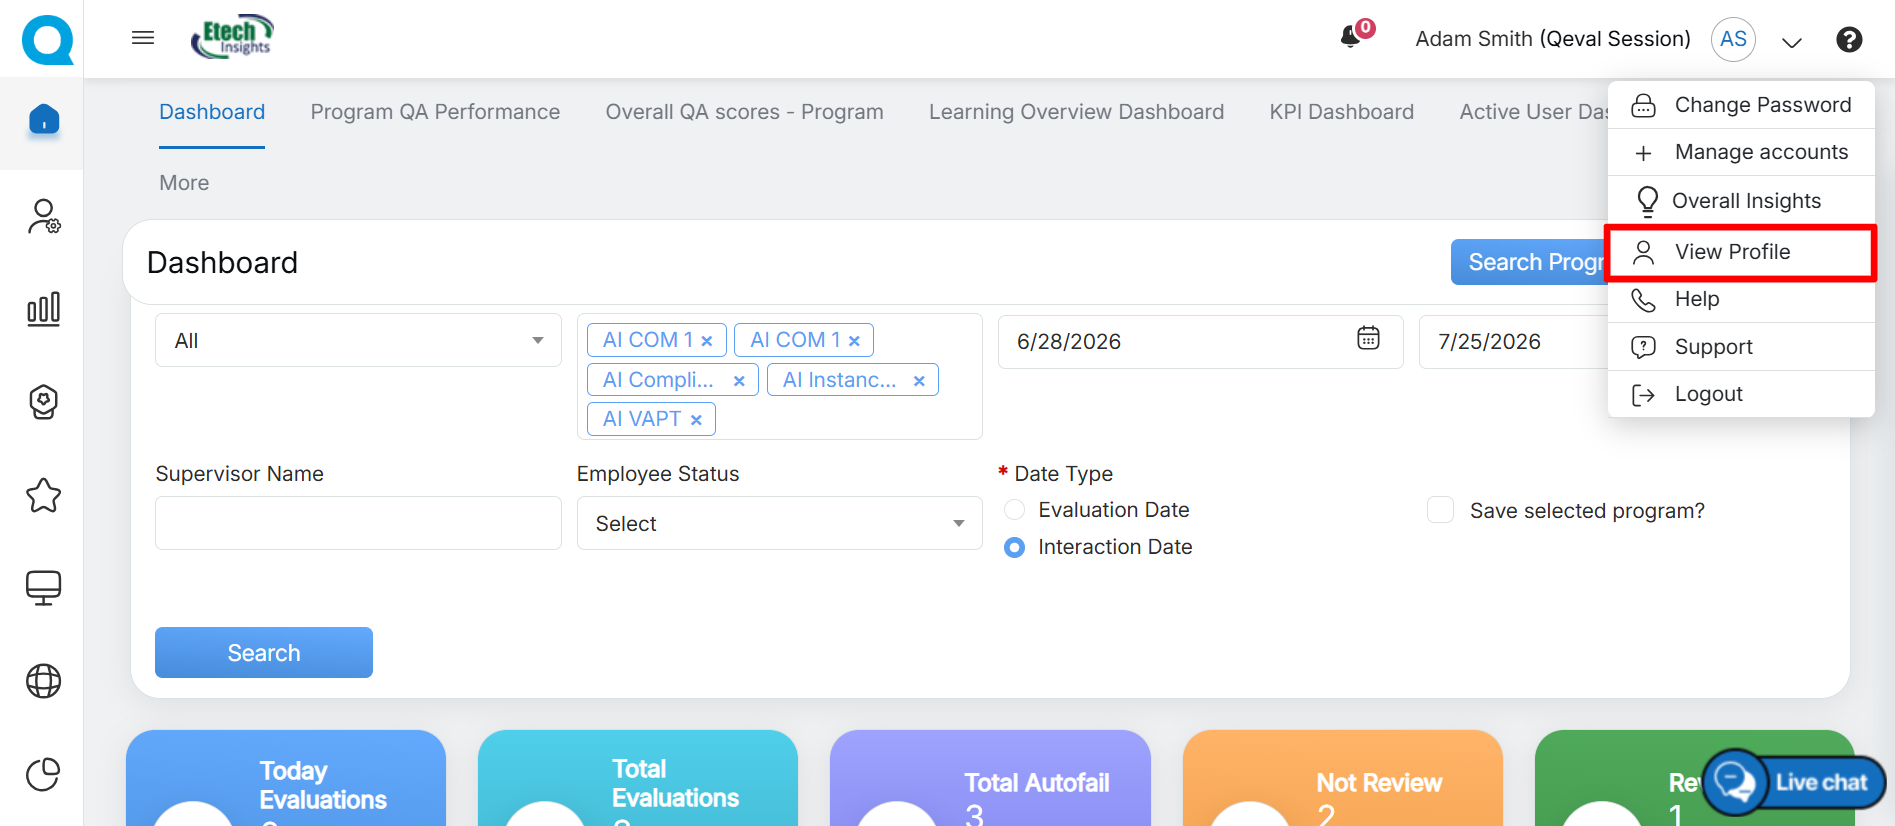
View Profile
Once opened, the View Profile page displays your personal, organizational, dashboard, and access-related information in a single location.
The information displayed on this page varies based on your assigned user role and permissions. Users can only view the sections and actions that they are authorized to access.
User Information Header
The top section of the View Profile page displays key personal and organizational information, providing a quick overview of the user’s profile.
The following information is displayed:
- Profile Picture
- Full Name and Employee ID
- Email Address
- Supervisor Name
- Location
- Joining/Start Date
- Business Unit
- Program
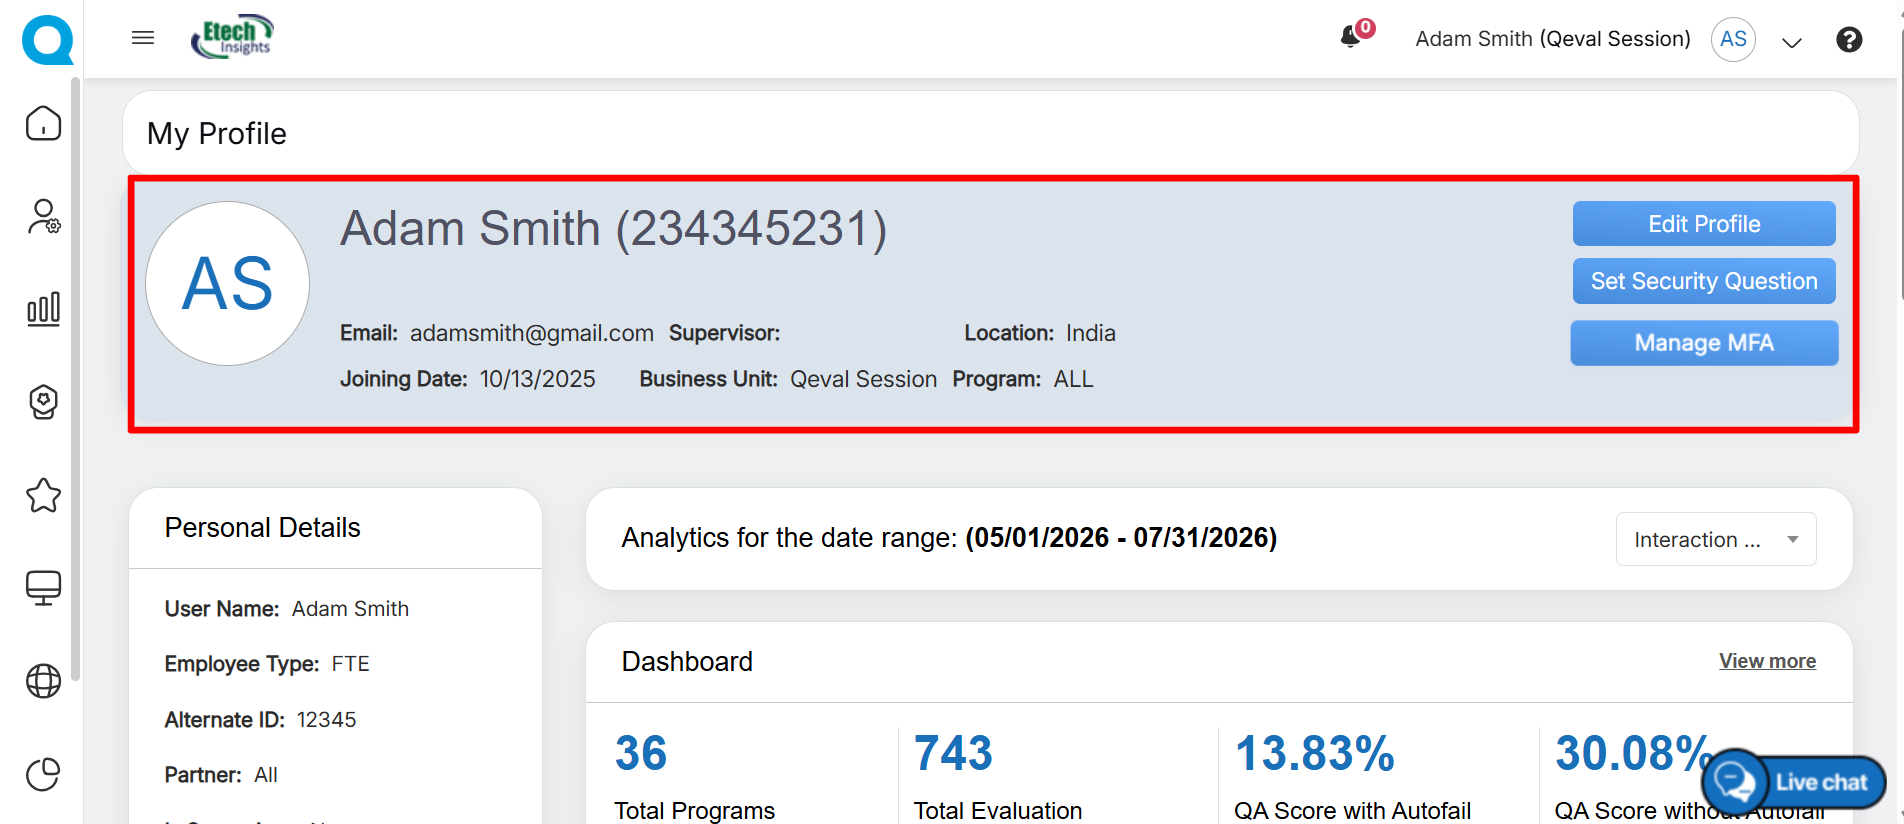
Personal Details
This section provides a quick overview of the user’s profile information, allowing users to verify their personal and organizational details. It helps ensure that the information displayed in the system is accurate and up to date.
Available Actions
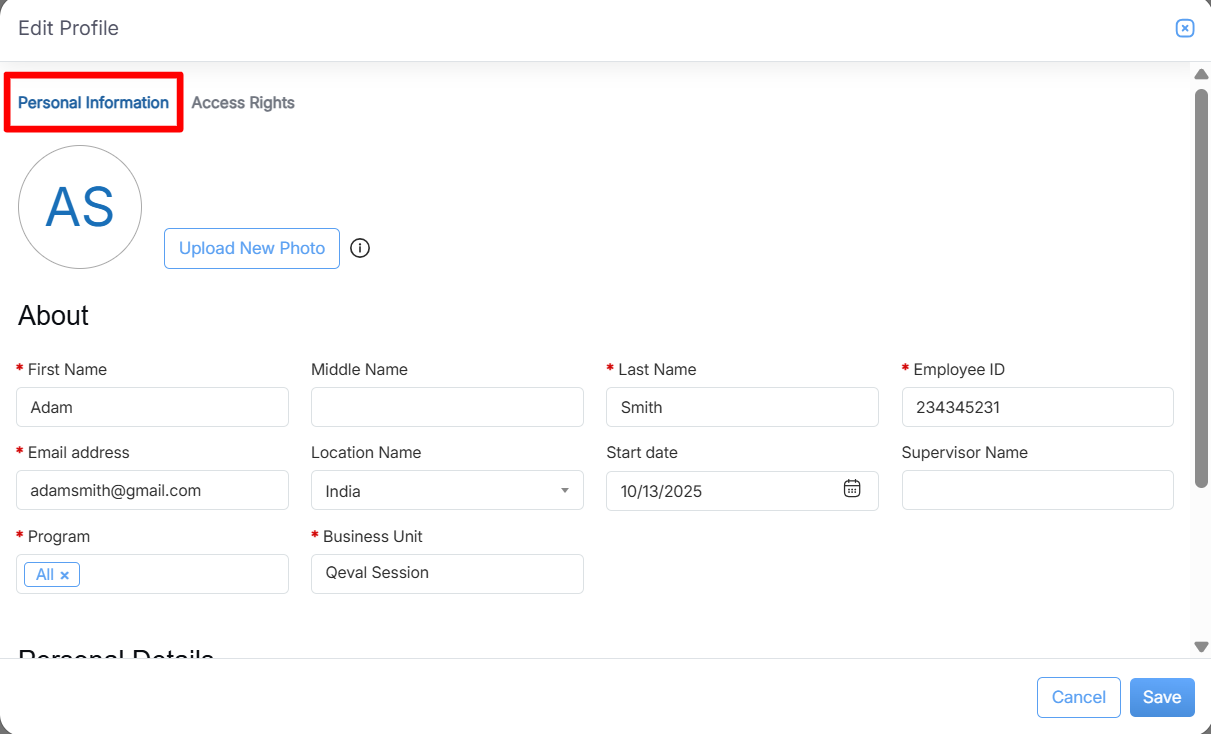
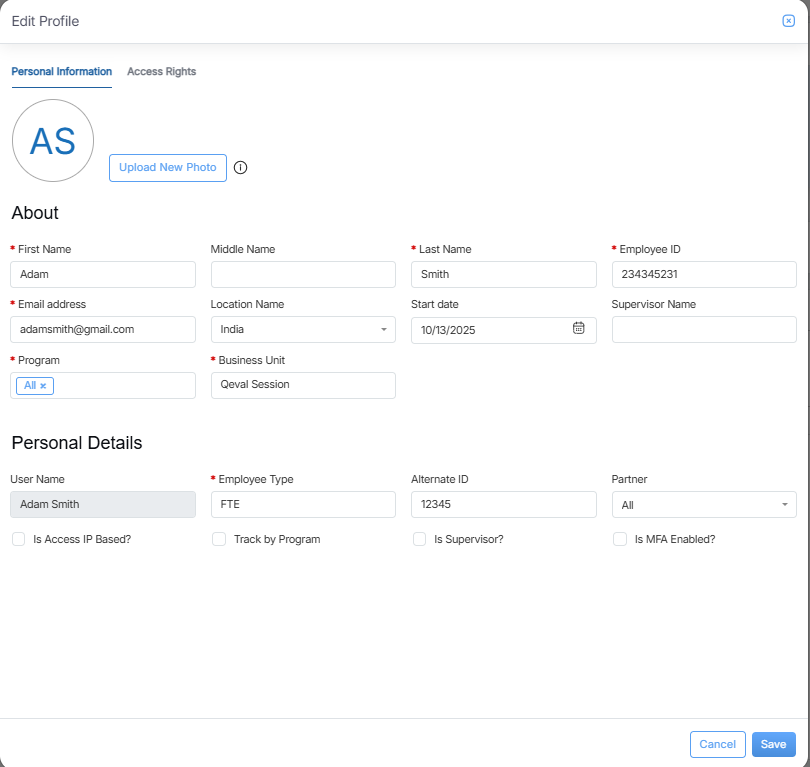
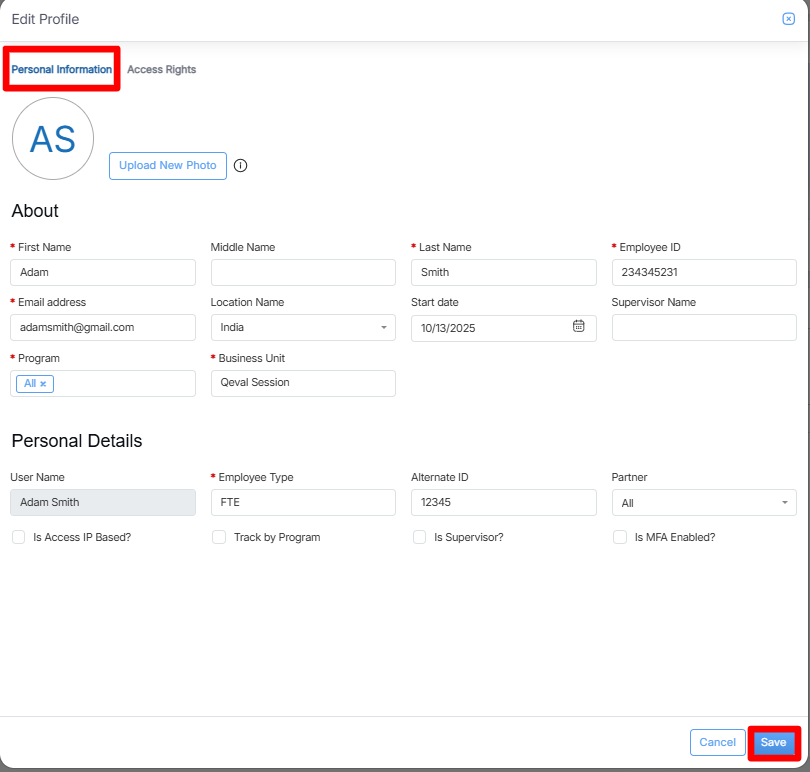
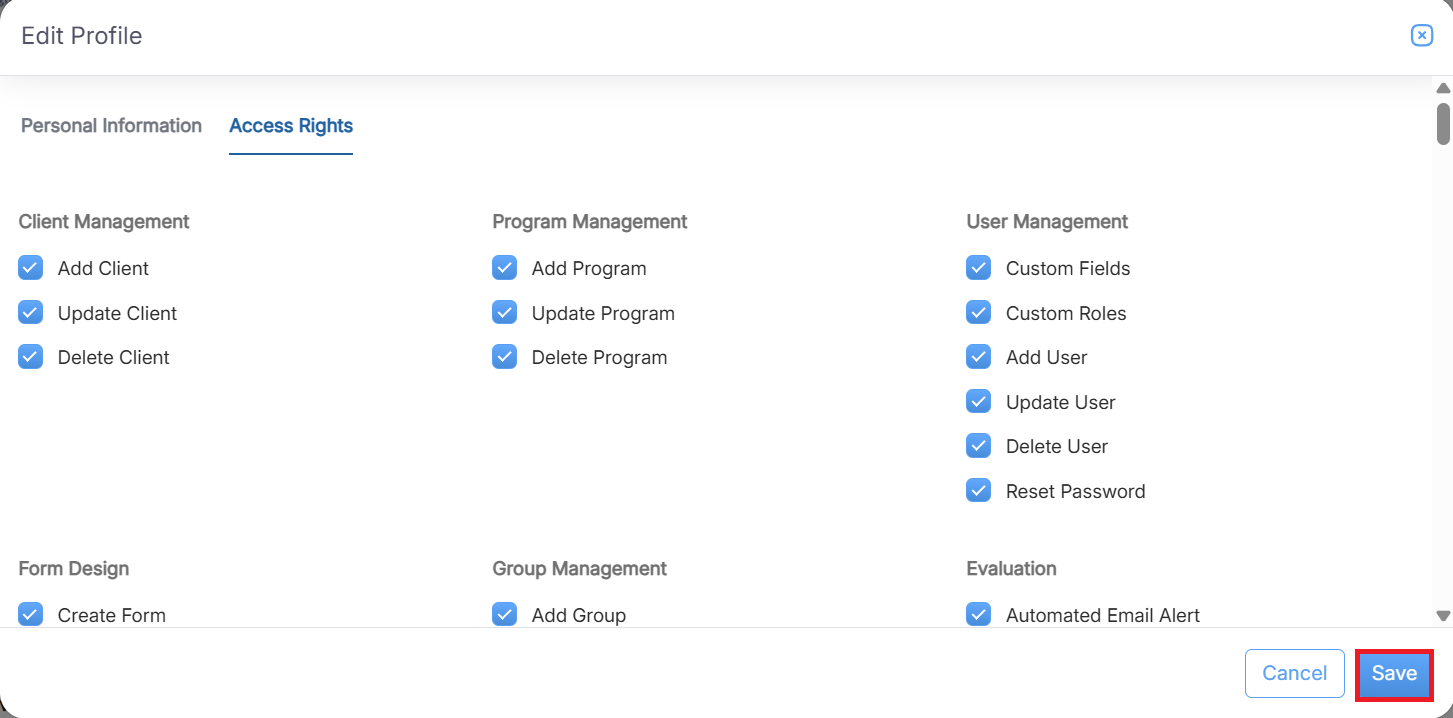
Edit Profile
To modify your profile information, click the Edit Profile button.
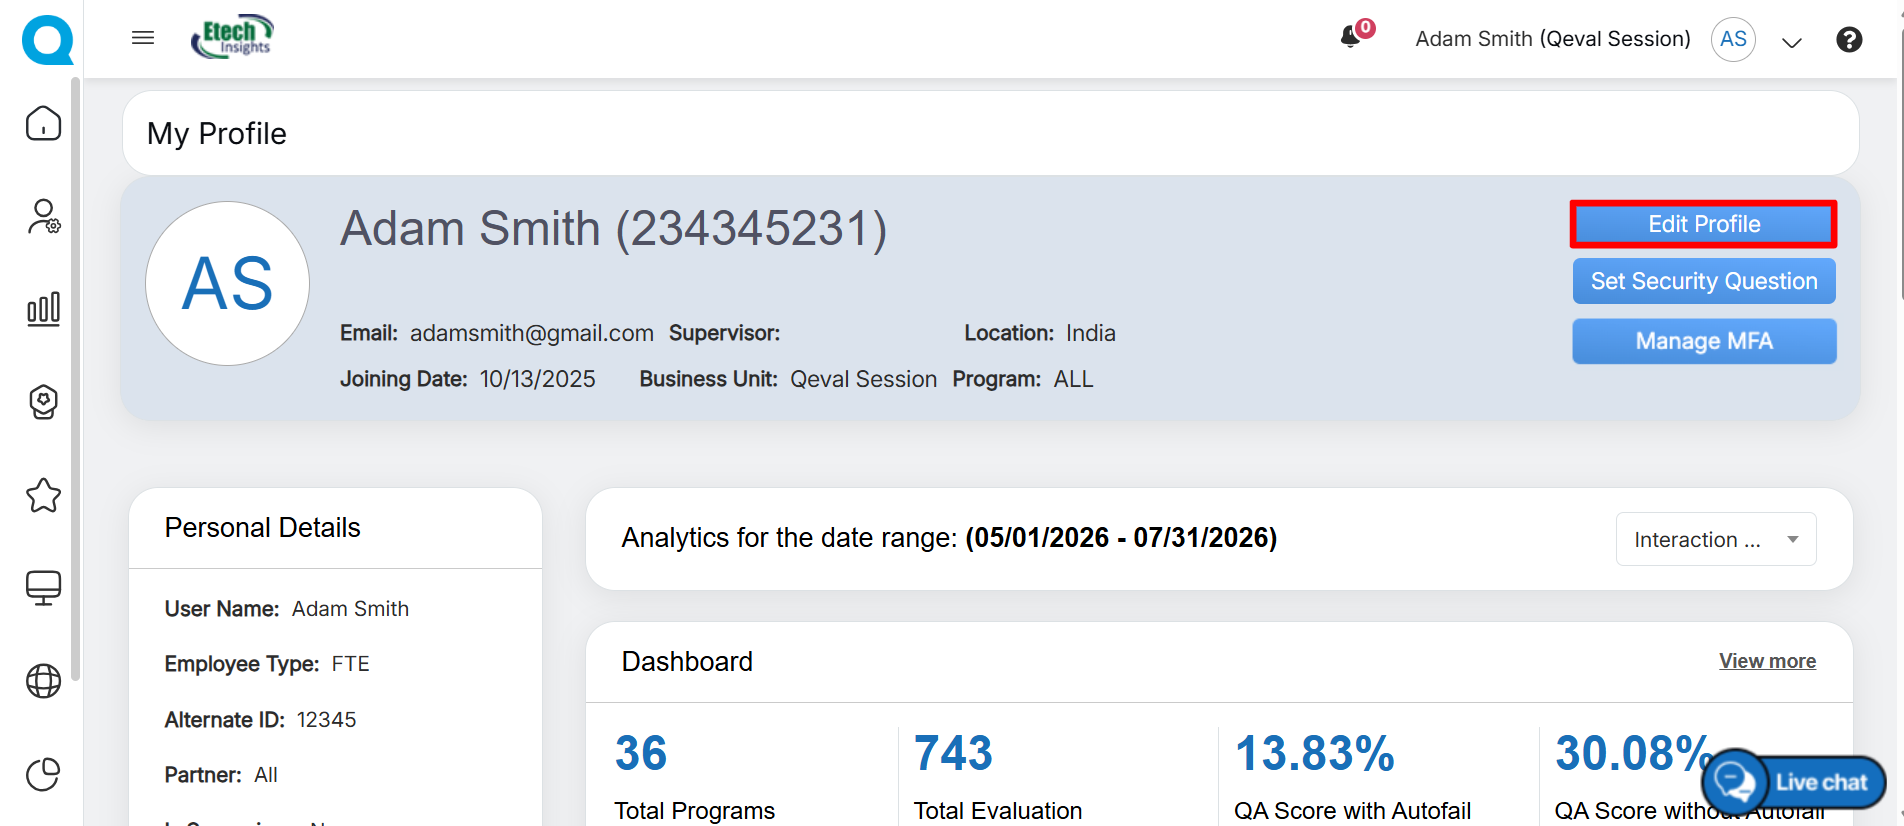
Edit Profile
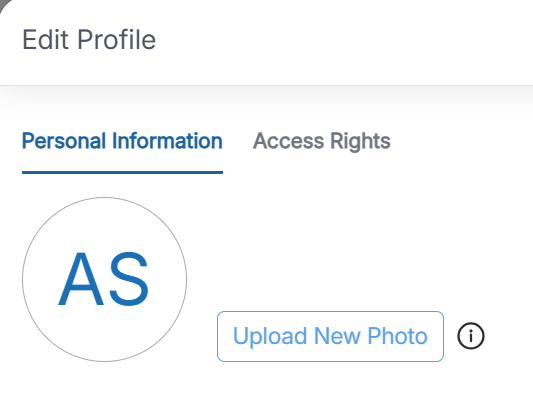
Set Security Question
The Security Question feature helps users reset or unlock their account if they forget their password.
From the View Profile page, all users can set up or update their security questions to enhance account security and support the account recovery process.
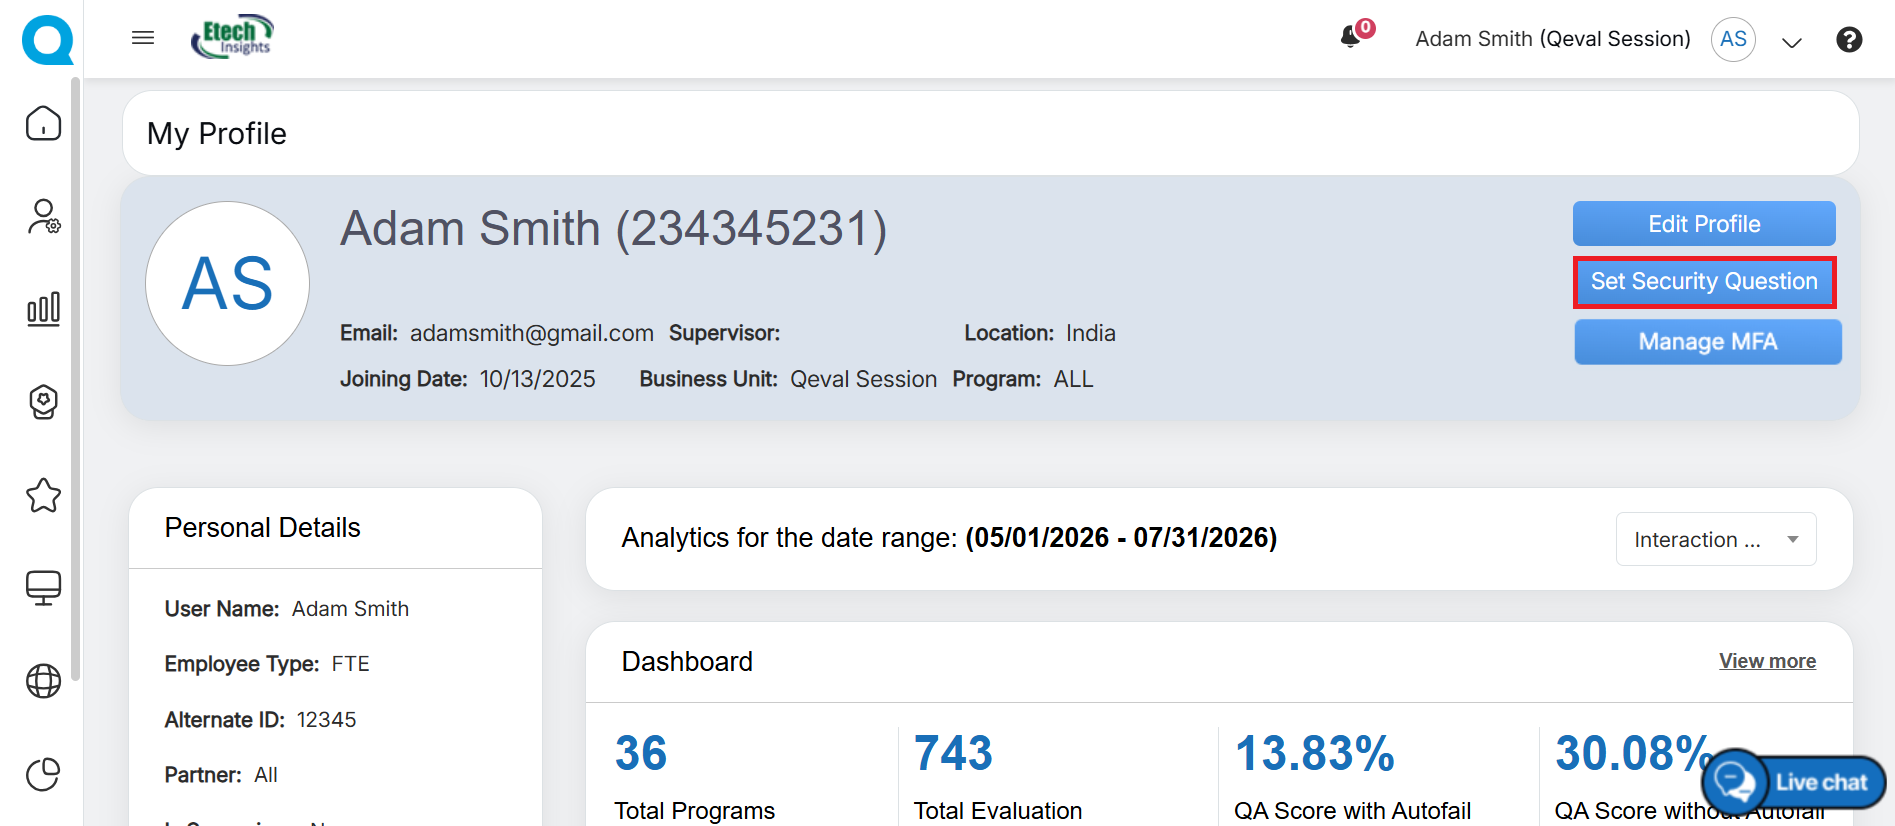
Set Security Question
If a security question has already been configured, the current question is displayed along with the Change Question option, allowing you to update it when required.
Click Change to update the existing security question.

Change Question
To update a secret question, the user must:
- Enter your account password.
- Select a security question from the drop-down list.
- Enter the answer to the selected security question.
- Click Submit to save the changes.
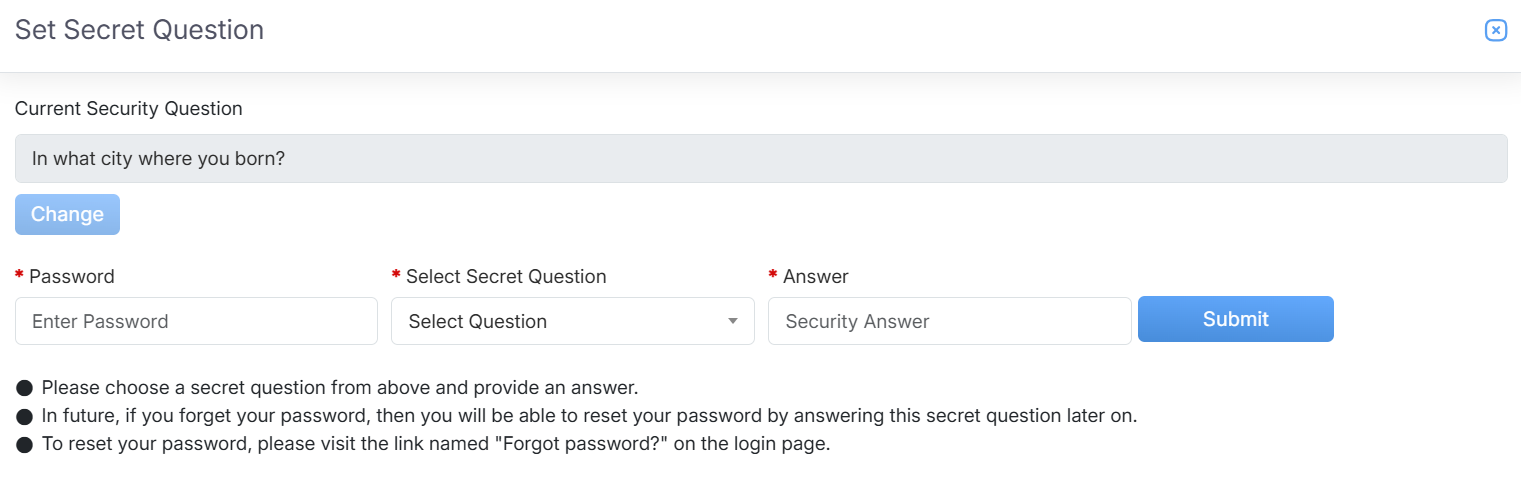
Change Question Details
Role-Based View Breakdown
| Role | Visible Information | Editable Fields / Actions | Dashboard / Cards Access | Other Capabilities |
|---|---|---|---|---|
| Agent | Personal details (view-only), User Information Header, Monthly QA Trend Chart | Update profile picture, Set/Update Security Question | Personal Information Card, Access Rights Card, Dashboard Metrics, Program Weekly Score (Bar Graph), Tactical Coaching Status (Donut Chart), KPI Dashboard Card, User Dashboard Card | “View More” to access detailed dashboards |
| Supervisor | Full personal details, Assigned roles (view-only), QA & Coaching trends, Agent-wise coaching summary, Drill-down charts | Update profile picture, Edit limited personal fields (if permission), Set/Update Security Question | All Agent cards plus Coaching Dashboard insights, Drilldown views for evaluations & performance | Navigate to detailed dashboards via “View More” |
| Admin | Complete personal & system attributes | Edit all personal/system fields, Upload/Remove profile pictures, Modify roles & permissions, Configure dashboard access | All cards (Personal Info, Access Rights, Dashboard, Program Weekly Score, Tactical Coaching Status, KPI Dashboard, User Dashboard) | Full administrative & operational control, “View More” to access detailed dashboards |
| QA Supervisor | Evaluation summaries, Live Dashboard, User Dashboard, Dispute Evaluation metrics | Update personal information (role-dependent) | Personal Information, Access Rights, Evaluation Summary Cards, Dispute-related dashboards, Program Performance Charts | Navigate to detailed dashboards via “View More” |
| QA Verifier | Total Evaluations, Auto-Fail Evaluations, Audits Reviewed / Not Reviewed, Dispute Evaluation, User Dashboard metrics | Update profile picture only | Personal Information Card, Access Rights Card, Dashboard Metrics, Dispute Evaluation Dashboard | Full visibility into verification dashboards, “View More” to explore detailed analytics |
Manage Multi-Factor Authentication (MFA)
You can configure, manage, or disable Multi-Factor Authentication (MFA) for your account from the View Profile page.
To access the MFA settings, navigate to View Profile and click Manage MFA.
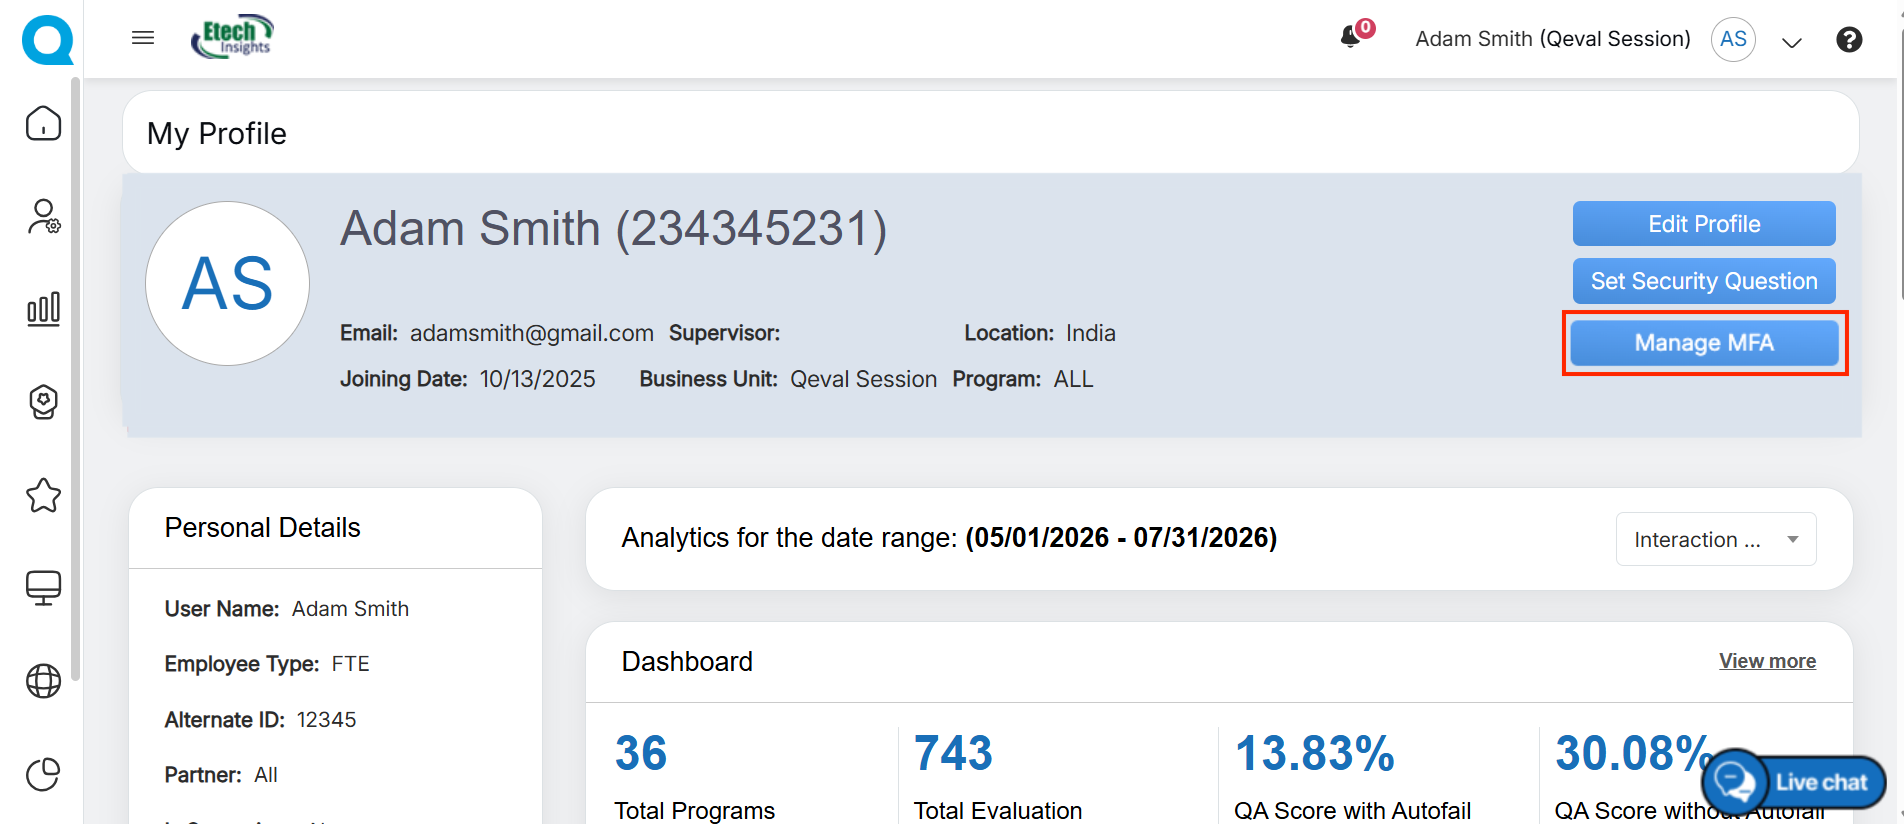
Multi-Factor Authentication (MFA) adds an extra layer of security to your QEval account by requiring a 6-digit verification code generated through a supported authenticator application during sign-in. Once MFA is enabled, users must enter this security code after providing their account credentials.
QEval supports popular authenticator applications, including:
- Google Authenticator
- Microsoft Authenticator
- Authy
- Compatible browser authenticator extensions
Configure Multi-Factor Authentication
To enable MFA for your account:
- Navigate to View Profile and Click Manage MFA.
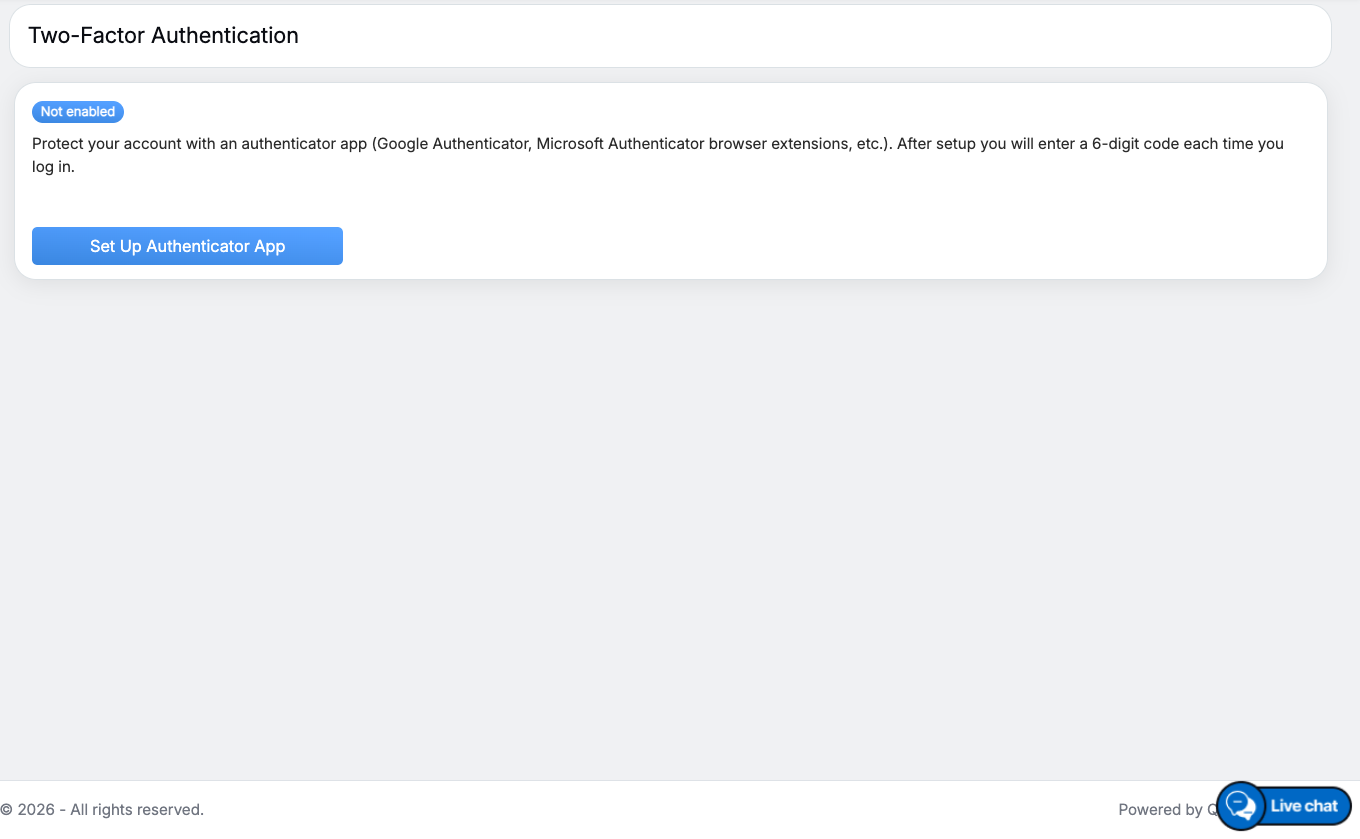
- On the MFA Settings page, Two-Factor Authentication Status is shown. Since MFA is disabled, Click Enable MFA to begin configuring Multi-Factor Authentication for your account.
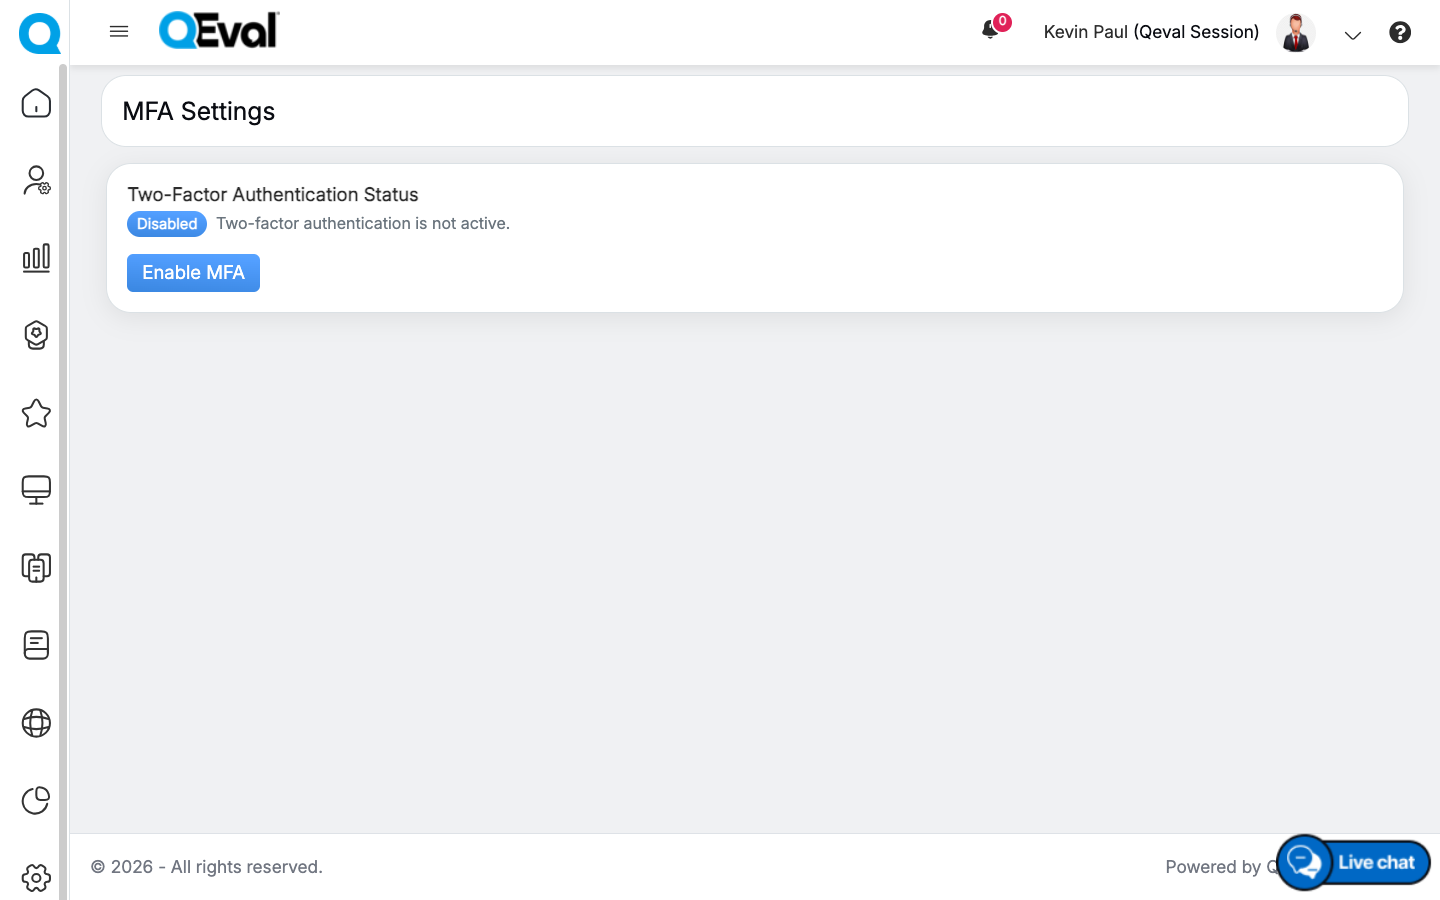
- On the next screen, click Set Up Authenticator App to start configuring your preferred authenticator application.
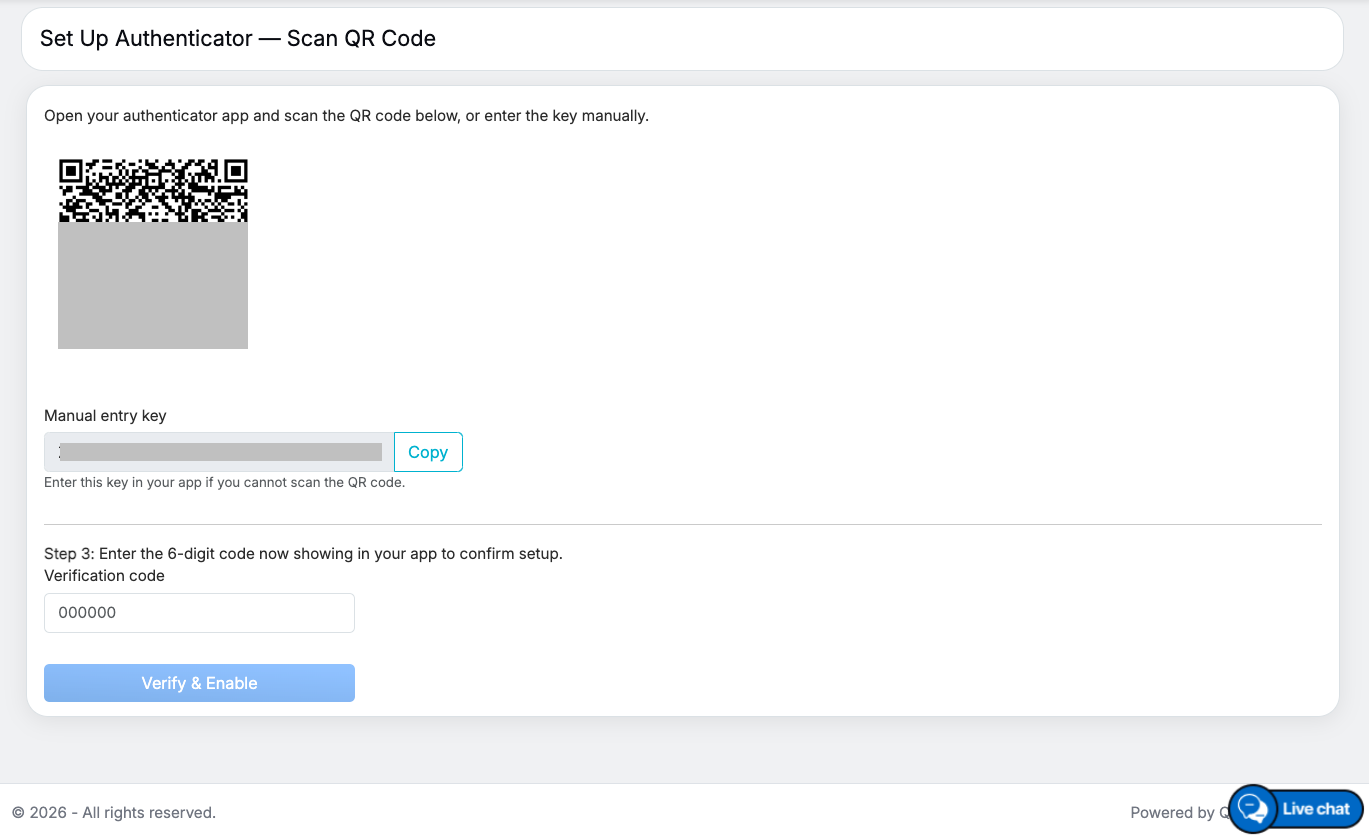
- Open your preferred authenticator application and Scan the QR code displayed on the screen or manually enter the provided setup key.
- Enter the 6-digit verification code generated by the authenticator application.
- Click Verify & Enable.
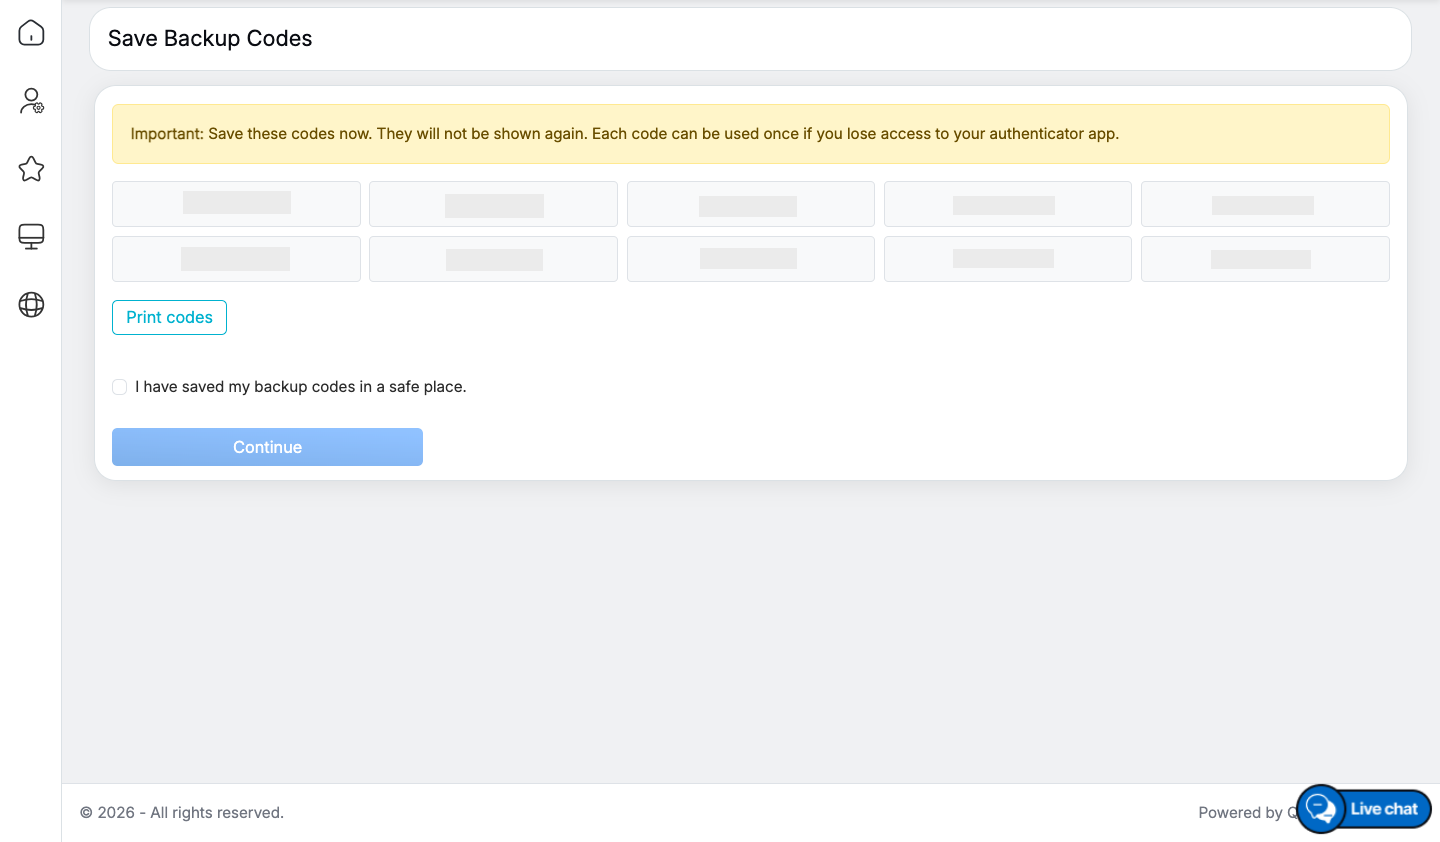
- Save the generated Backup Codes by printing or storing them securely.
- After securely saving your backup codes, select the I have saved my backup codes in a safe place checkbox, then click Continue to complete the MFA setup.
- A success message is displayed confirming that Multi-Factor Authentication has been configured successfully. Click Continue to Dashboard to navigate to the QEval Dashboard.
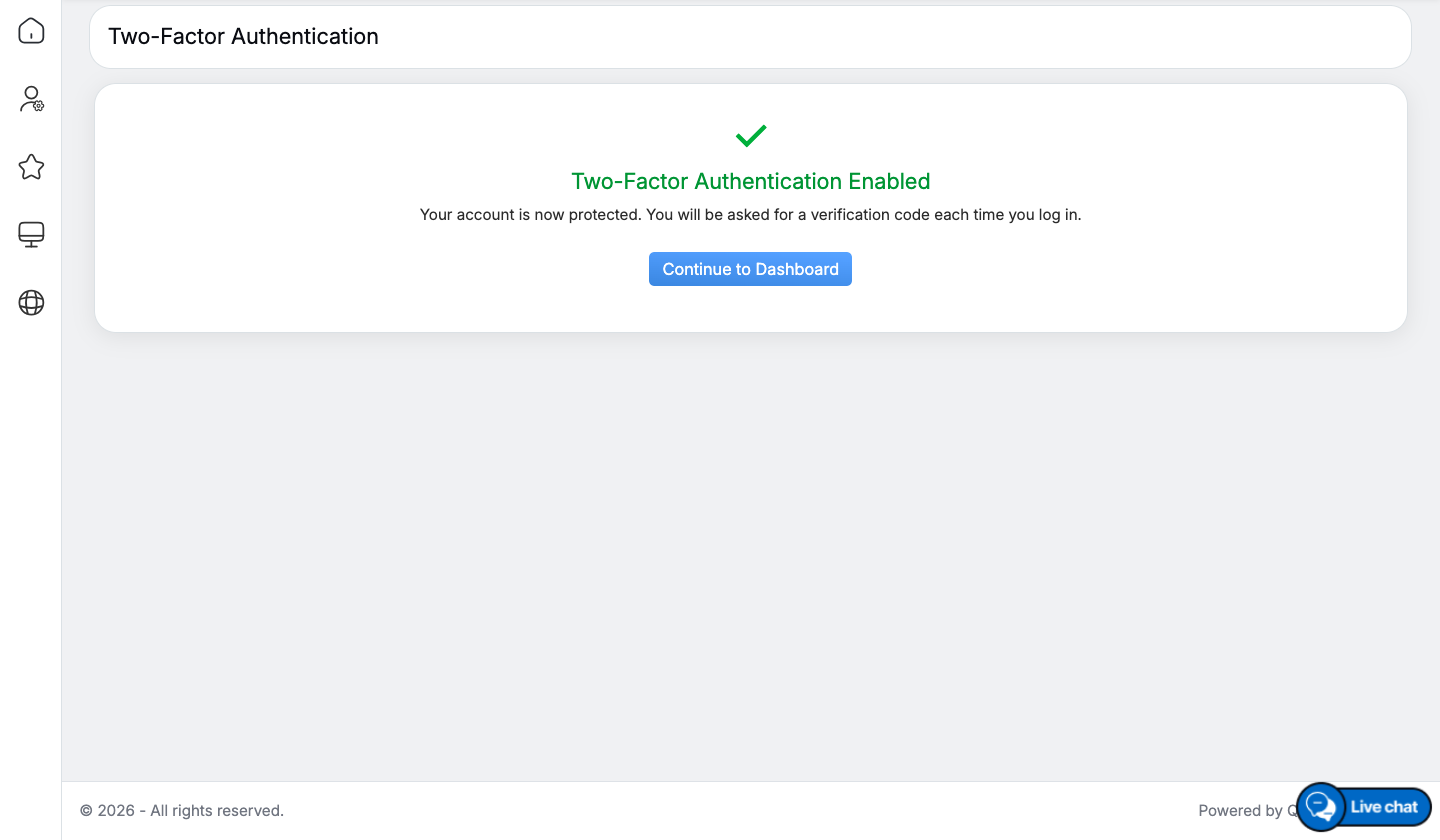
Success Pop-up
Once configured successfully, MFA is enabled for your account and will be required during every login.
Sign In Using MFA
After MFA has been configured:
- Sign in using your User Name and Password.
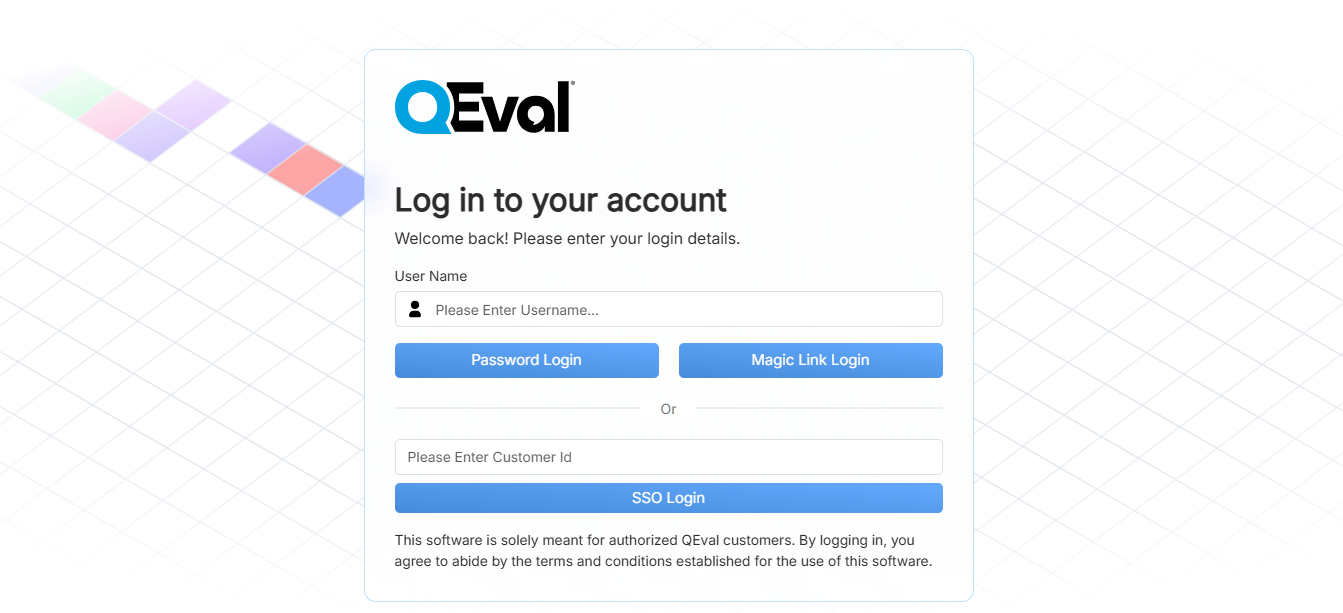
- Open your configured authenticator application.
- Enter the current 6-digit security code generated by the application.
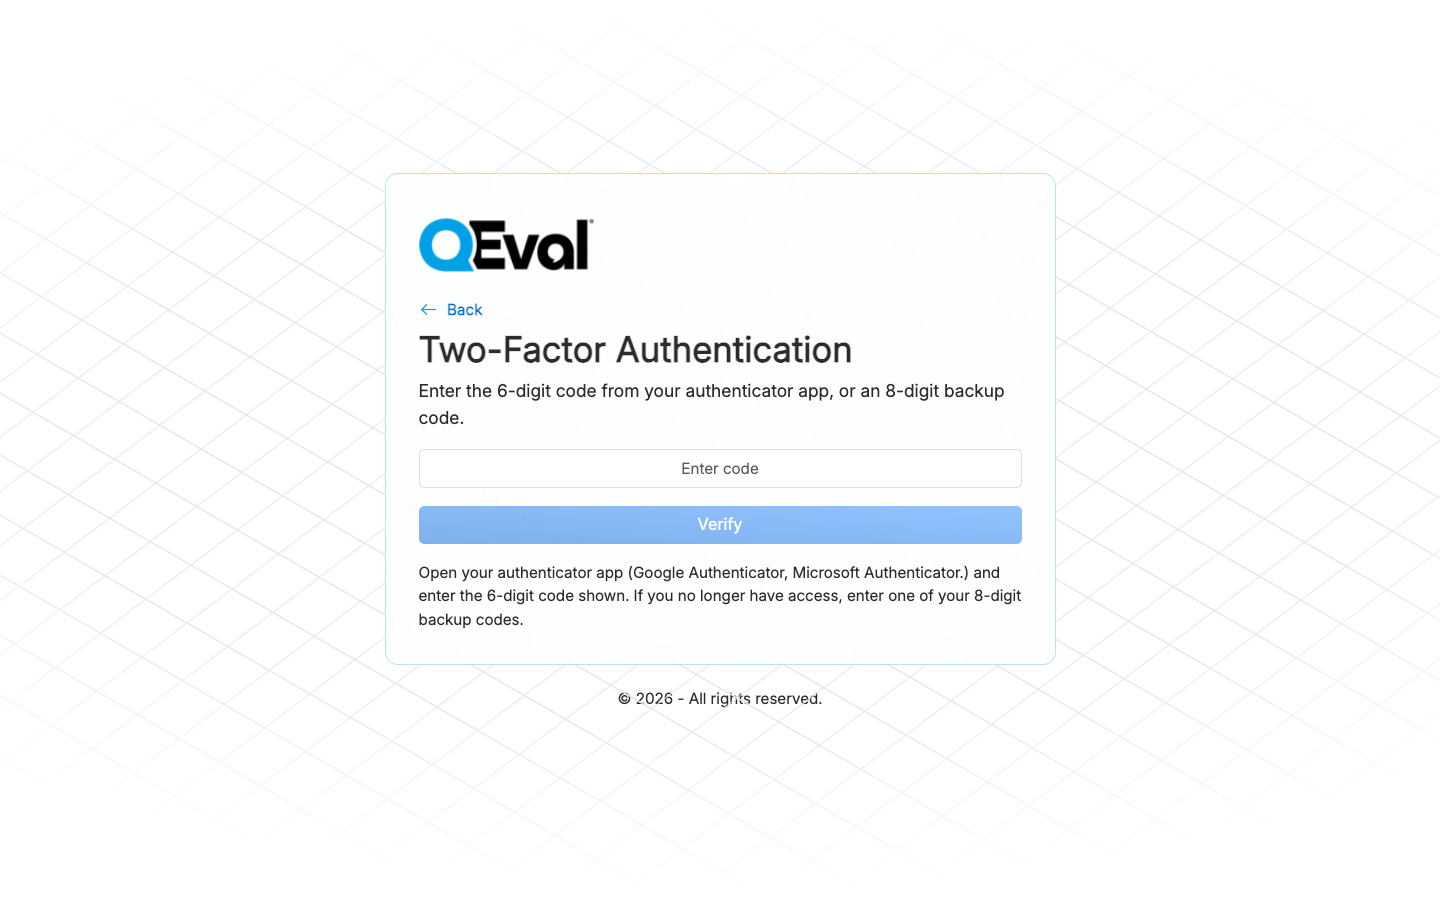
- Click Verify to securely access your QEval account.
Manage Existing MFA
To manage your existing MFA configuration:
-
Navigate to My Profile > Manage MFA.
- The MFA Settings page displays the current authentication status and the number of available backup codes.
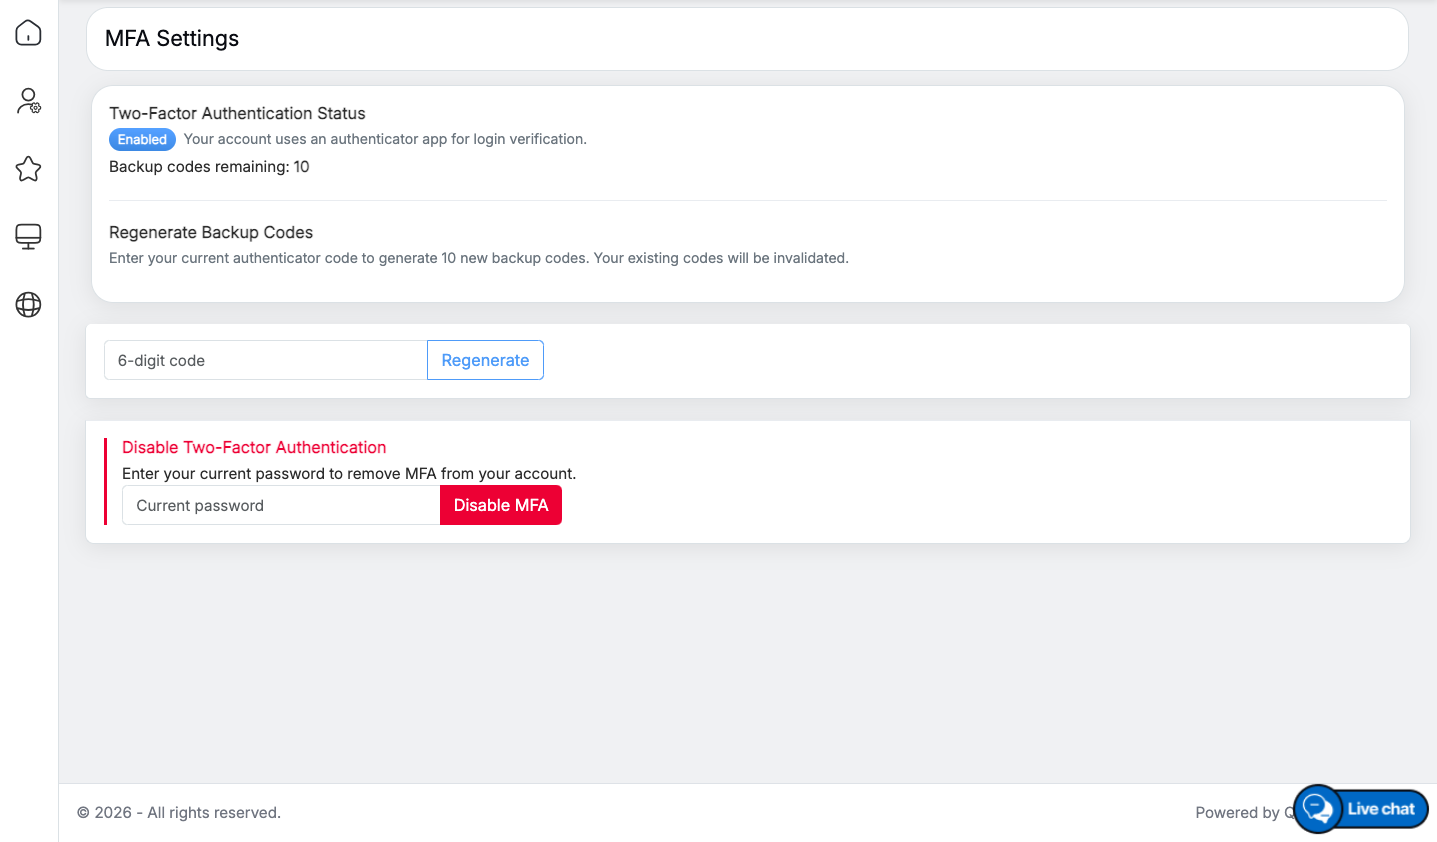
From this page, you can:
- Regenerate Backup Codes by entering the current 6-digit authenticator code and clicking Regenerate. Generating new backup codes invalidates all previously generated backup codes.
- Disable MFA by entering your current account password and clicking Disable MFA.
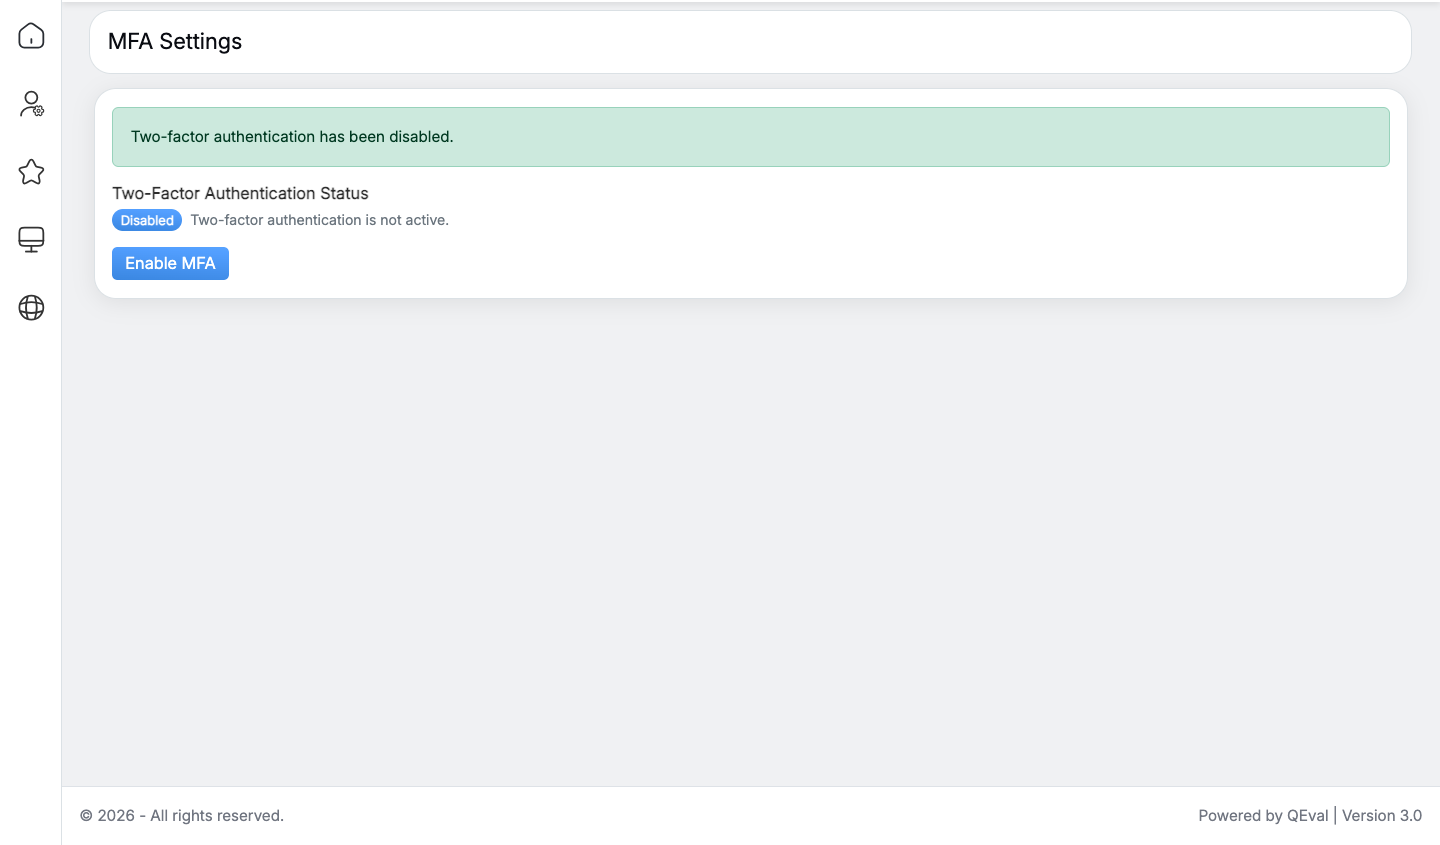
Important Notes
- MFA setup is required only once for each account.
- Backup codes are generated during the initial setup and should be stored securely.
- Each backup code can be used only once.
- If you lose access to your authenticator application, you can use a backup code to sign in and reconfigure MFA.
- A supported authenticator application is required to generate the 6-digit verification code used during sign-in.
Cards Displayed Below Header
Across all roles, several analytical cards appear; availability depends on permissions.
A. Personal Information Card
This card displays the user’s personal, organizational, and system-related information available in the QEval system.
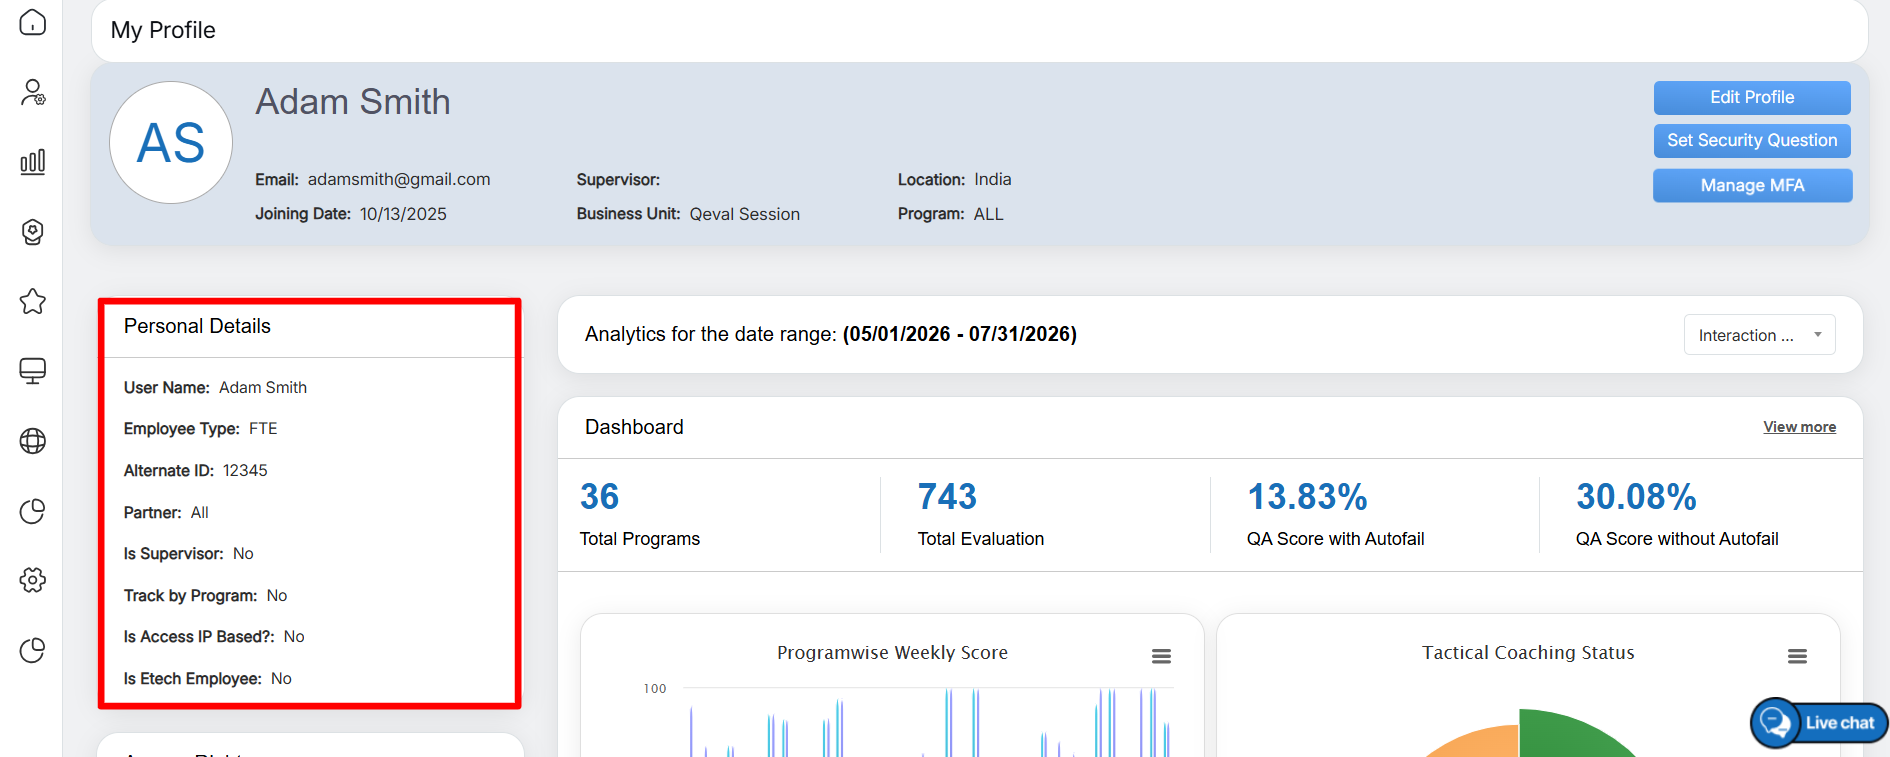
Personal Details
B. Access Rights Card
This card displays all roles and permissions assigned to the user. It provides a clear overview of the modules, features, and actions the user is authorized to access within the QEval system based on their assigned role.
Examples of access rights include:
- Client Management
- User Permissions
- Coaching Access
- Dashboard Access
- Training Module Access
- Evaluation & Dispute Handling
- Reporting & Analytics
- Program Management
Only the rights available to the user’s role are shown.
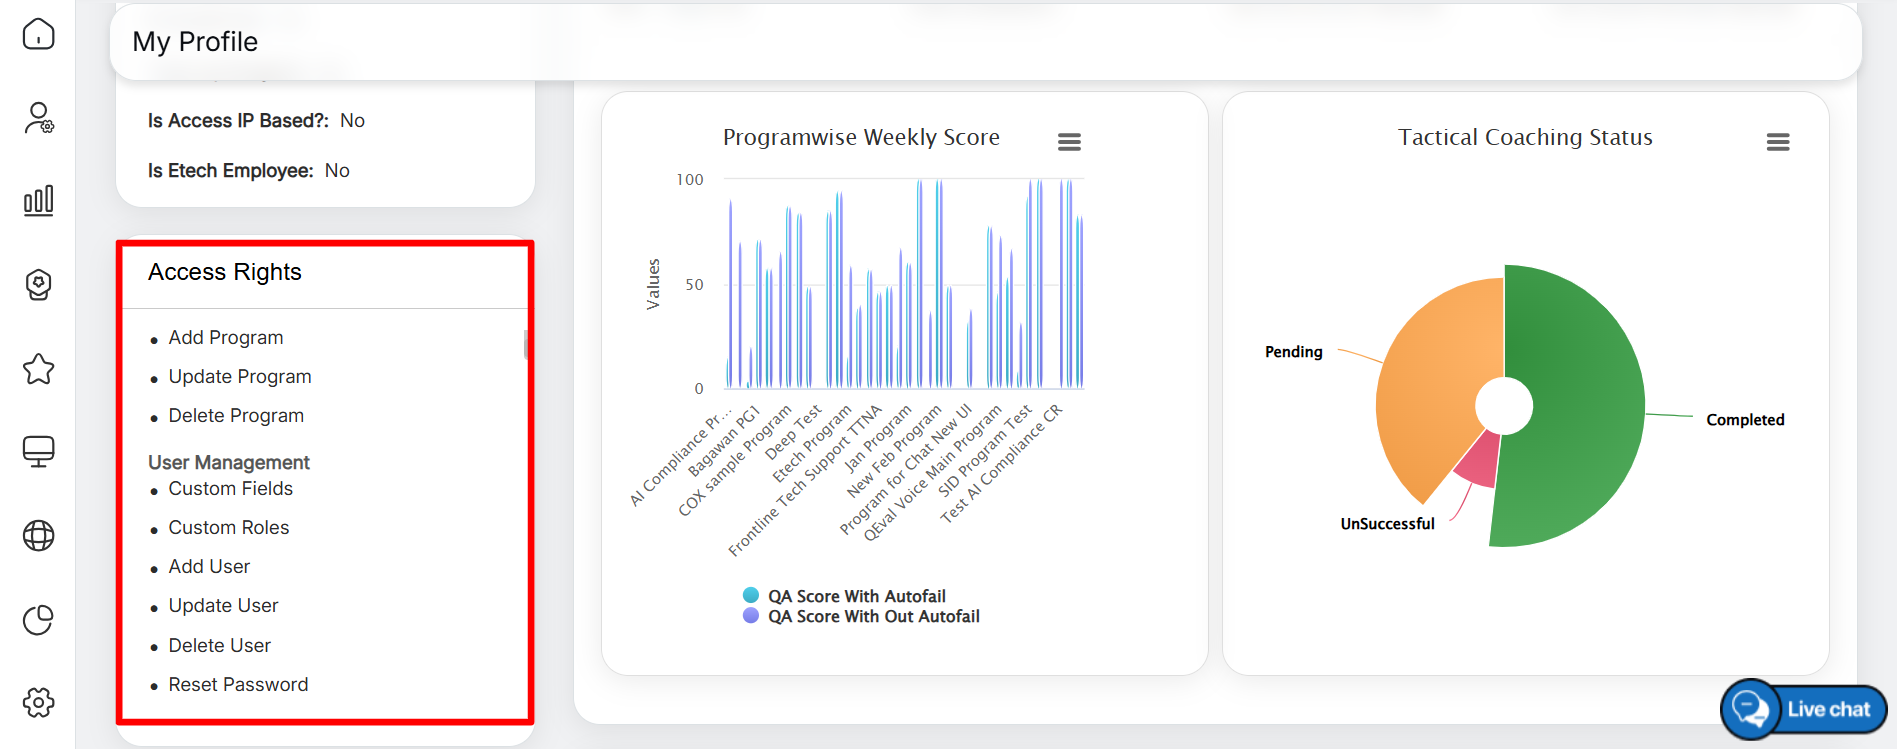
Access Rights
Analytics Overview
The Analytics section displays performance data for the last three months by default. It includes dashboard cards, graphs, and charts that provide a comprehensive overview of performance insights.
By default, the Date Type is set to Evaluation Date. If required, you can change it to Call/Chat Date by selecting the appropriate option from the Date Type drop-down list located in the upper-left corner of the page.
A. Dashboard Card
This card provides a summary of key performance metrics for the selected date range. It displays important information such as the Total Programs, Total Evaluations, and Overall QA Score, allowing users to quickly review overall performance at a glance.
Example metrics:
- Total Programs – 36
- Total Evaluations – 2743
- QA Score with Auto-Fail – 13.83%
- QA Score without Auto-Fail – 30.08%
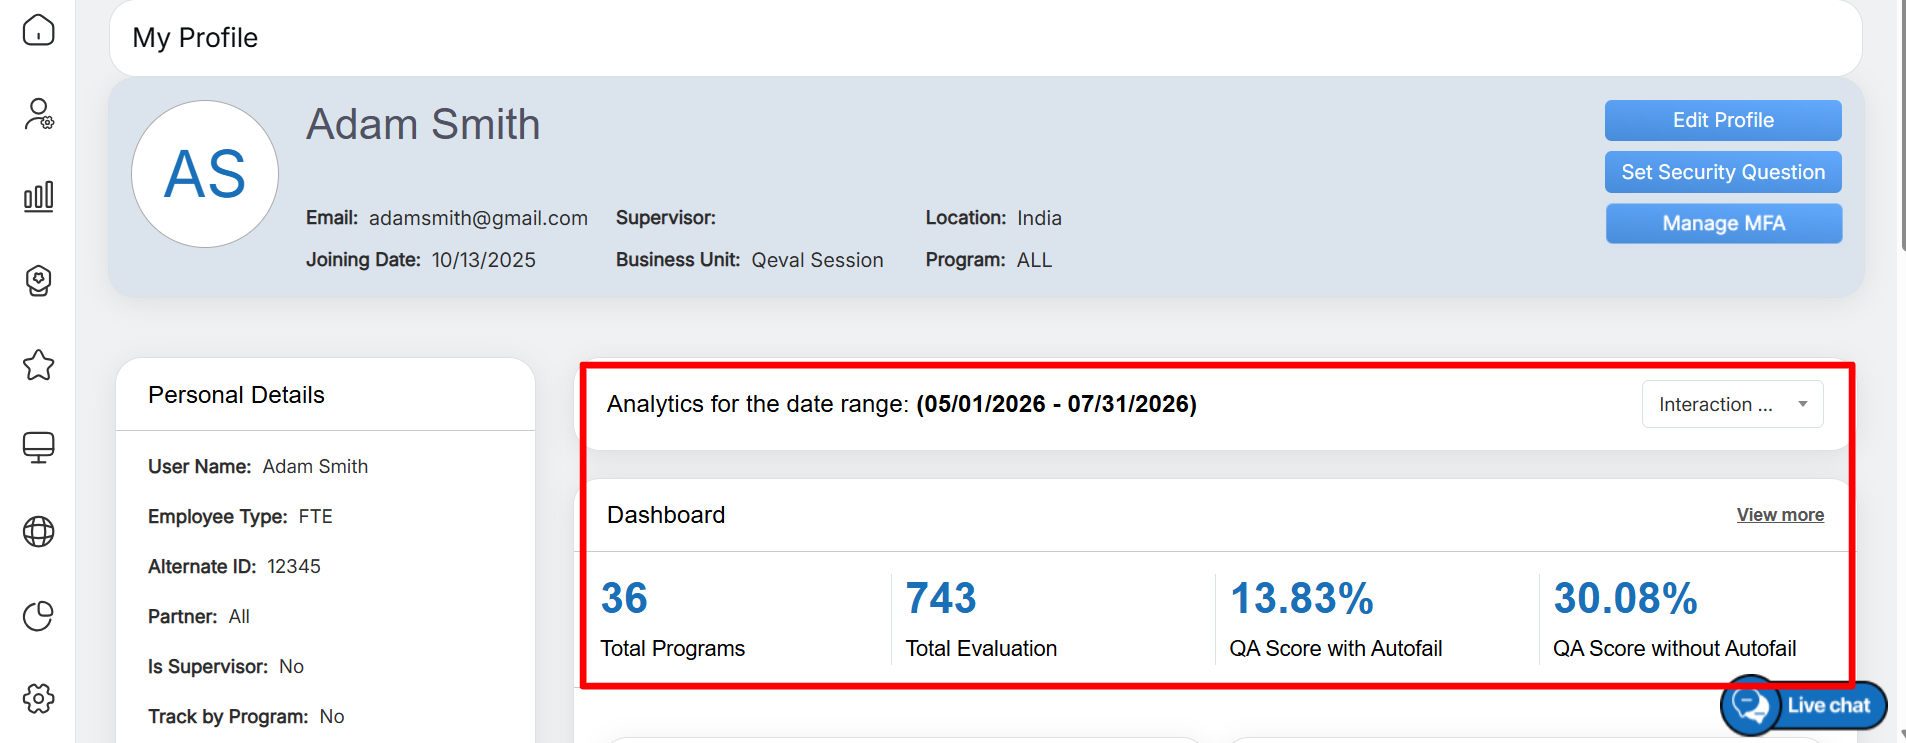
Analytics
This section displays a bar graph that represents the weekly performance trends for programs. It helps users analyze performance over time, identify trends, and compare weekly results across different programs.
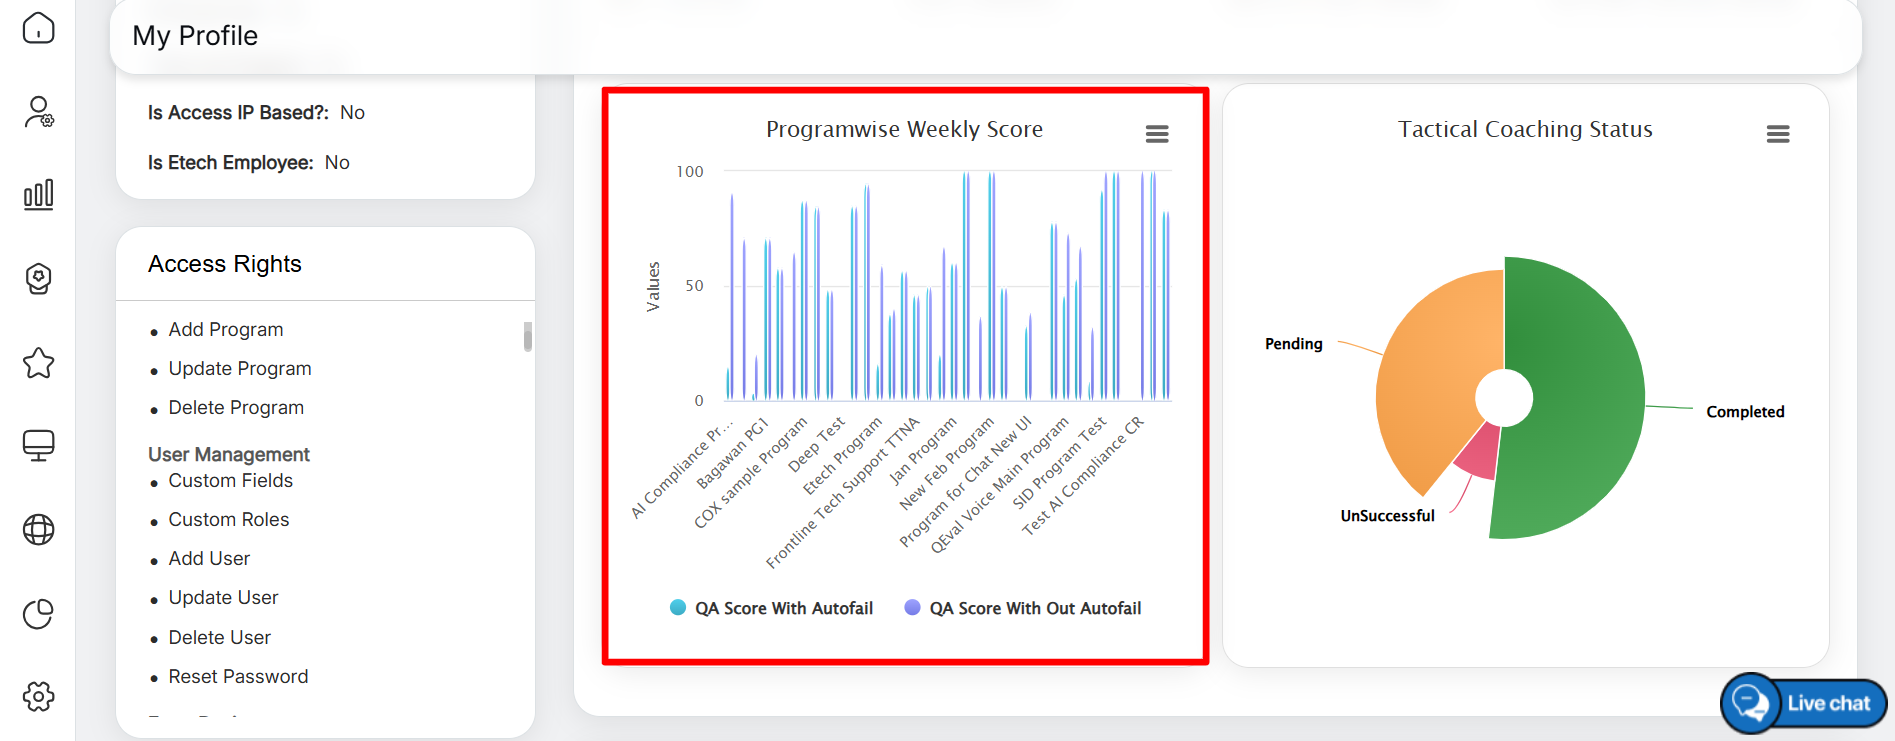
Programwise Weekly Score
C. Tactical Coaching Status
This section displays a donut chart that illustrates the distribution of coaching activities. It provides an overview of the number of coaching sessions that are Completed, Unsuccessful, and Pending, enabling users to monitor coaching progress and identify areas that may require additional attention.
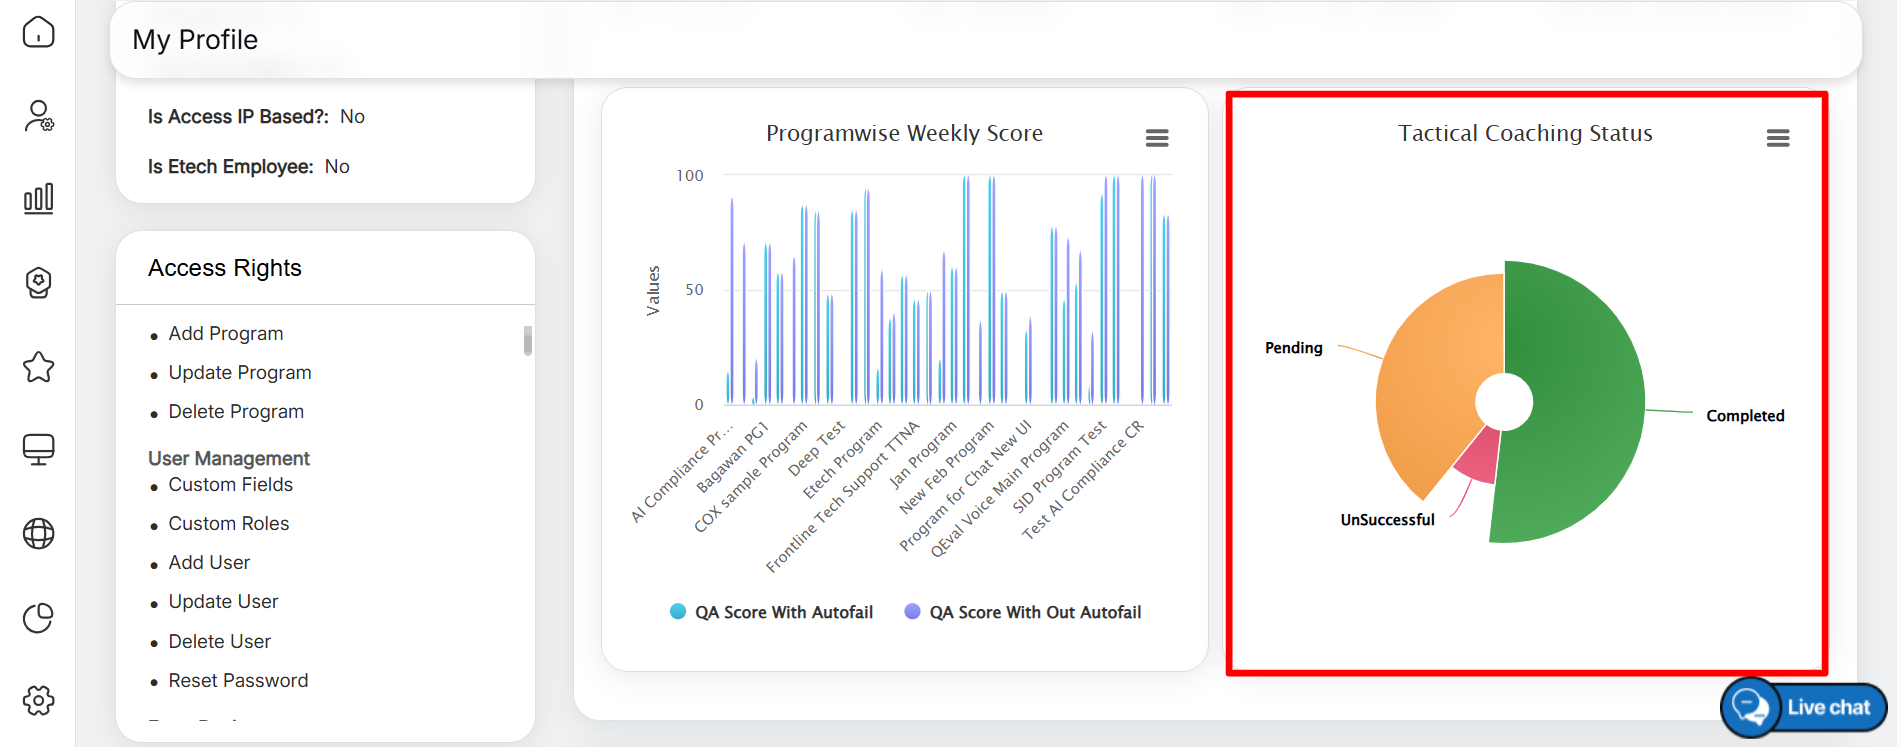
Tactical Coaching Status
D. KPI Dashboard Card
This card displays the KPI Index score for the selected date range. Click View More to open the KPI Dashboard, where you can view detailed KPI metrics and performance insights.
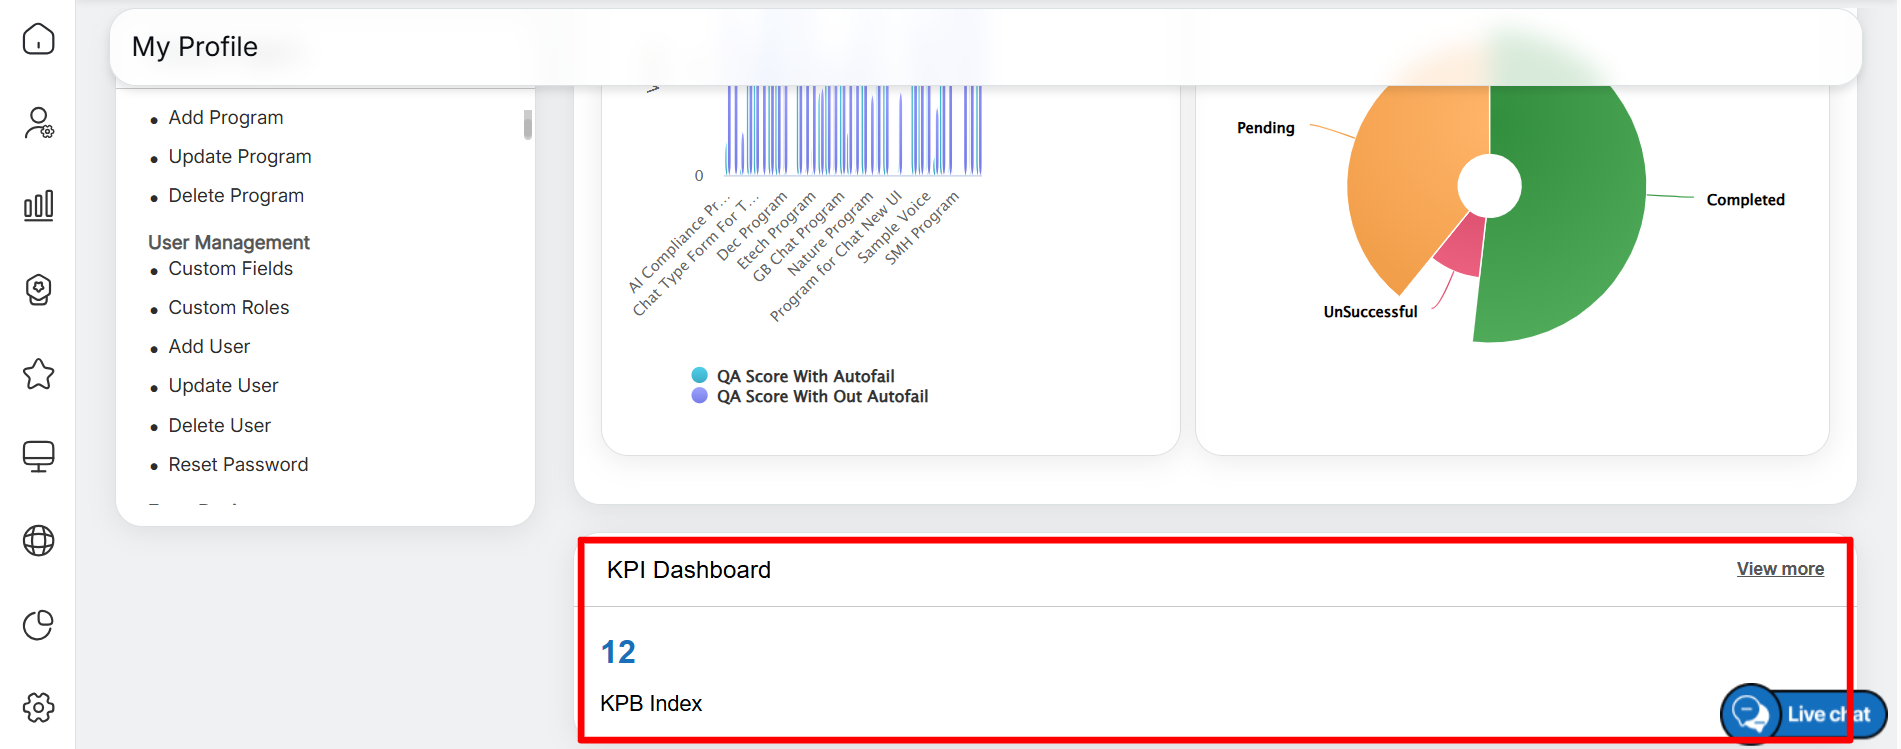
KPI Dashboard Card
E. User Dashboard Card
This card provides an overview of user activity and engagement metrics:
Example metrics:
- Total Users – 73
- Active Users – 45
- Average Active Hours – 14:48:06
- Average Duration – 14:48:06
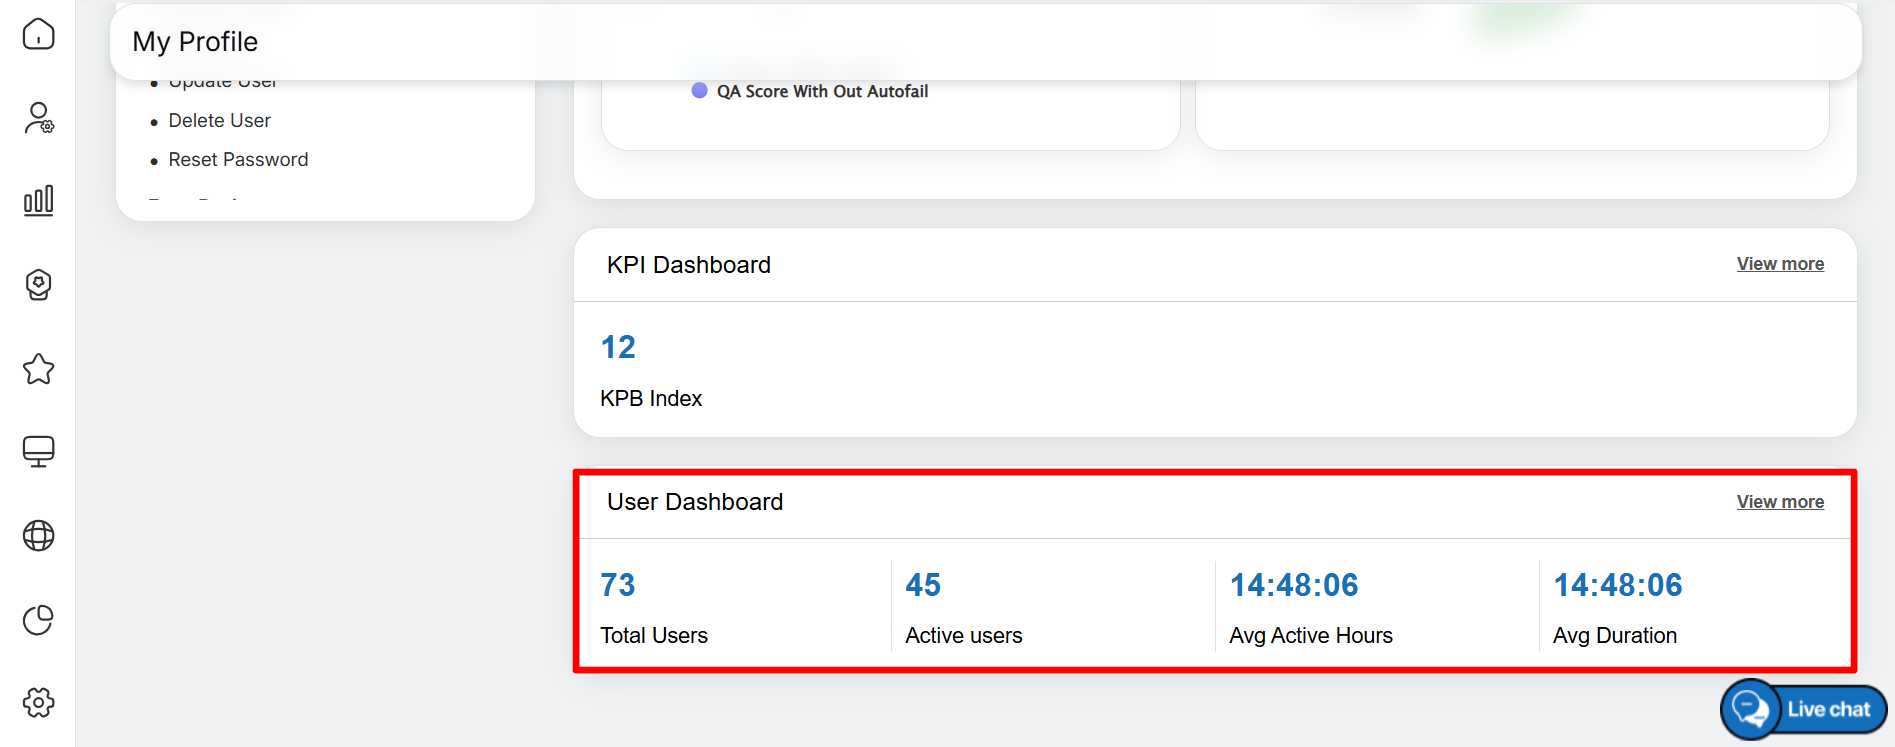
User Dashboard Card
Video