Table of Contents
Overview
The Program is a feature that maps a form and configures various types of email notifications. Form creation relies on the utilization of the program feature. Each program contains multiple forms, and activation of a single form is possible for a given program. The authorized users can add, edit, delete, or search different programs created for various clients.
To access this feature, click on the Menu button or move the mouse on the left side of the page to open the menu bar :
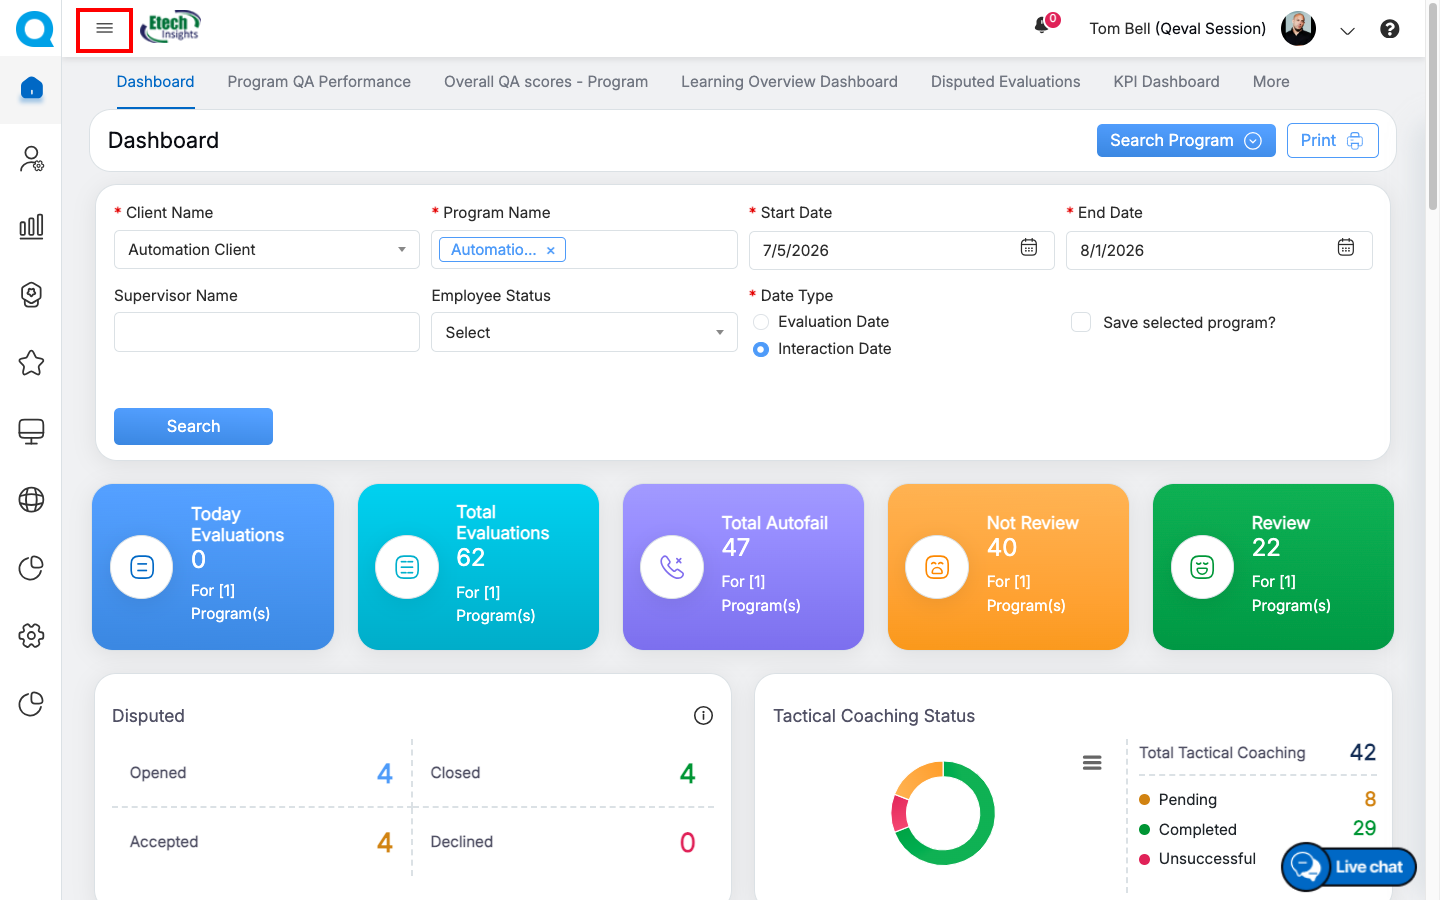
Menu Bar
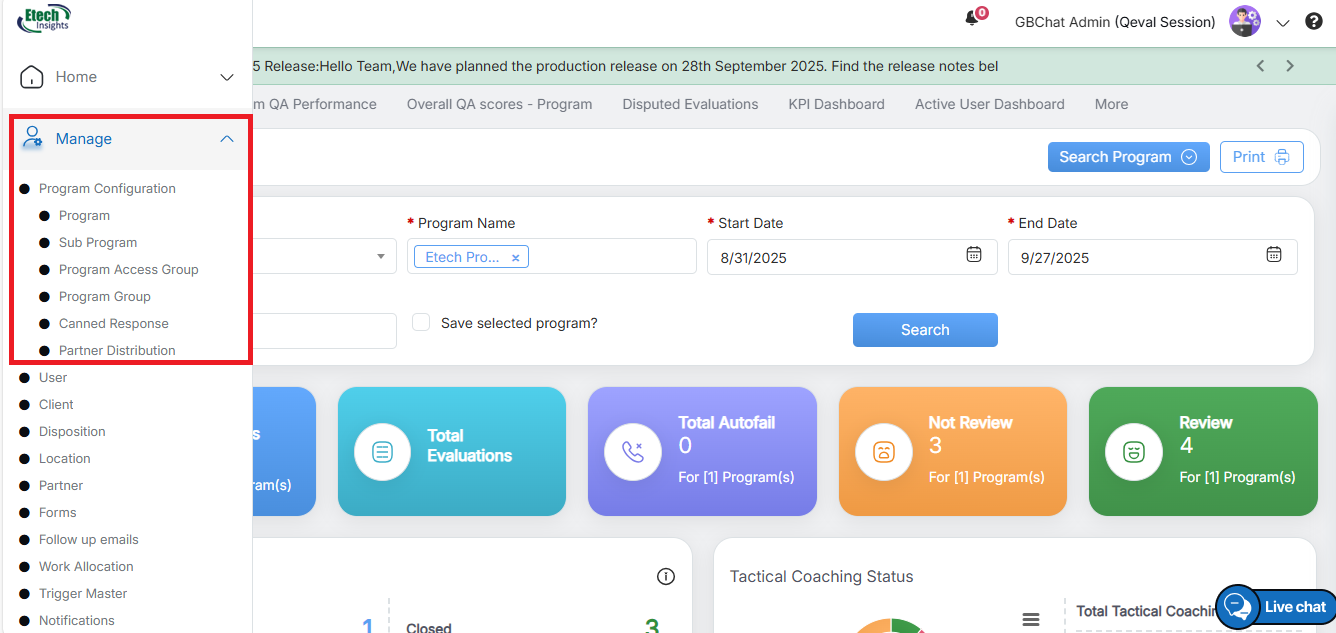
On the Menu Bar, click on the Manage option and then select the Program Configuration option :
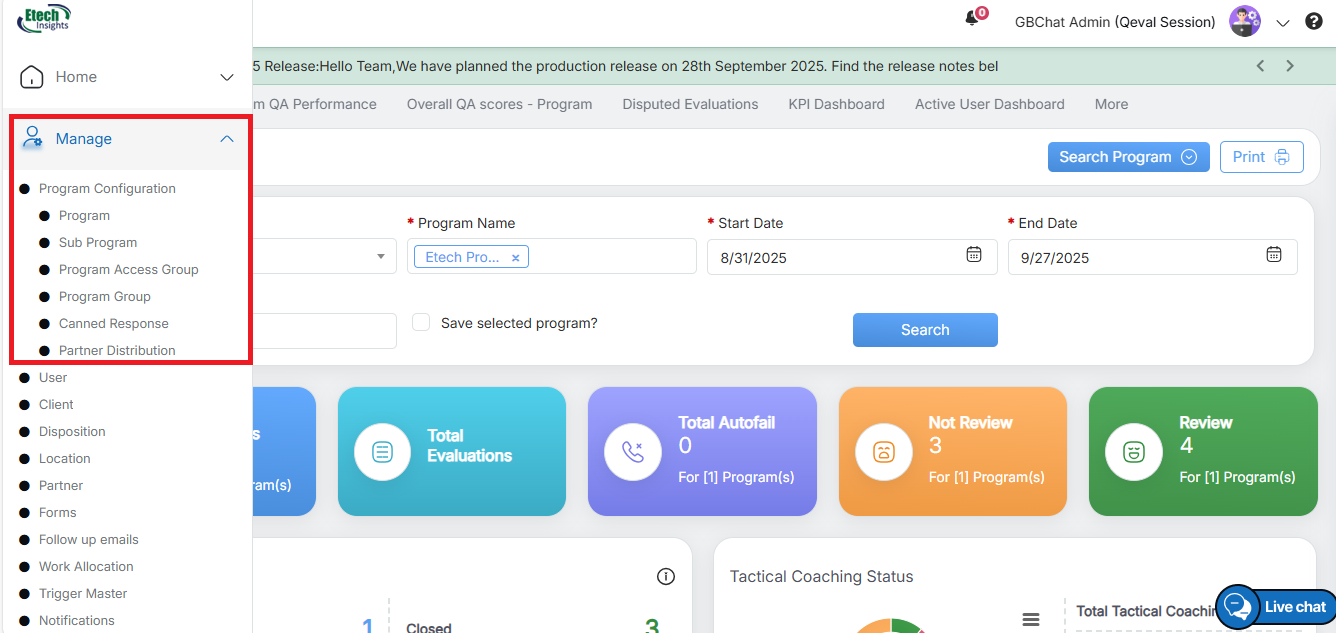
 Click on the Program option from the list of different features available under the Program Configuration :
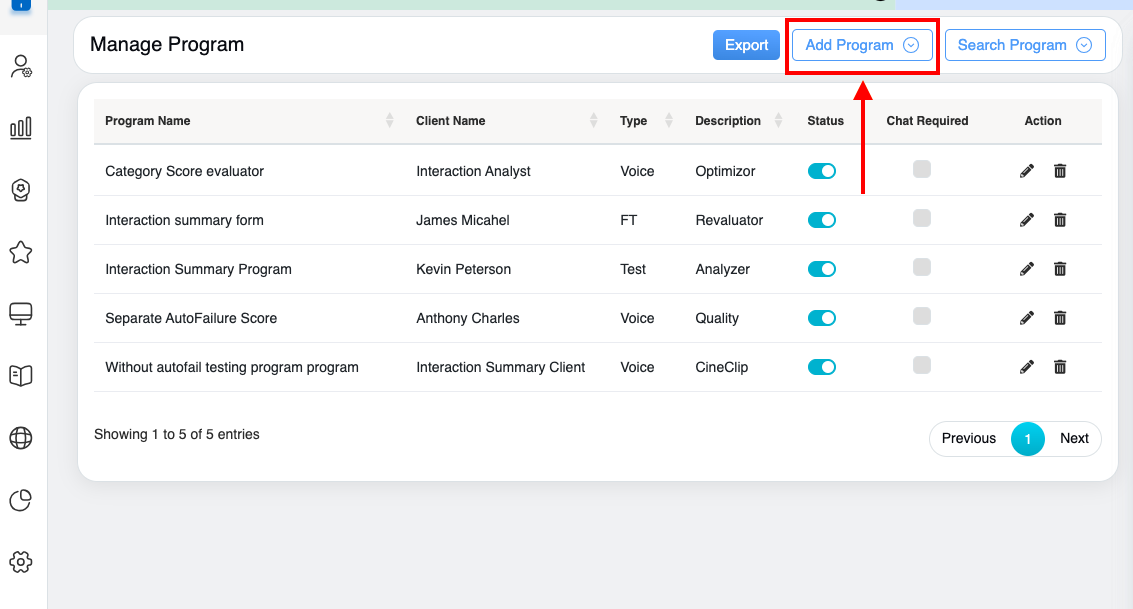
 The user will be directed to the Manage Program page. This page displays the list of all the programs that are already created for various clients:
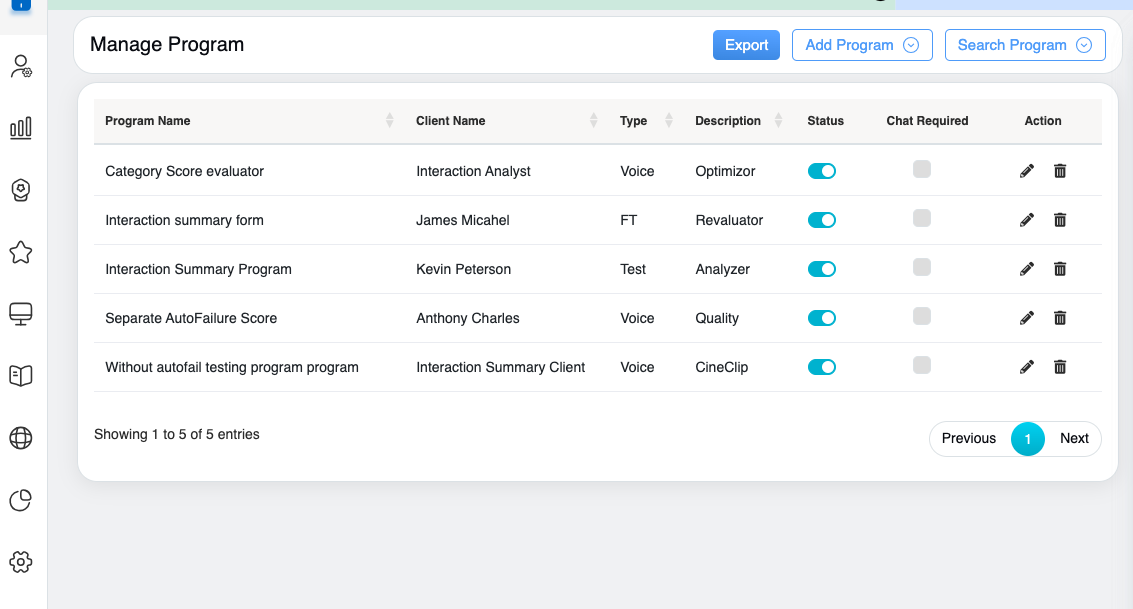
Manage Program Page
Add Program
The authorized user can add programs for a specific location in a QEval system. The page also allows the authorized user to provide certain functionalities to specific programs or all programs.
To add the program for a specific location, click on the Add Program button displayed on the Manage Program page :
The Add Program window will be opened on the same page :
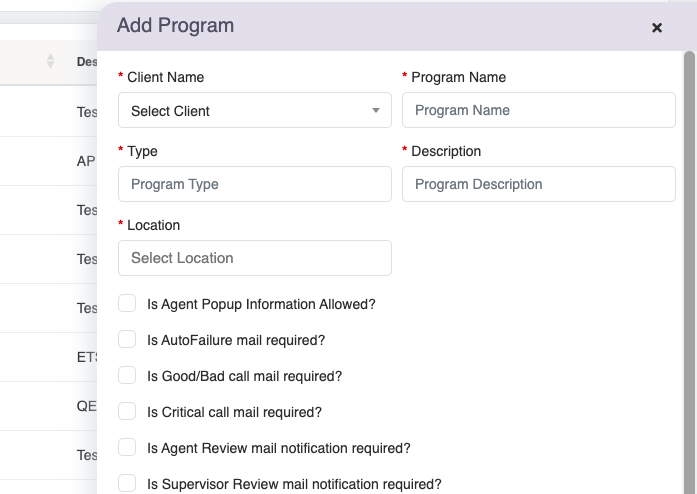
Add Program Window
Provide the following details to add the program:
- The Client Name drop-down menu displays the list of clients. Select the name of the client from this list.
- Enter the name of the program in the textbox available under the Program Name field.
- Enter the type of program under the Type textbox. For example, chat or voice, or non-voice, or calls etc.
- Enter the program description under the Description textbox.
- The Location drop-down menu displays the list of locations. Select the location name for the program. One can select multiple locations from the drop-down list. It will be reflected in the Evaluation Form to select the location.
To remove the selected Location then click on the Cross button displayed beside the location name:
Note: Refer to Location module to add new location in the QEval system, if the location name is not available under the location drop-down menu
- By clicking on Is Agent Popup Information Allowed? checkbox enables this option. When this option is enabled, the evaluation console will display the location as well as the name of the supervisor while entering the name of the agent.
Note: When the QA Verifier selects the agent’s name in the Evaluation Form, the location and supervisor’s name of that selected agent will be taken automatically from the agent’s user profile. It is advisable to keep the user profile updated otherwise wrong details will be fetched.
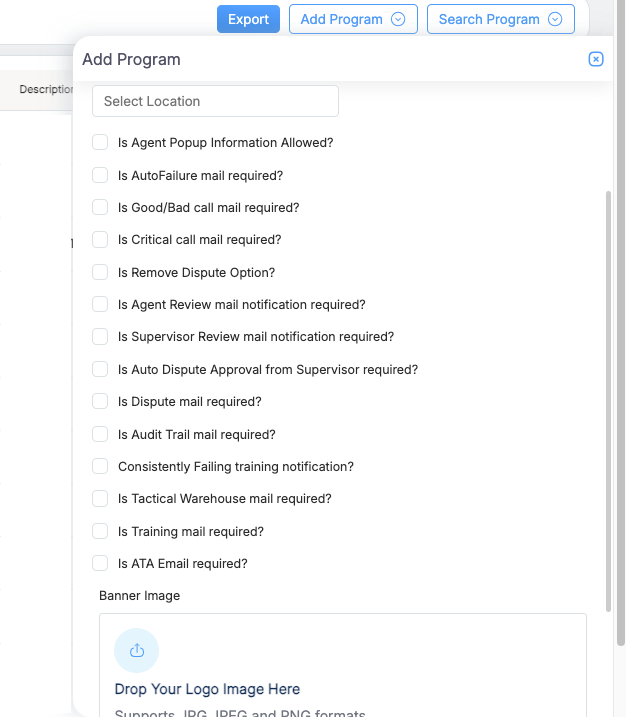
Add Program Window
- Select Is Auto Failure Mail Required? Checkbox, if an auto failure email is needed to be sent to other people. Also, select the people to whom the email is to be sent.
-
- Agent: Select if an auto failure email is to be sent to the agent. It will take the agent’s name from the evaluation and check the email ID from the user profile and send an email notification.
- Supervisor: Select if an auto failure email is to be sent to the supervisor. It will take the supervisor’s name from the evaluation and check the email ID from the user profile and send an email notification.
- Other: Select if an auto-failure email is to be sent to others. When selecting this option, the logged-in user can enter multiple email addresses, separated by a comma, in the Distribution List field for individuals whose user profiles are not created. Email notifications will be sent to the added email addresses.
- Select Is Good/Bad call mail required? Checkbox, if Good or Bad call email sent to the added user.
- Select Is Critical call mail required? Checkbox, if critical call email is needed to be sent to other people. Also, select the people to whom the email is to be sent.
-
- Agent: Select if a critical call email is to be sent to the agent. It will take the agent’s name from the evaluation and check the email ID from the user profile and send an email notification.
- Supervisor: Select if a critical call email is to be sent to the supervisor. It will take the supervisor’s name from the evaluation and check the email ID from the user profile and send an email notification.
- Other: Select if a critical call email is to be sent to others. When selecting this option, the logged-in user can enter multiple email addresses, separated by a comma, in the Distribution List field for individuals whose user profiles are not created. Email notifications will be sent to the added email addresses.
- Select Is Remove Dispute Option checkbox to enable this option. The agent can can view the item but cannot make changes, and the Dispute option is hidden from the interface.
- Select Is Agent Review mail notification required? Checkbox to enable this option. The agent will receive a review notification mail soon after the evaluation is completed by the QA Verifier. It will send the email notification to the agent only by this option and not the supervisor. Enter the Agent Mail Subject Line with which the mail will be sent. If this option is skipped, the system will generate a pop-up message thereby not allowing to send the mail.
-
- Other: Select if the agent review mail notification is to be sent to others. When selecting this option, the logged-in user can enter multiple email addresses, separated by a comma, in the Distribution List field for individuals whose user profiles are not created. Email notifications will be sent to the added email addresses.
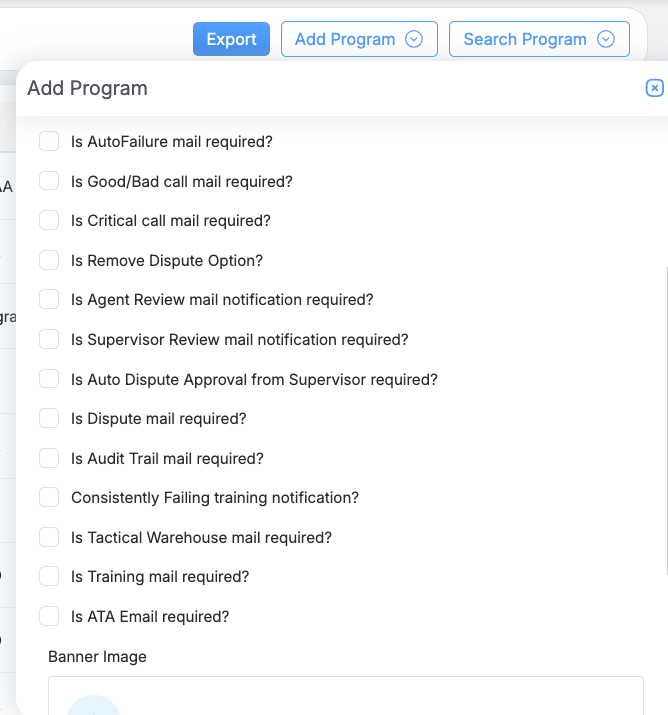
Add Program Window
- The supervisor will receive the evaluation review mail when Is Supervisor Review mail notification required? checkbox is selected.
- Supervisor Mail Subject Line: Enter the subject line avoiding which the mail will not be sent to the recipient.
- Mail Schedule Day: Enter the specific day on which the mail to the supervisor will be generated and the consolidated data will be sent at once instead of sending the separate mail.
- Other: Select if the supervisor review mail notification is to be sent to others. When selecting this option, the logged-in user can enter multiple email addresses, separated by a comma, in the Distribution List field for individuals whose user profiles are not created. Email notifications will be sent to the added email addresses.
- If the supervisor wants to set auto dispute approval when the agent raises the dispute for an evaluation, then select Is Auto Dispute Approval from Supervisor required? Checkbox. The dispute will be sent directly to the QA Supervisor with the dispute approval of supervisor.
- On selection of Is Dispute mail required? Checkbox, a dispute mail will be posted to the selected recipients by clicking on the checkbox of agent, supervisor, QA supervisor, or QA verifier. The logged-in user can enter multiple email addresses separated by a comma, in the Distribution List field for recipients whose user profiles are not created by clicking on the other checkbox. Whenever any dispute process is updated by anyone, it will trigger an email notification.
- Select Is Audit Trail mail required? Checkbox to send the audit trail mail to the selected user roles or individuals. It allows to get to know the parameter which the user has set for the audit trail while designing the form that has been updated after the submission.
-
- Agent: Select if the audit trail email is to be sent to the agent. It will take the agent’s name from the evaluation and check the email ID from the user profile and send an email notification.
- Supervisor: Select if the audit trail email is to be sent to the supervisor. It will take the supervisor’s name from the evaluation and check the email ID from the user profile and send an email notification.
- Other: Select if the audit trail email is to be sent to others. When selecting this option, the logged-in user can enter multiple email addresses, separated by a comma, in the Distribution List field for individuals whose user profiles are not created. Email notifications will be sent to the added email addresses.
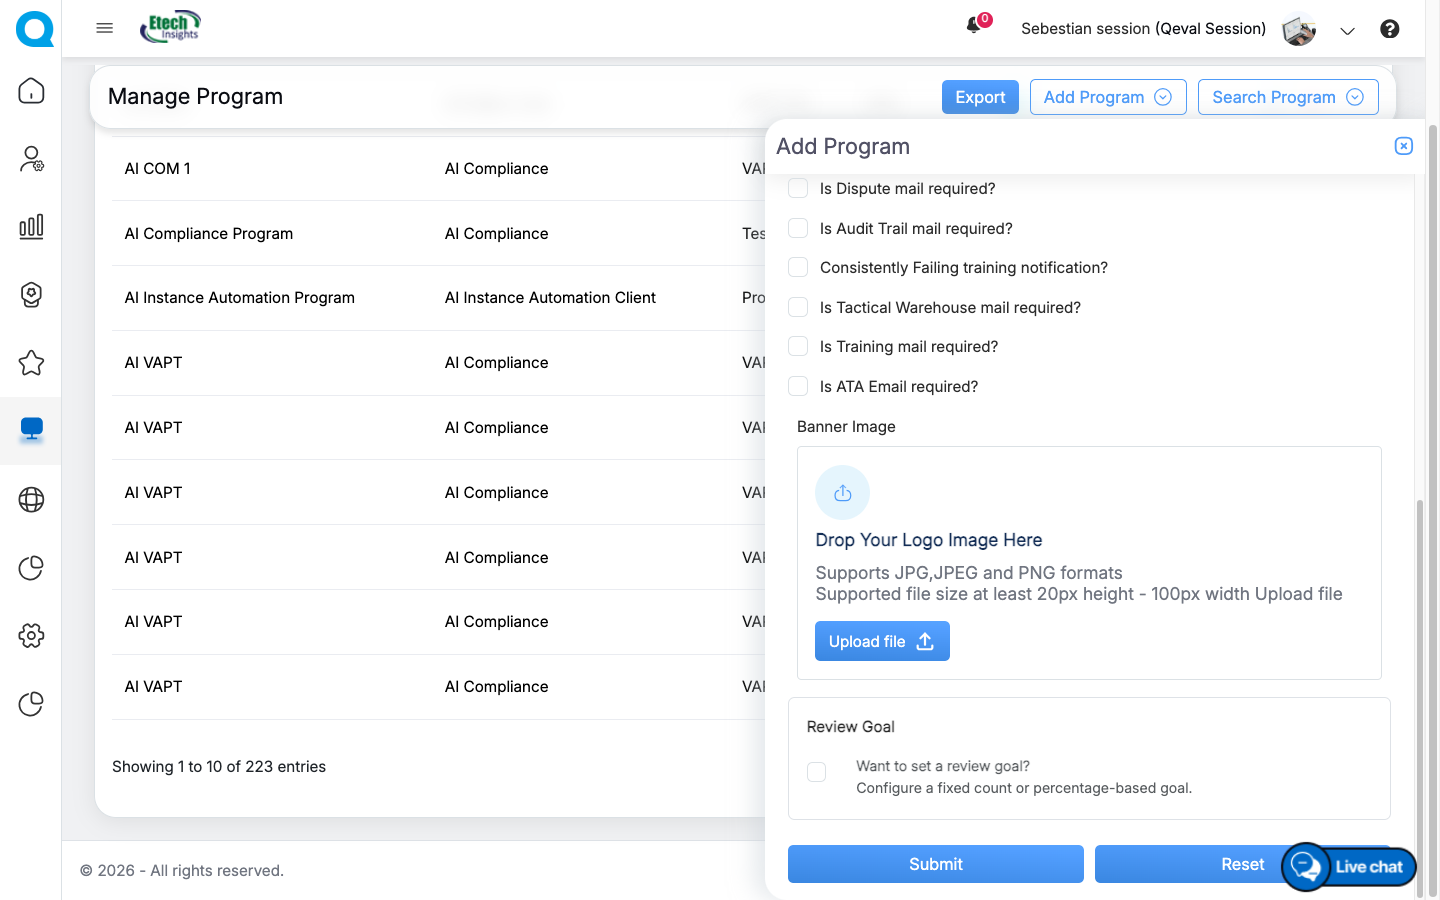
- Select the Consistently Failing training notification checkbox to send the notifications to the selected user roles or individuals when the agent consistently fails the assigned training. If an agent fails training for three consecutive days in the same aspect during evaluation, an email notification will be sent to the supervisor. Additionally, if there are two or more additional training failures in the same category, email notifications will be sent to both the distribution list and supervisor.
Note: If the second or third failure occurs in the next month, no email will be sent to the supervisor. The process of a three-day count for email notifications is only applicable if the failures happen within the same month.
Add Program Window
- Select Is Tactical Warehouse Mail Required? Checkbox to send the Tactical Warehouse mail to the selected user roles or individuals. Once the tactical warehouse is created for an agent, it will trigger an email notification to that agent.
-
- Agent: Select if the tactical warehouse email is to be sent to the agent. It will take the agent’s name from the evaluation and check the email ID from the user profile and send an email notification.
- Supervisor: Select if the tactical warehouse email is to be sent to the supervisor. It will take the supervisor’s name from the evaluation and check the email ID from the user profile and send an email notification.
- Other: Select if the tactical warehouse email is to be sent to others. When selecting this option, the logged-in user can enter multiple email addresses, separated by a comma, in the Distribution List field for individuals whose user profiles are not created. Email notifications will be sent to the added email addresses.
- Select Is Training mail required? Checkbox to send the training mail to the selected user roles or individuals whenever any new training has been assigned to the agents. Whenever the QA Verifier submits an evaluation having the training parameter selected, it will trigger an email notification to the agent.
-
- Agent: Select if the training email is to be sent to the agent. It will take the agent’s name from the evaluation and check the email ID from the user profile and send an email notification.
- Supervisor: Select if the training email is to be sent to the supervisor. It will take the supervisor’s name from the evaluation and check the email ID from the user profile and send an email notification.
- Other: Select if the training email is to be sent to others. When selecting this option, the logged-in user can enter multiple email addresses, separated by a comma, in the Distribution List field for individuals whose user profiles are not created. Email notifications will be sent to the added email addresses.
- Select Is ATA Email required? Checkbox to send the ATA mail to the selected user roles or individuals whenever ATA is completed by the QA Verifier.
-
- QA Verifier: Select if the ATA email is to be sent to the QA Verifier. It will take the QA Verifier’s name from the evaluation and check the email ID from the user profile and send an email notification.
- QA Supervisor: Select if the ATA email is to be sent to the QA Supervisor. It will take the QA Supervisor’s name from the evaluation and check the email ID from the user profile and send an email notification.
- Other: Select if the ATA email is to be sent to others. When selecting this option, the logged-in user can enter multiple email addresses, separated by a comma, in the Distribution List field for individuals whose user profiles are not created. Email notifications will be sent to the added email addresses.
- Upload the Program/Brand logo using the Upload File option. The system supports JPG, JPEG, and PNG file formats with a minimum image size of 100 px (width) × 20 px (height).
-
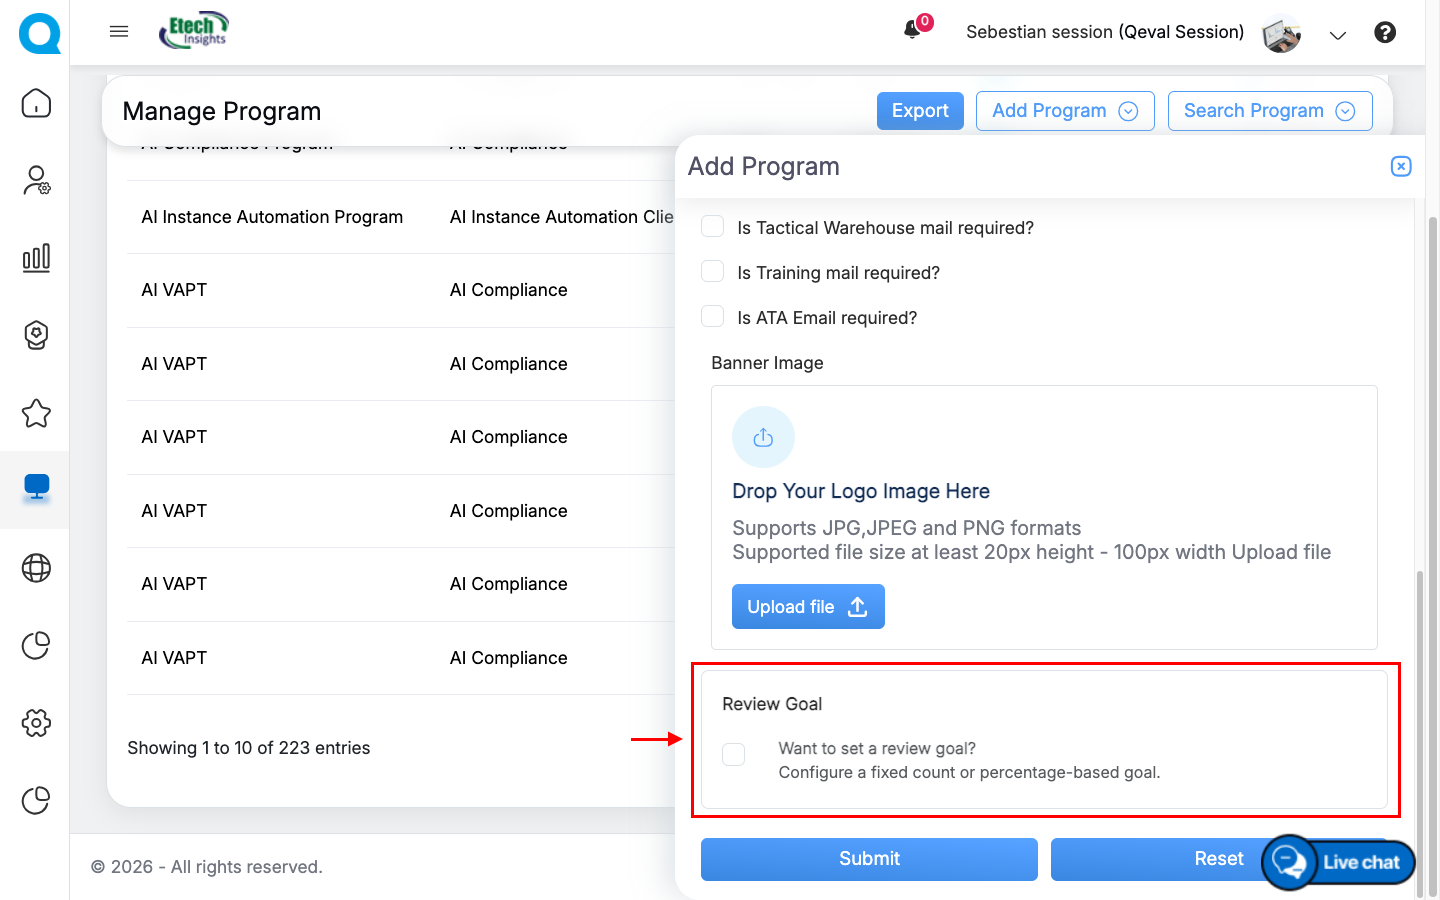
Configure Program Review Goal: Users can configure a daily review target for a program by selecting either a Count or Percentage goal. This target is used to calculate review performance and is reflected on both the Supervisor Dashboard and Agent Dashboard.
Program Level Evaluation Review Goal
Purpose
The Program Level Evaluation Review Goal feature enables organizations to configure program-specific evaluation review targets using either a Count-Based or Percentage-Based goal. This helps standardize evaluation review expectations, improve review accountability, and provide better visibility into review completion across different programs.
Overview
The Program Level Evaluation Review Goal allows administrators to define a daily review target for individual programs. Based on the configured goal, QEval automatically calculates review progress and displays it on the Supervisor Dashboard and Agent Dashboard. If a program-specific review goal is not configured, the system continues to use the Client-Level Review Goal.
Enable Review Goal
- In the Review Goal section, select the Want to set a review goal? checkbox.
- Choose the required Goal Type.
- Enter the review goal value.
Review Goal
Count-Based Review Goal
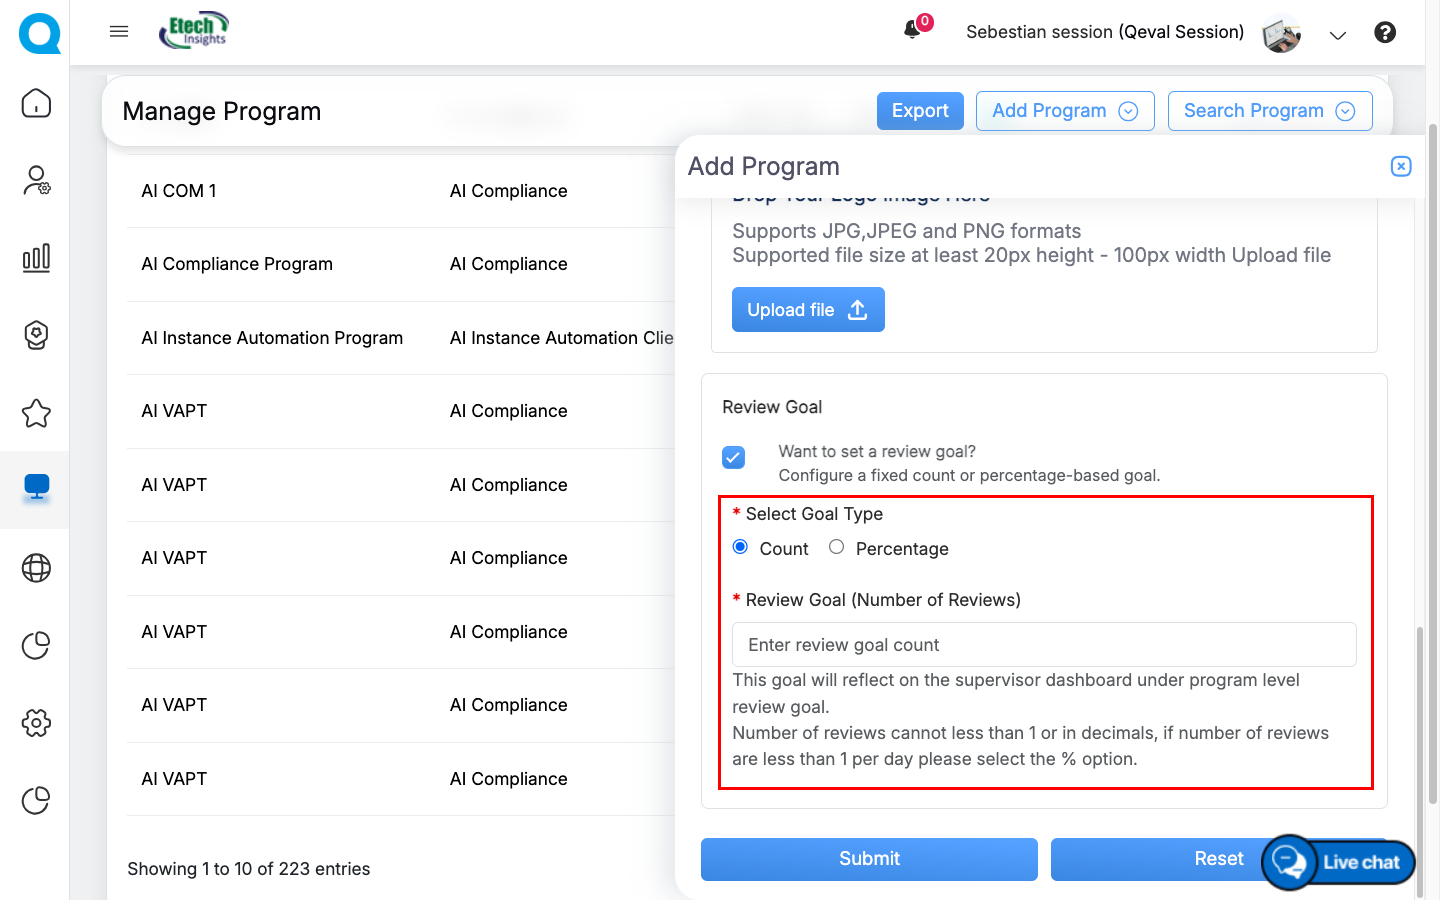
Select Count to set a fixed number of reviews to be completed each day.
Steps
- Select Count under Goal Type.
- Enter the daily review target in the Review Goal (Number of Reviews) field.
Validation
- Accepts whole numbers only.
- Minimum value: 1
- Maximum value: 100
- Decimal values are not allowed.
Note: If the required daily review target is less than one review, configure a Percentage goal instead.
Percentage-Based Review Goal
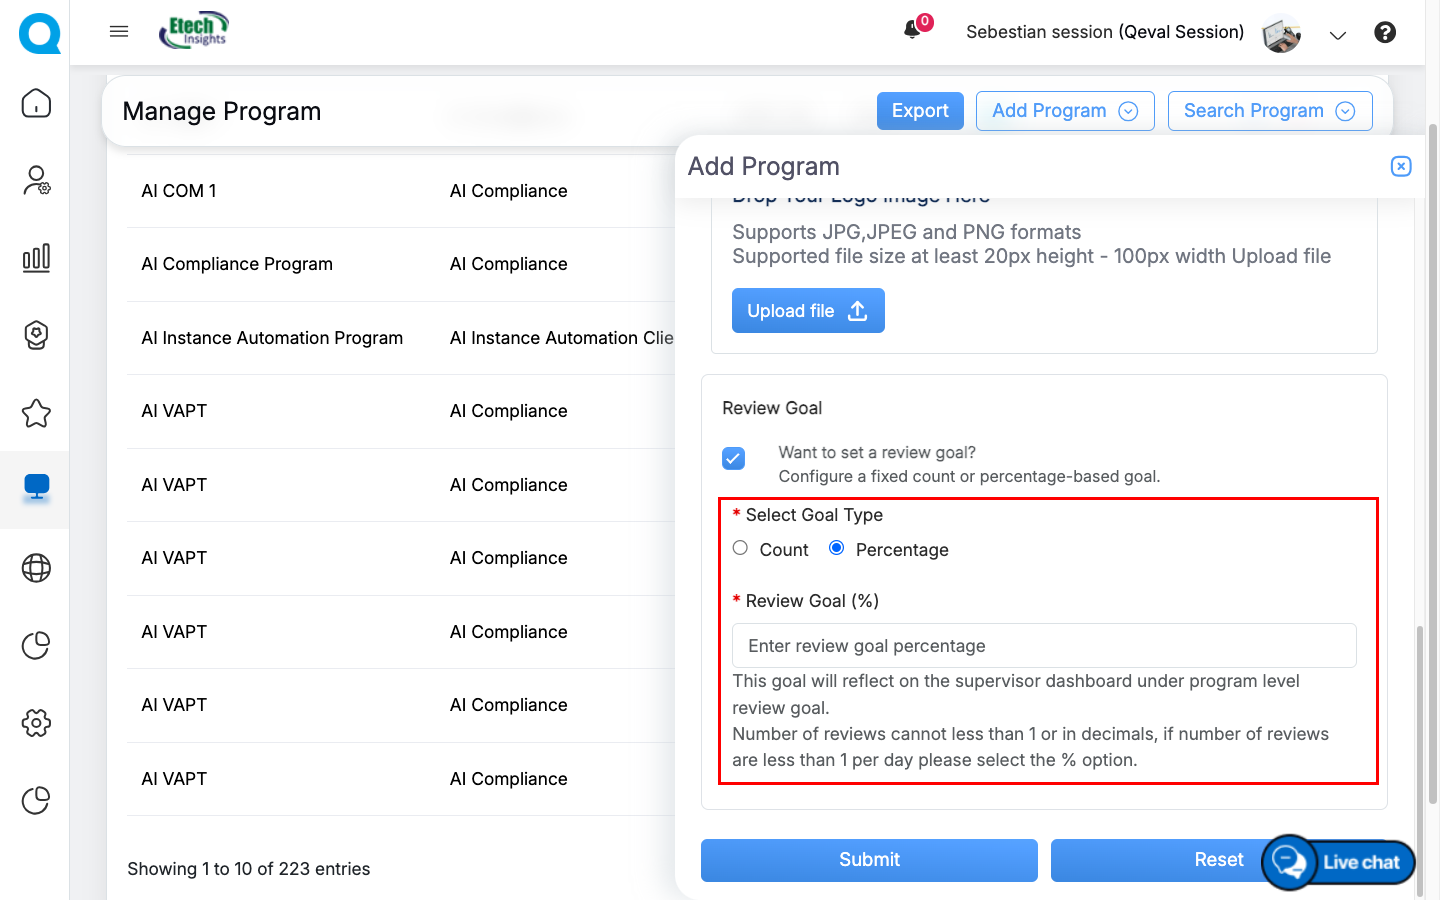
Select Percentage to calculate the review target based on the percentage of total daily evaluations.
Steps
- Select Percentage under Goal Type.
- Enter the review goal percentage in the Review Goal (%) field.
Validation
- Accepts values greater than 0 up to 100.
- Decimal values (for example, 0.5%) are supported.
- Negative and zero values are not allowed.
Note: The system automatically calculates the required number of reviews based on the configured percentage and daily evaluations.
Review Goal Performance
The configured review goal is treated as a daily target.
- Count Goal: Tracks completed reviews against the configured review count.
- Percentage Goal: Calculates the required reviews based on the configured percentage of daily evaluations.
Performance is displayed on the Supervisor Dashboard and Agent Dashboard as:
- Review Goal of Total Evaluation (Target vs. Achieved)
- Review (%)
Important Notes (Review Goal)
- Review goals are configured at the Program level and apply to agents assigned to that program.
- Programs without a configured review goal continue to use the Client-Level Review Goal configuration.
- Review goals can be updated by editing the respective program.
- The configured Review Goal defines the evaluation review target for the program. Based on this target, review progress is automatically calculated and displayed on both the Agent Dashboard and Supervisor Dashboard, enabling users to track review completion against the configured program-level goal.
Tip: Use Count for a fixed daily review target, or Percentage when review targets should adjust automatically based on daily evaluation volume.
Once the necessary fields are configured, click on the Submit button to add the program or click on the Reset button to reset the fields.
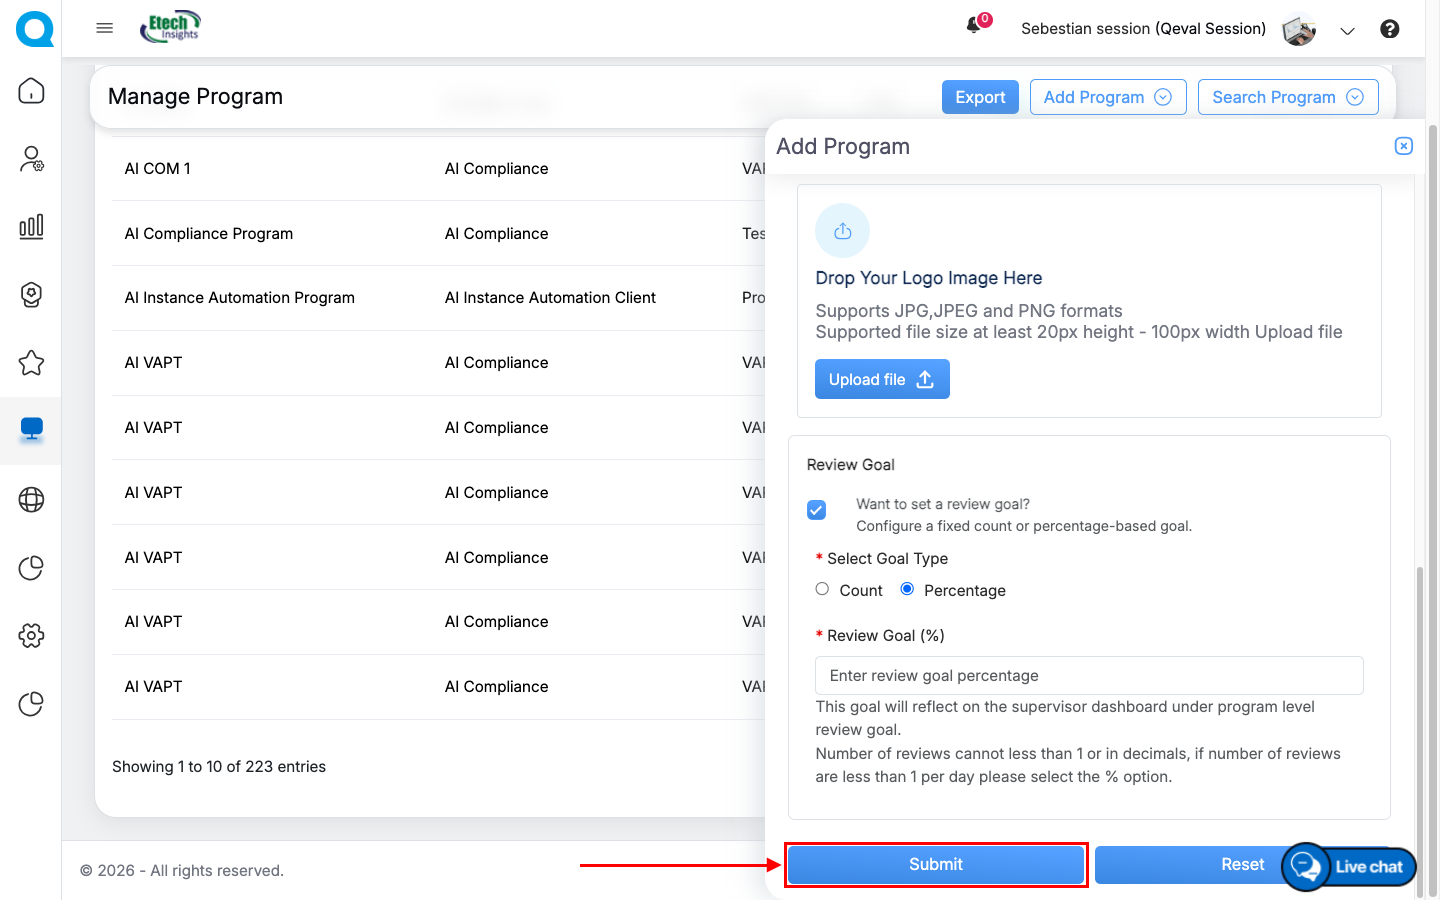
Submit Button
An acknowledgment message will be displayed on the same page, and the new program will be added.
The user will be directed to the Manage Program page and the newly added program will be displayed in the table grid and by default the status of the program will be Active:
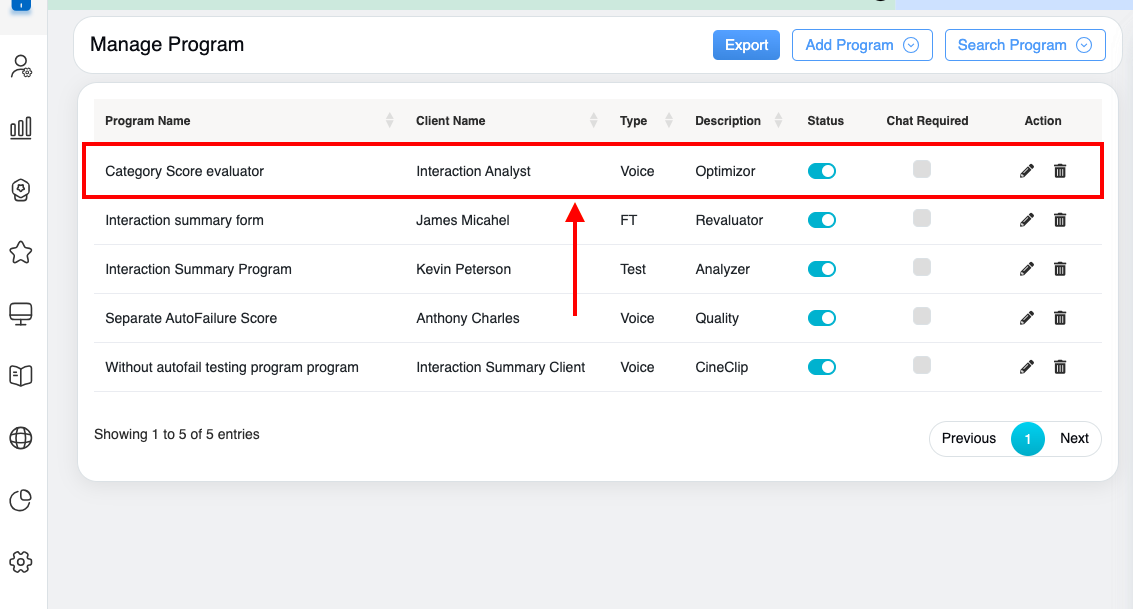
Manage Program Page
Search Program
A Search Program helps the logged-in user to search active or inactive programs from the QEval system. The logged-in user has the option to search all the clients for a specific program or to search all the programs.
To access this functionality, click on the Search Program button available on the Manage Program page as highlighted in the screen below:
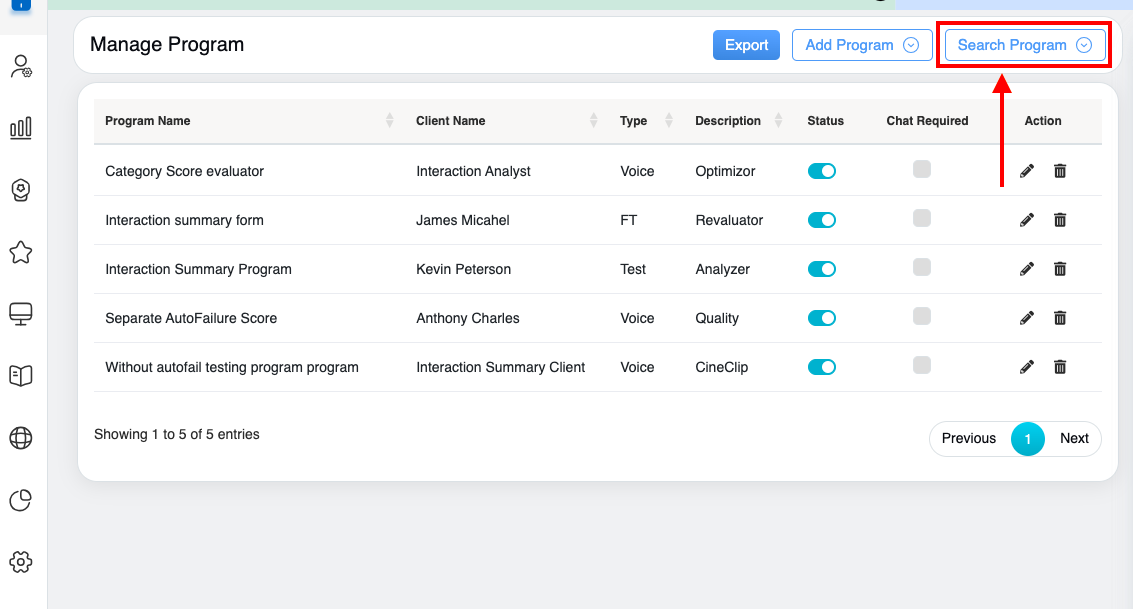
Search Program button
The Search Program window will be opened on the same page. The window displays the search criteria based on which the logged-in user can search for the specific active or inactive program.
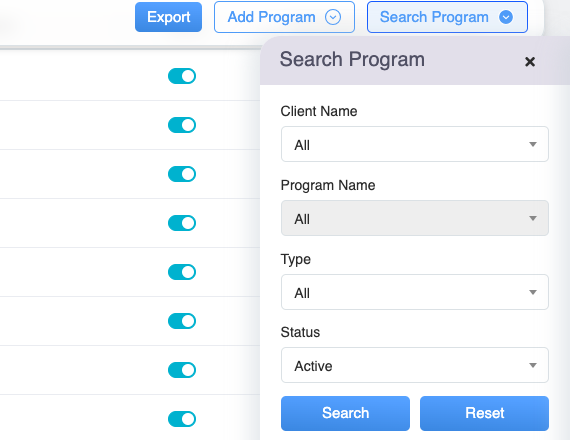
Search Program Tab
A program can be searched by following the mentioned below steps:
- From the Client Name drop-down menu displays the list of clients. Select the name of the client from the list. One can also search for the name of the client by entering keywords in the Search Bar textbox displayed under the drop-down field.
- From the Program Name drop-down menu displays the list of programs. Select the name of the program from the list. One can search the name of the program by entering a keyword in the Search Bar textbox displayed under the drop-down list.
- The Type drop-down menu displays the list of types of programs. Select the type of program from the list. One can search the type of the program by entering keywords in the Search Bar textbox displayed under the drop-down list.
- From the Status drop-down menu, then select the Active option to search all the active programs based on the selected criteria.
Once the necessary search filters are configured, click on the Search button to search the active programs, or click on the Reset button to reset the search filters.
Based on the selected criteria, the search results of Active programs will be displayed in the table grid as shown below:
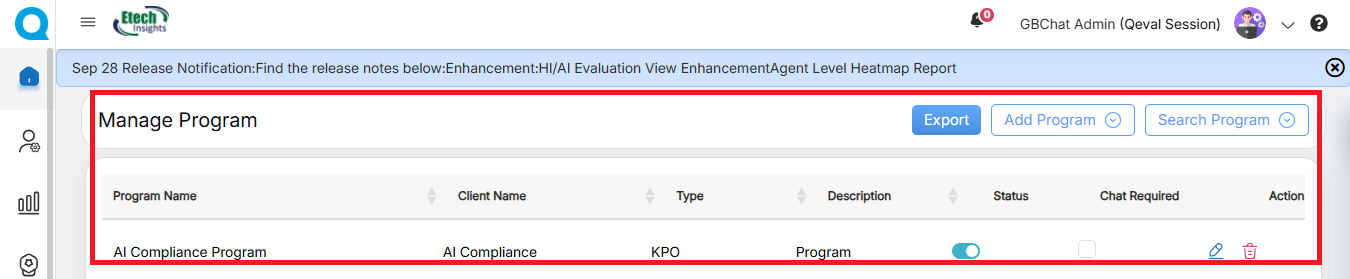
To change the specific program status from Active to Inactive, click on the Active  toggle button displayed under the Status column. An acknowledgment message will be displayed, and the selected program status will be changed to inactive.
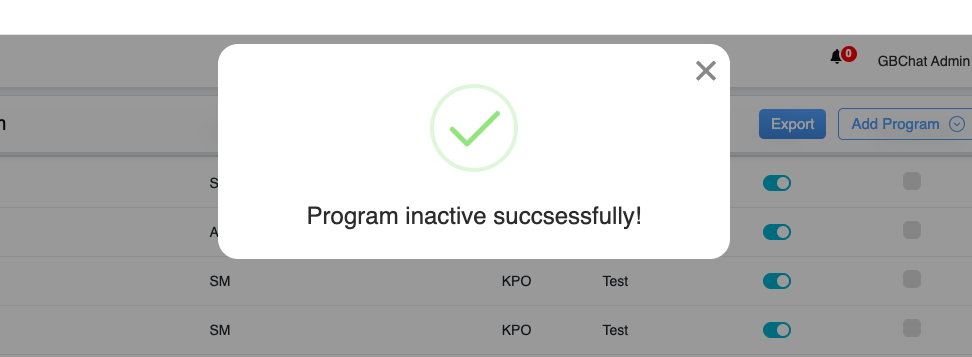
Acknowledgment Message – Program Status Changed to Inactive
The Inactive program can be searched based on selected criteria – Client Name, Program Name, Type, or combination of any selected criteria, and from the Status drop-down menu select the Inactive option. Once the necessary search filters are configured, click on the Search button to search the inactive programs, or click on the Reset button to reset the search filters.
Based on the selected criteria, the search results of Inactive programs will be displayed in the table grid.
The data elements displayed on the table grid are explained below:
| Table Elements | Description |
| Program Name | Displays the name of the program. |
| Client Name | Displays the name of the client. |
| Type | Displays the type of program. |
| Description | Displays the description of the program. |
| Status |
The status of the program whether it is active or inactive is displayed. The toggle button allows users to change the Active program to Inactive and vice versa.
|
| Action |
The Edit The Delete |


Edit Program
On the Manage Program page, the authorized user can edit the added active or inactive program details.
To access this functionality, click on the Edit button displayed under the Action column as highlighted in the screen below:

The Edit Program window will be opened on the same page as shown below:
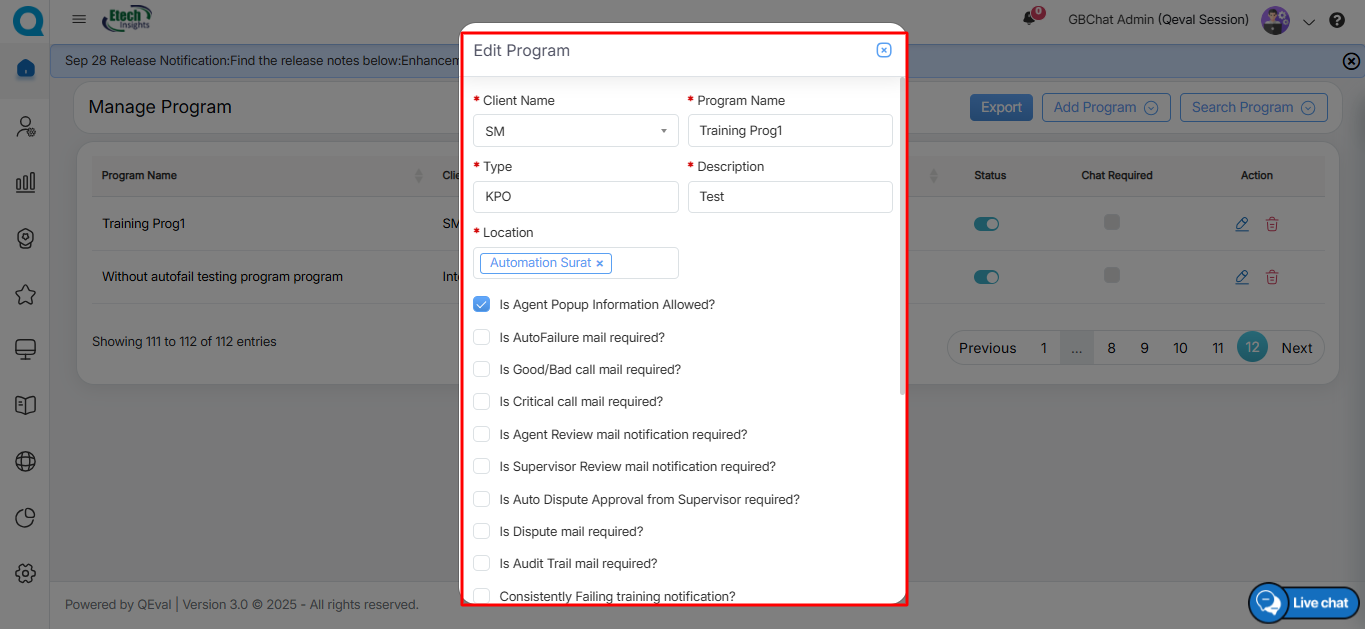
Once the necessary modifications are done for the specific program, scroll down on the same window and click on the Update button to save the changes, or click on the Cancel button to discard the changes. Refer to Add Program for details.
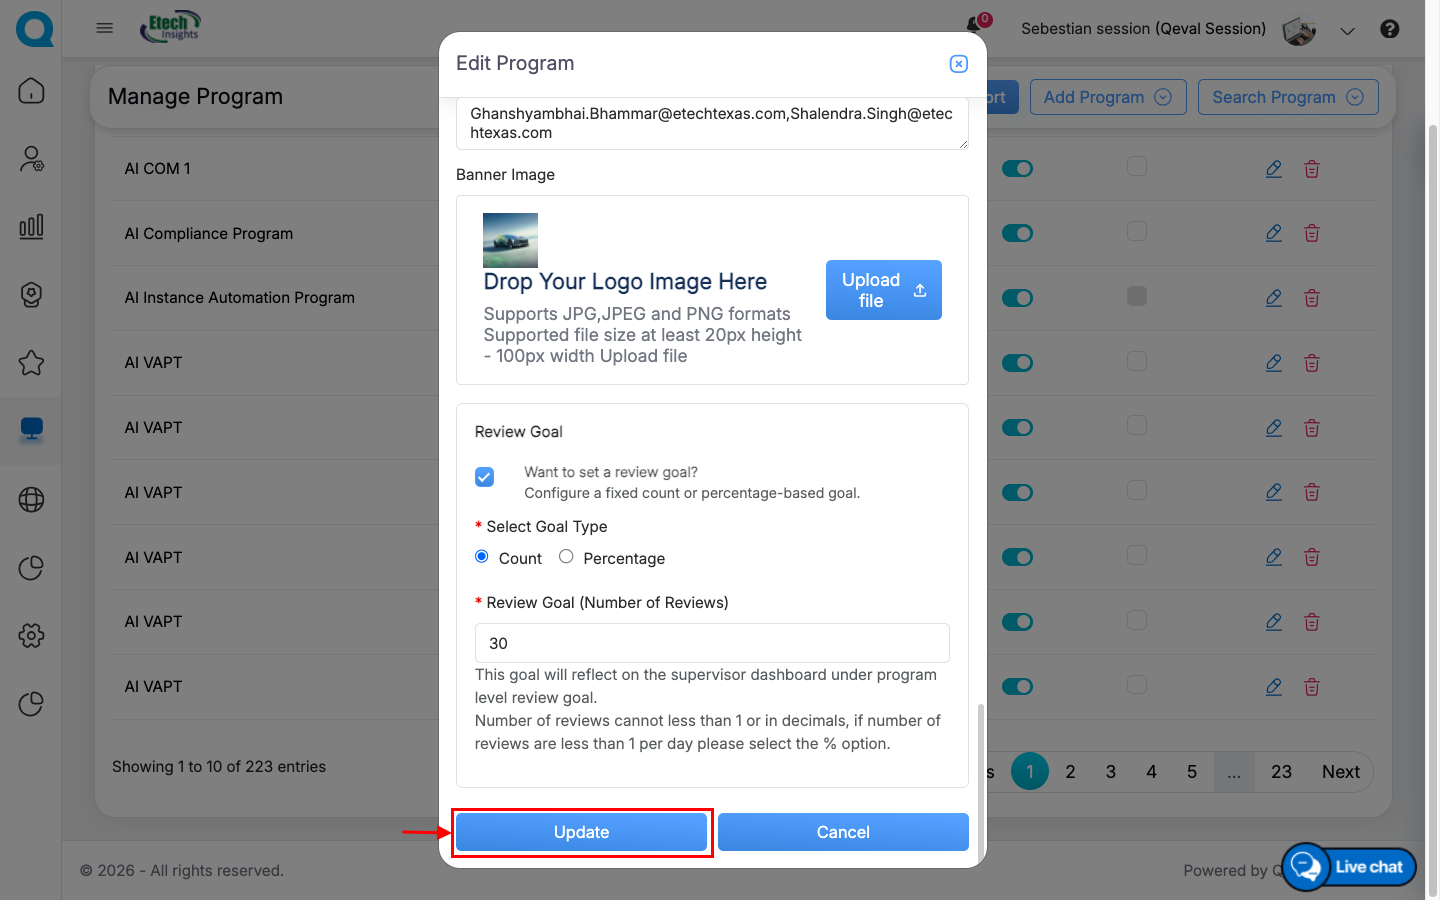
Edit Program Window
An acknowledgment message will be displayed and The user will be directed to the Manage Program page and specific program details will be updated and displayed in the table grid.
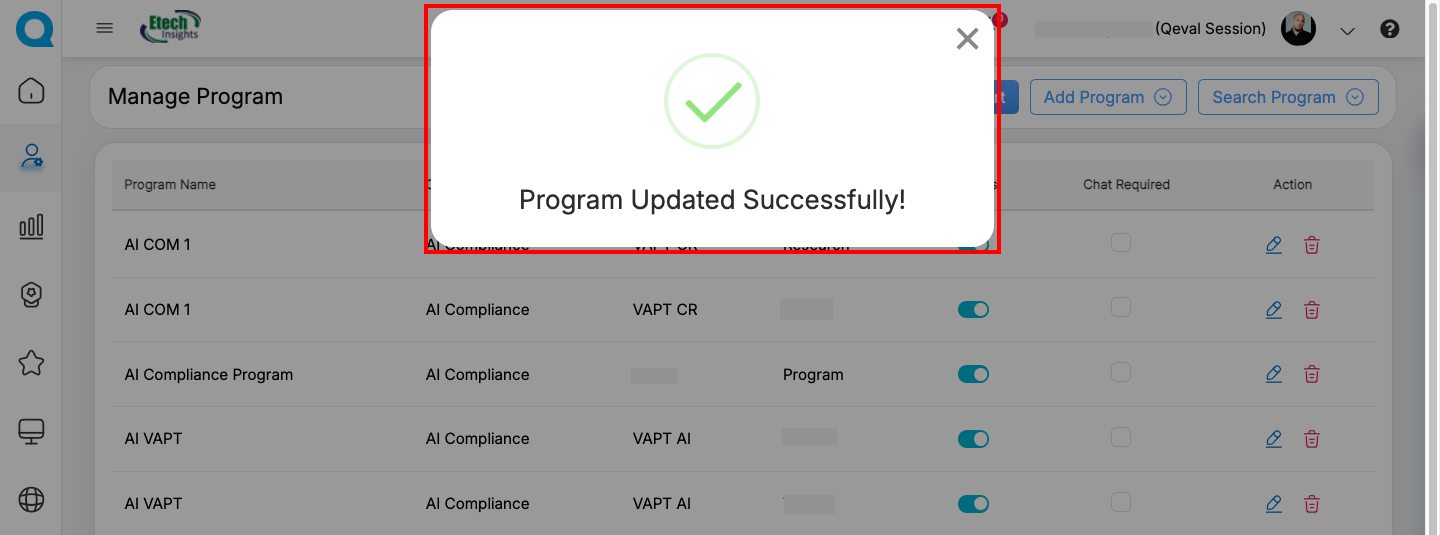
Success Confirmation message
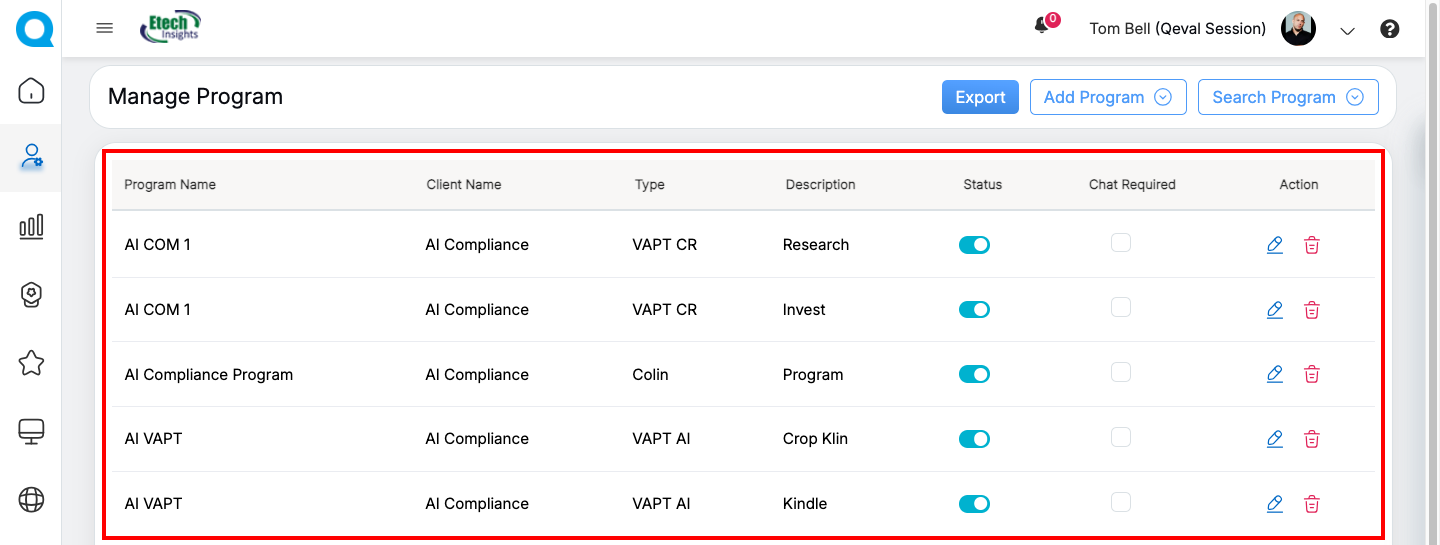
Updated Table Grid
Delete Program
On the Manage Program page, the authorized user can delete the program details from the QEval system.
To access this functionality, click on the Delete button displayed under the Action column as highlighted in the screen below:
A confirmation message will be displayed on the same page. Click on the Yes button to delete the program or click on the No button to discard this process.
Notes:
- It is advisable to change the program status to “Inactive” rather than opting to delete the program.
- Deleting a program will result in the permanent removal of program details from the QEval system, making it impossible for the user to fetch or recover the deleted program details.
An acknowledgment message will be displayed, and the specific program will be permanently deleted from the QEval system as well. Then the user will be directed to the Manage Program page, the table grid will be updated, and the selected program will be deleted.
Export
One can export the program details in Excel format. To do so, click on the Export button.

The file will be exported to the local system in the excel format.
Video